> For the complete documentation index, see [llms.txt](https://docs.datasaur.ai/llms.txt). Markdown versions of documentation pages are available by appending `.md` to page URLs; this page is available as [Markdown](https://docs.datasaur.ai/data-studio-projects/nlp-task-types/span-based/audio-project.md).
# Audio Project
Create and label an audio labeling project in Datasaur
### Project creation
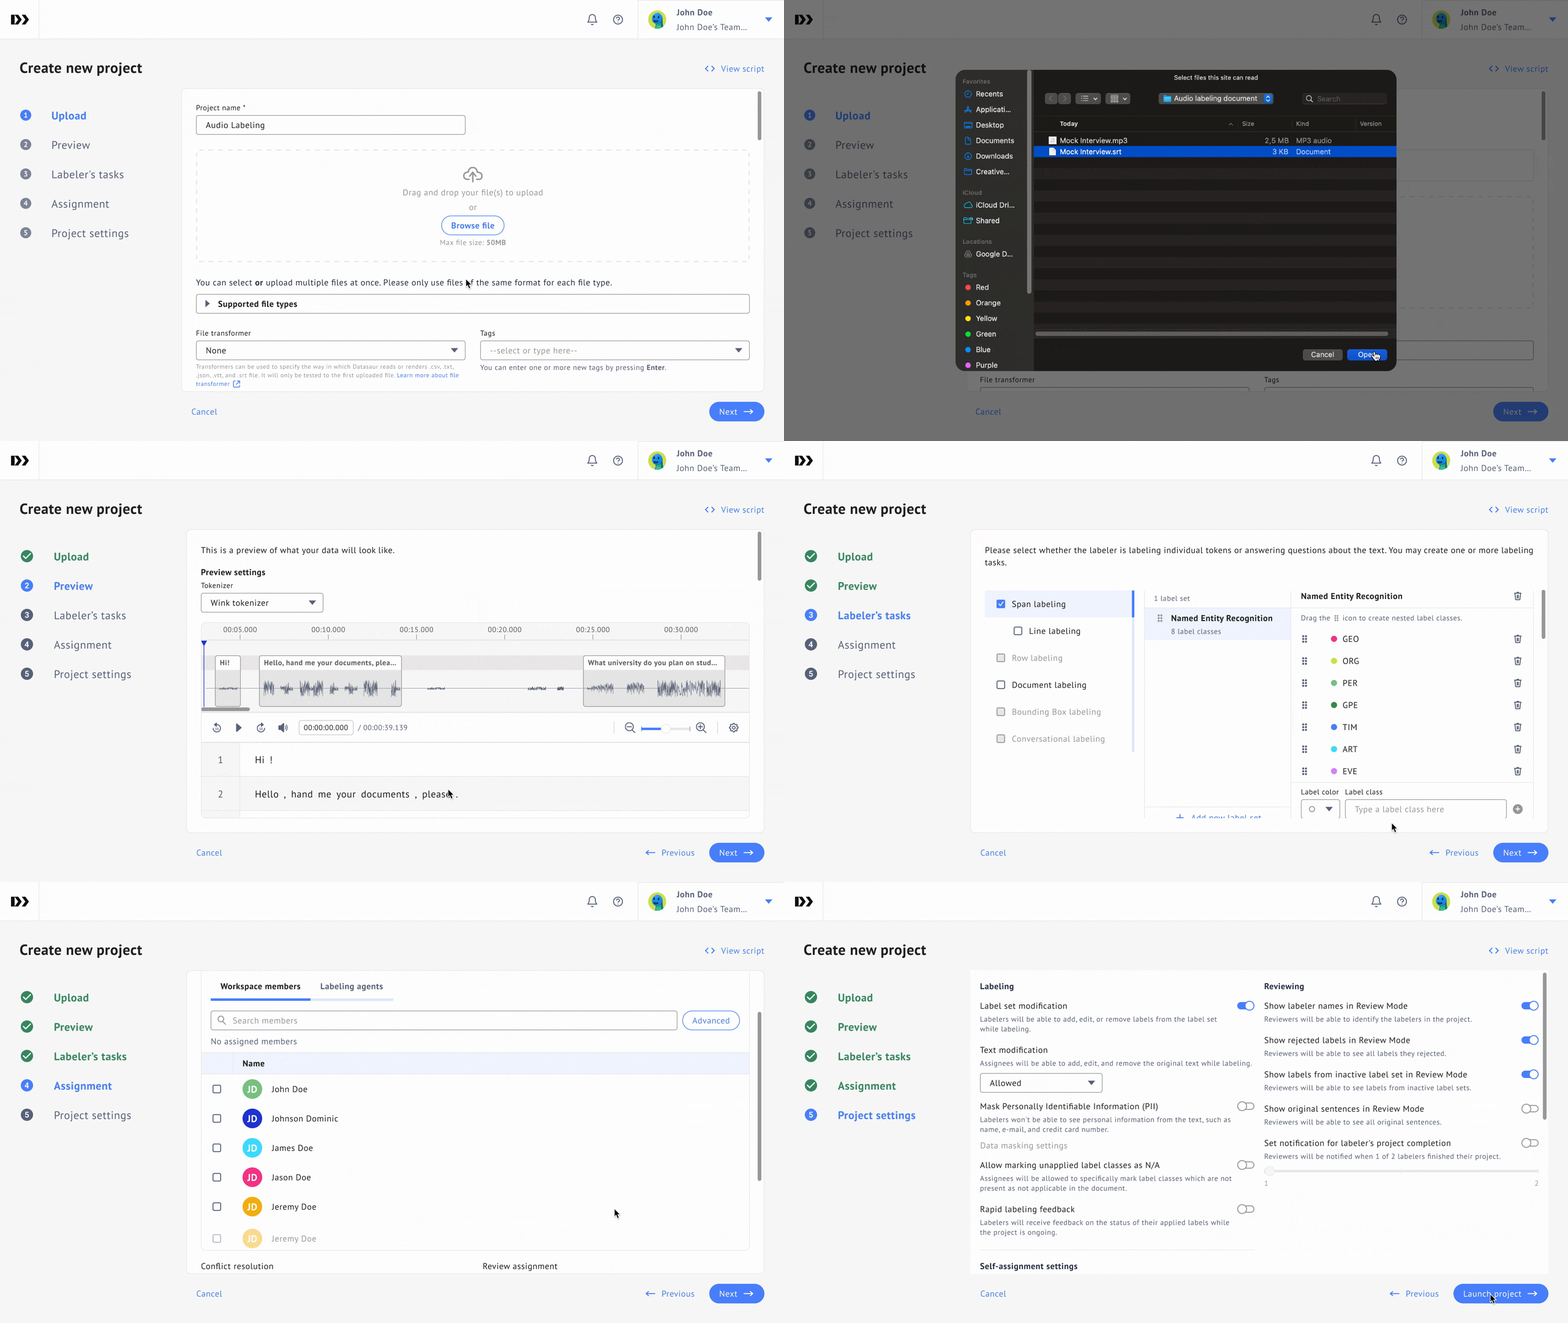
Creating an audio project is simple in Datasaur. All the steps are the same as creating other labeling task types.
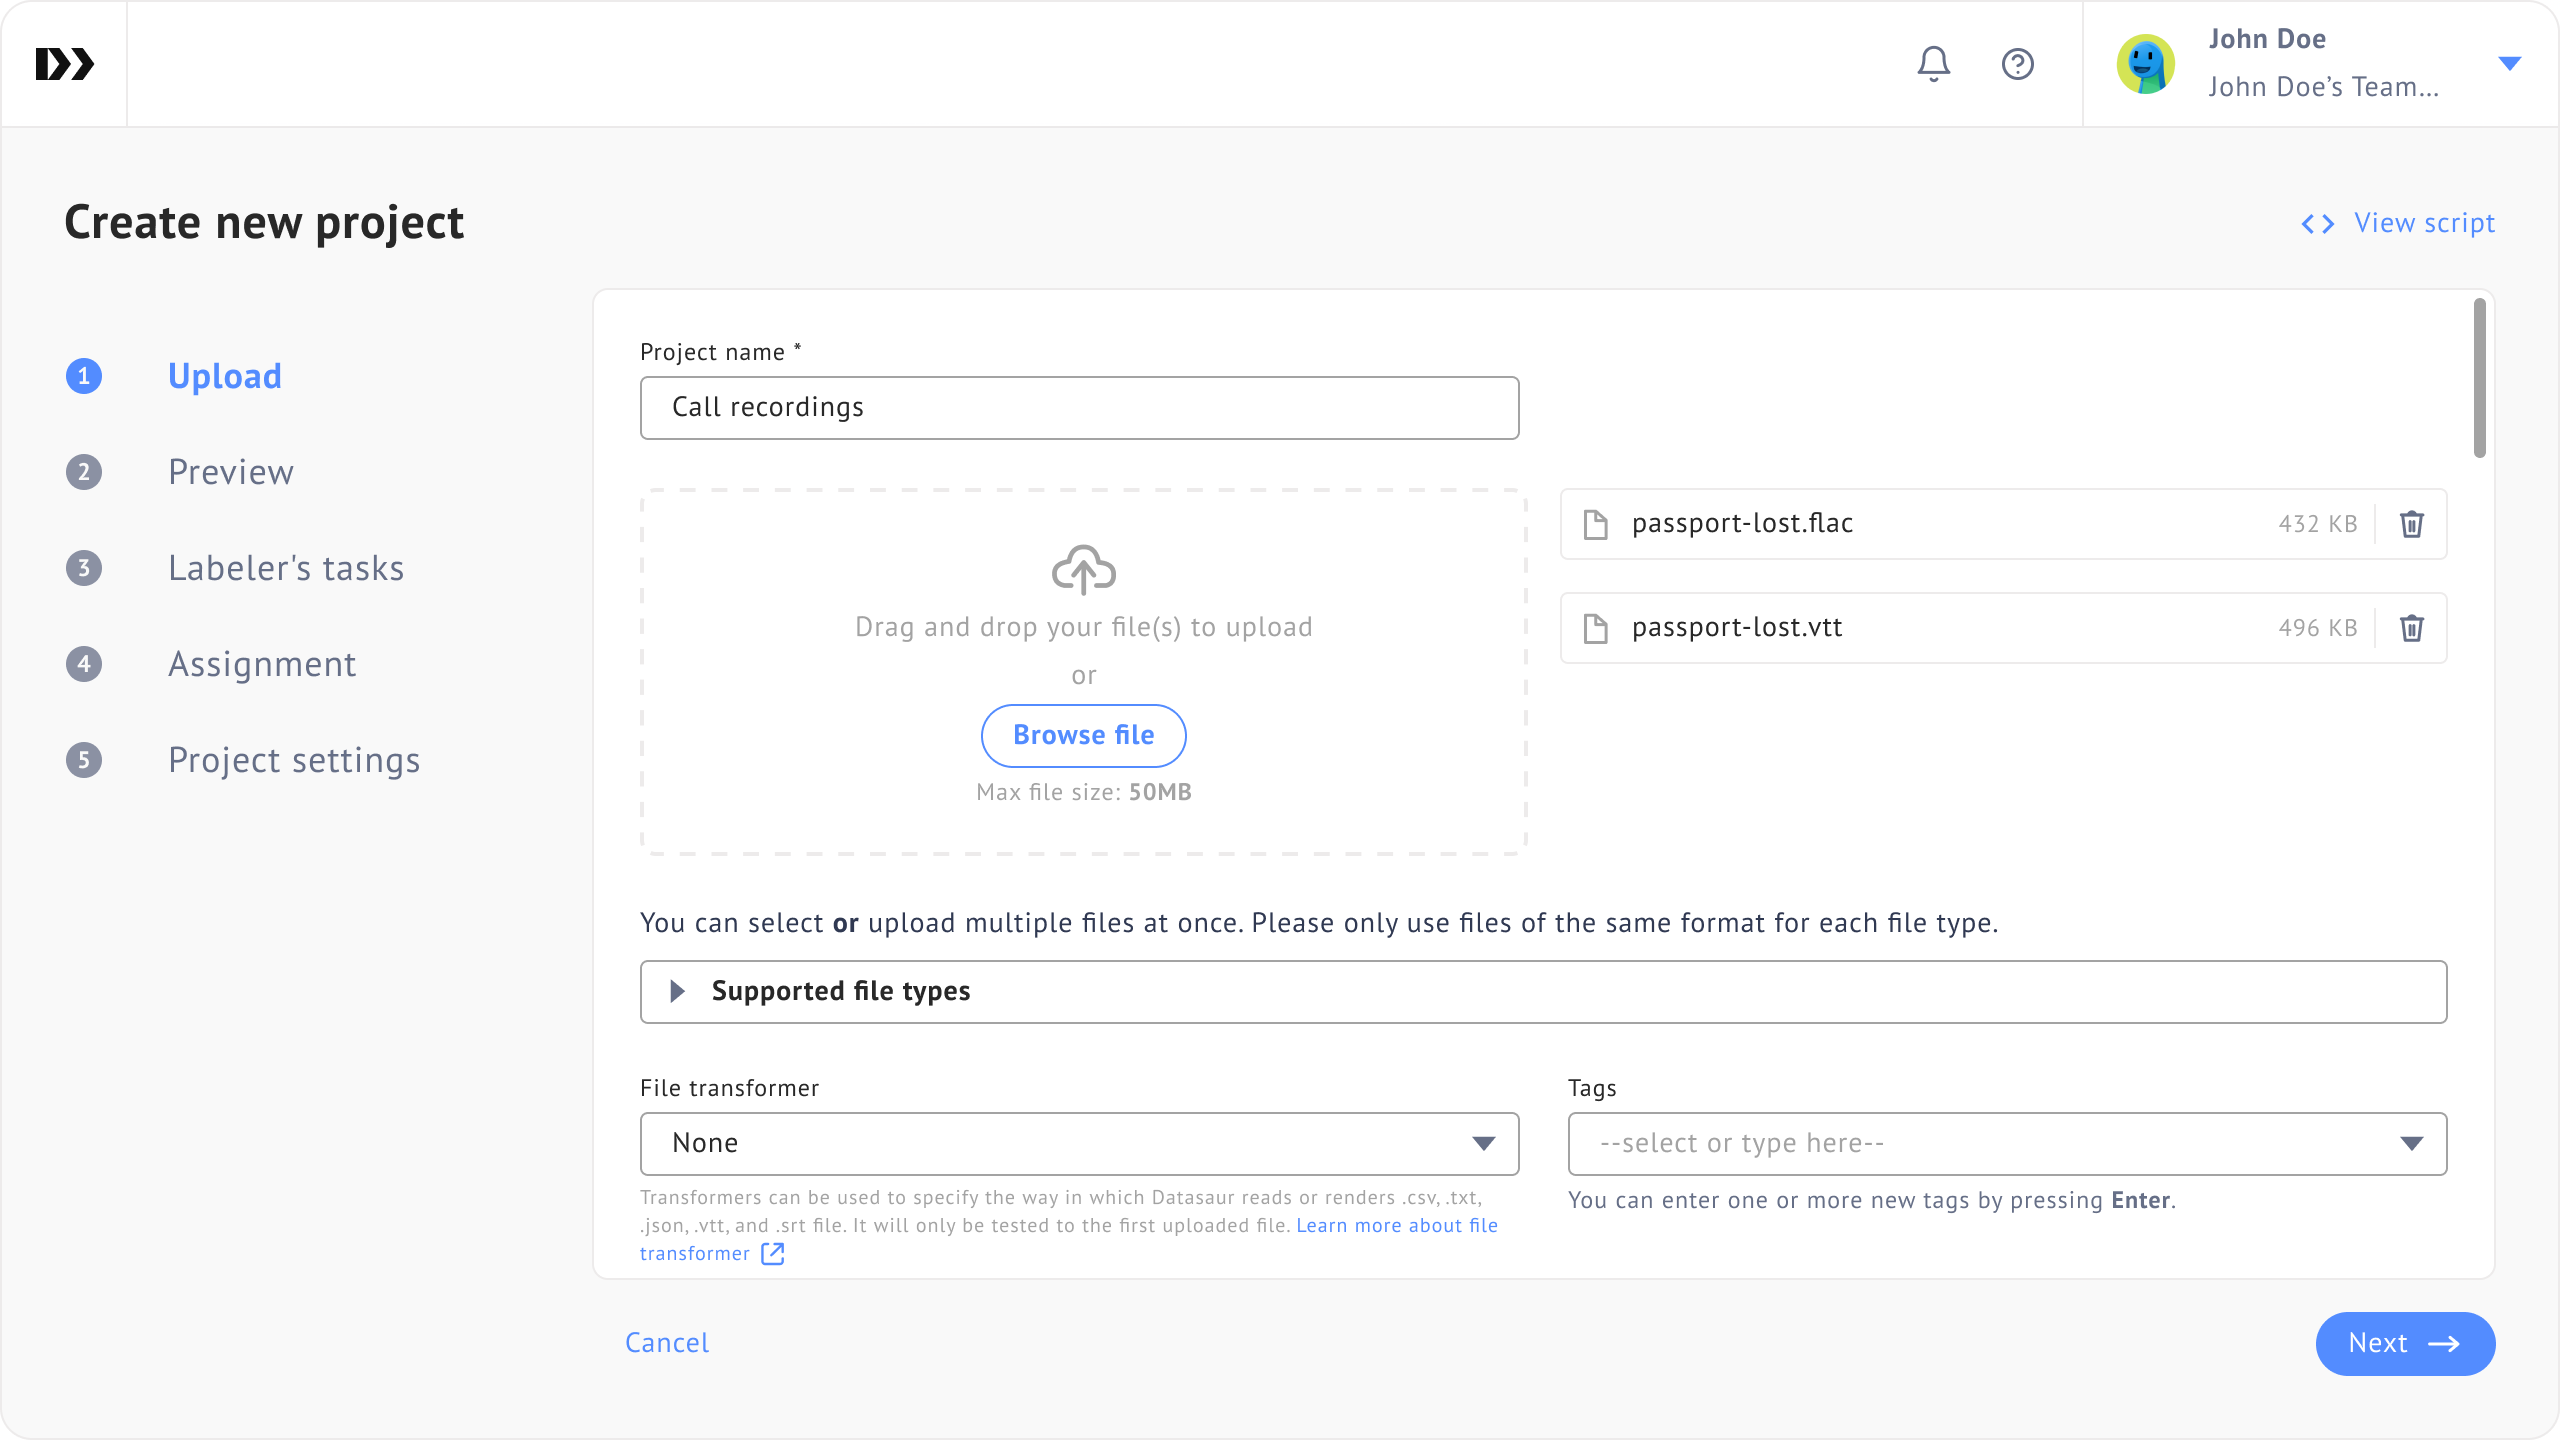
1. From the **Projects page**, click **Create project**.
2. Upload both your audio file and its transcription.
* Accepted audio formats: `.mp3`, `.flac`, and `.wav`
* Accepted transcription formats: `.srt` and `.txt`
* You can download example audio and transcription files below.
{% file src="/files/KcoYlp3WS2cohl7RHgdW" %}
Audio file sample
{% endfile %}
3. Make sure the transcription file name matches the audio file name. For example: `SampleFile.mp3` and `SampleFile.srt` . When both files have the same name, the system recognizes them as corresponding files.
4. Continue with the remaining project setup steps: **Preview**, **Labeler's tasks**, **Assignment**, and **Project Settings**.

### Audio interface legend
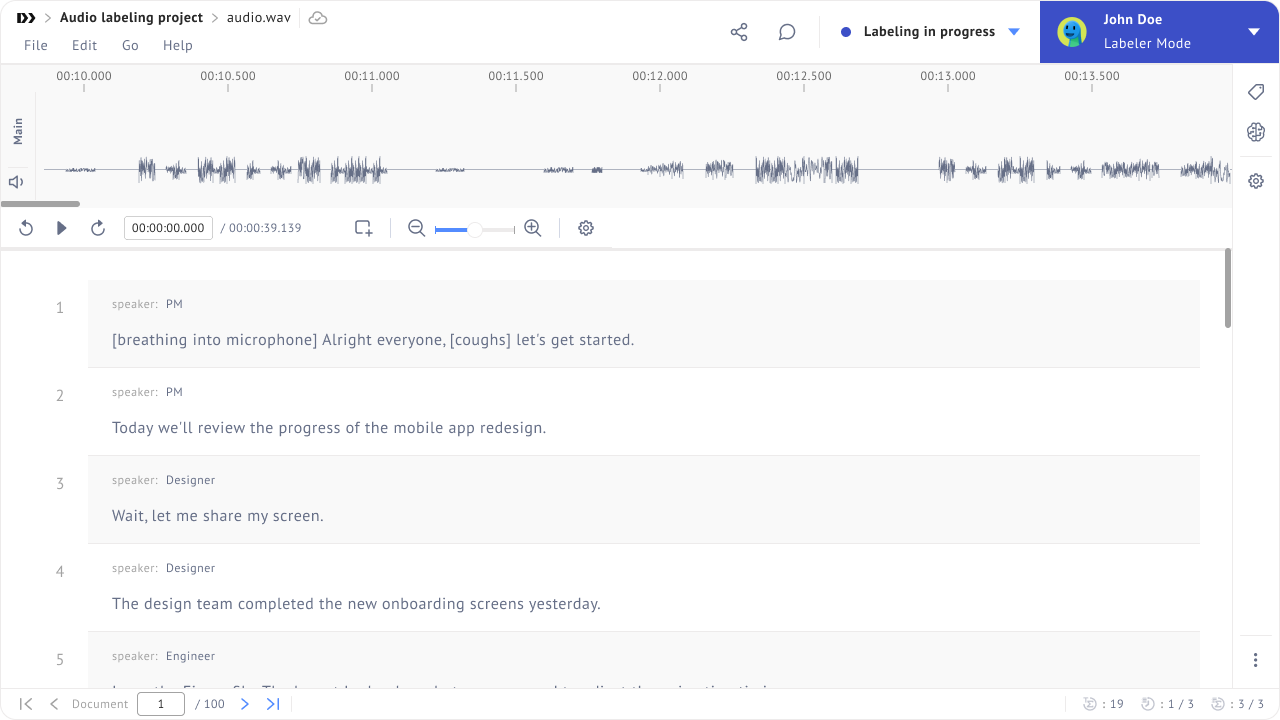
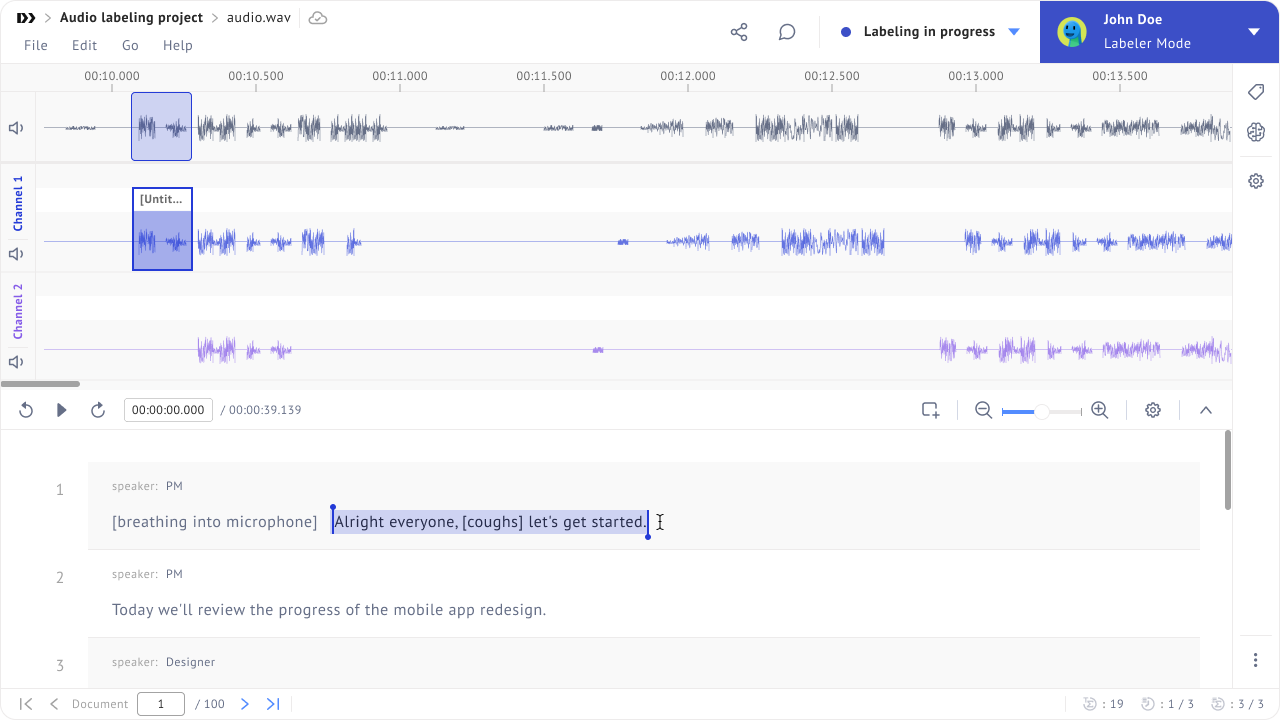
At the top of the interface, you will find an audio player with timestamps and, below the waveform, a dedicated track for audio labels. Below the audio player, you will see the transcript, where you can label the transcript using the label sets you have added.
Between the audio player and the transcript, there is a control panel where you can perform the actions listed below:
* Rewind 10 seconds.
* Play/Pause.
* Fast forward 10 seconds.
* Adjust volume.
* Use the timestamp field to jump to a specific time.
* Enter **Transcribe audio** / **Label audio** mode.
* Zoom in or out of the audio timestamps.
* Open audio settings (audio speed, auto-scroll, and loop playback, etc.).

### Transcribe audio
Transcribing audio links a segment of audio with its transcription text, so you can verify and correct the transcript directly against what's actually being said in the audio.
#### **Create an audio-transcript link**
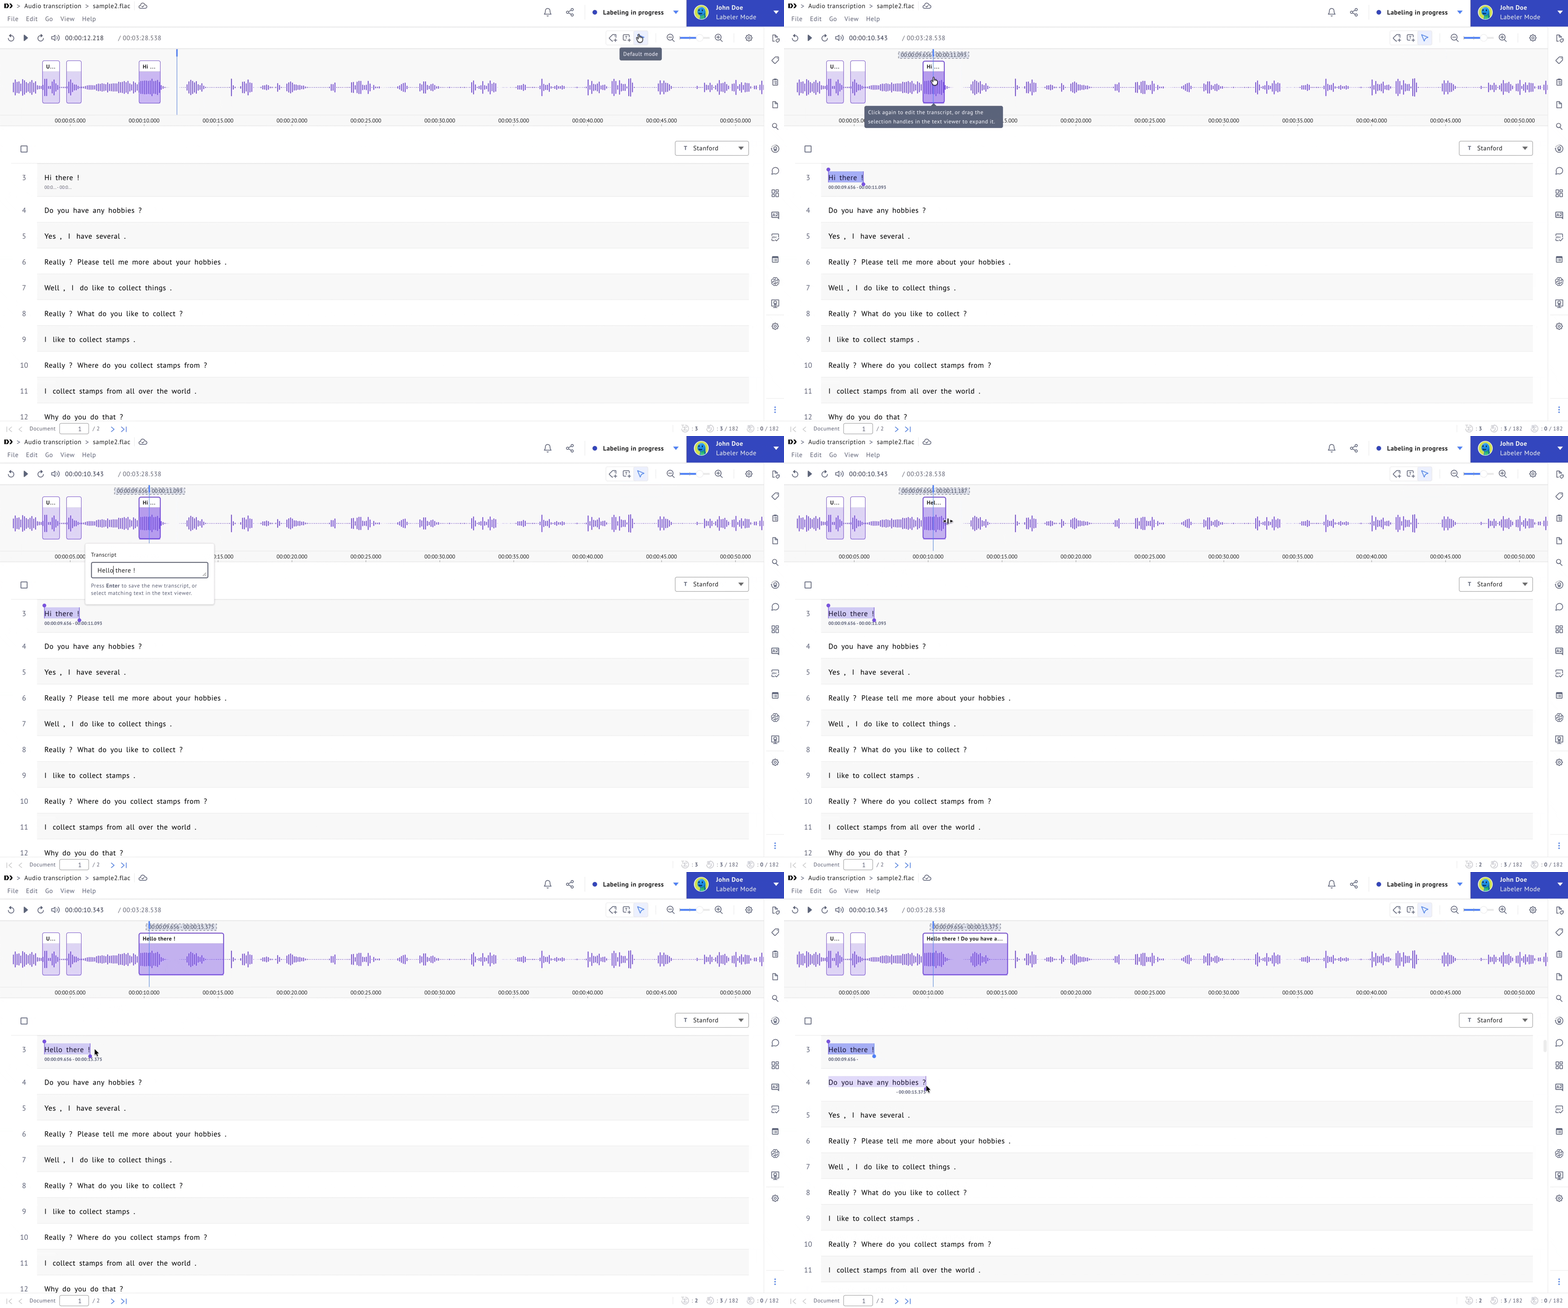
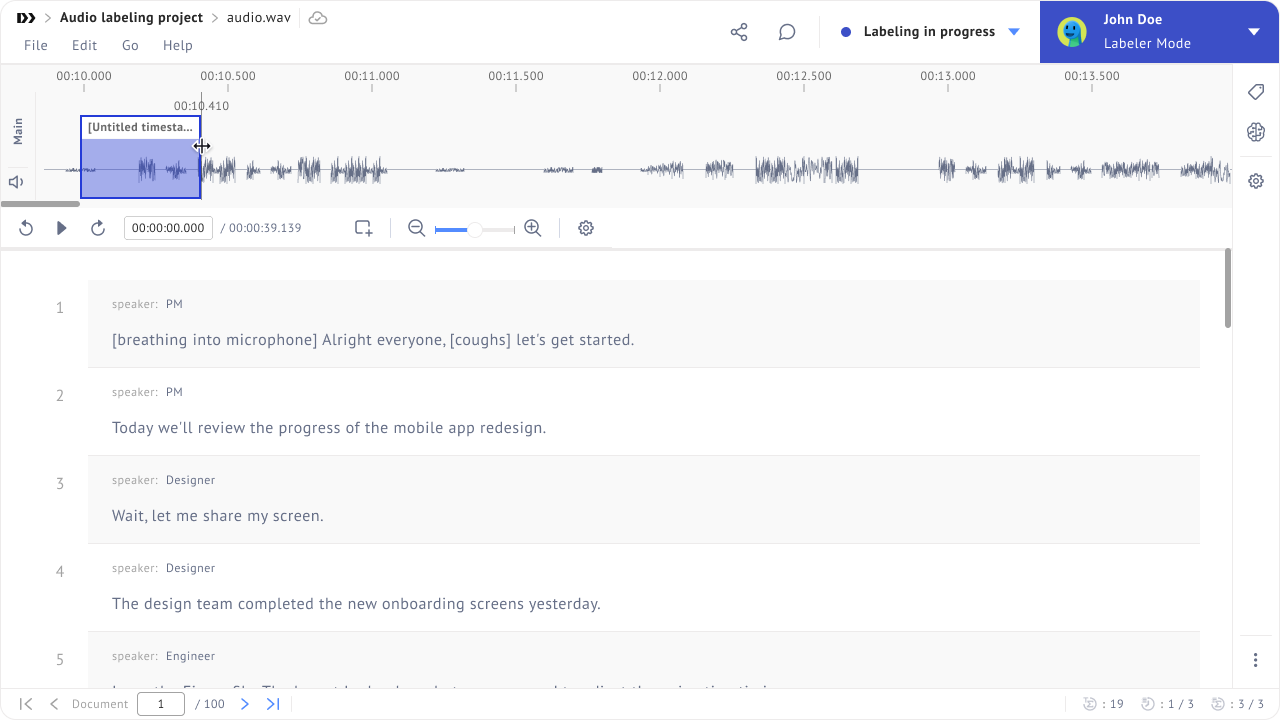
Enter **Transcribe audio** mode and draw a segment on the audio. Then, connect it to a transcript in one of two ways:
* **Link to existing text:** select the matching transcript in the text viewer to connect it to your new segment.
* **Type a new transcript:** click the drawn segment again to open an input popover, type the transcript, and press **Enter** to save it.
* This only works when **Text modification** project setting is enabled in the project's settings. Linking to existing text doesn't require this setting.
* The new line is automatically inserted into the transcript right after the nearest preceding audio-transcript link, based on that link's end time. If there are no existing links yet, the new line becomes the first line.
{% hint style="info" %}
**Tip:** While drawing an audio-transcript link, the snap feature helps align it with the edges of existing labels or audio-transcript links on the audio, making it easier to place labels precisely next to each other without gaps or overlap.
{% endhint %}
#### Edit an audio-transcript link
You can edit an existing link in three ways:
* **Edit the transcript:** double-click the transcript-link in the audio to open the input popover and edit its transcript. A single click only highlights the corresponding line in the transcript; it doesn't open the popover.
* Editing requires **Text modification** project setting to be enabled, same as typing a new transcript.
* This doesn't affect the link's start or end time.
* **Adjust the timing:** drag the link's pin handles on the audio to change its start or end time.
* **Change the linked transcript:** drag the pin handles on the currently selected transcript in the text viewer to adjust which text is linked to the audio segment.
### Label audio
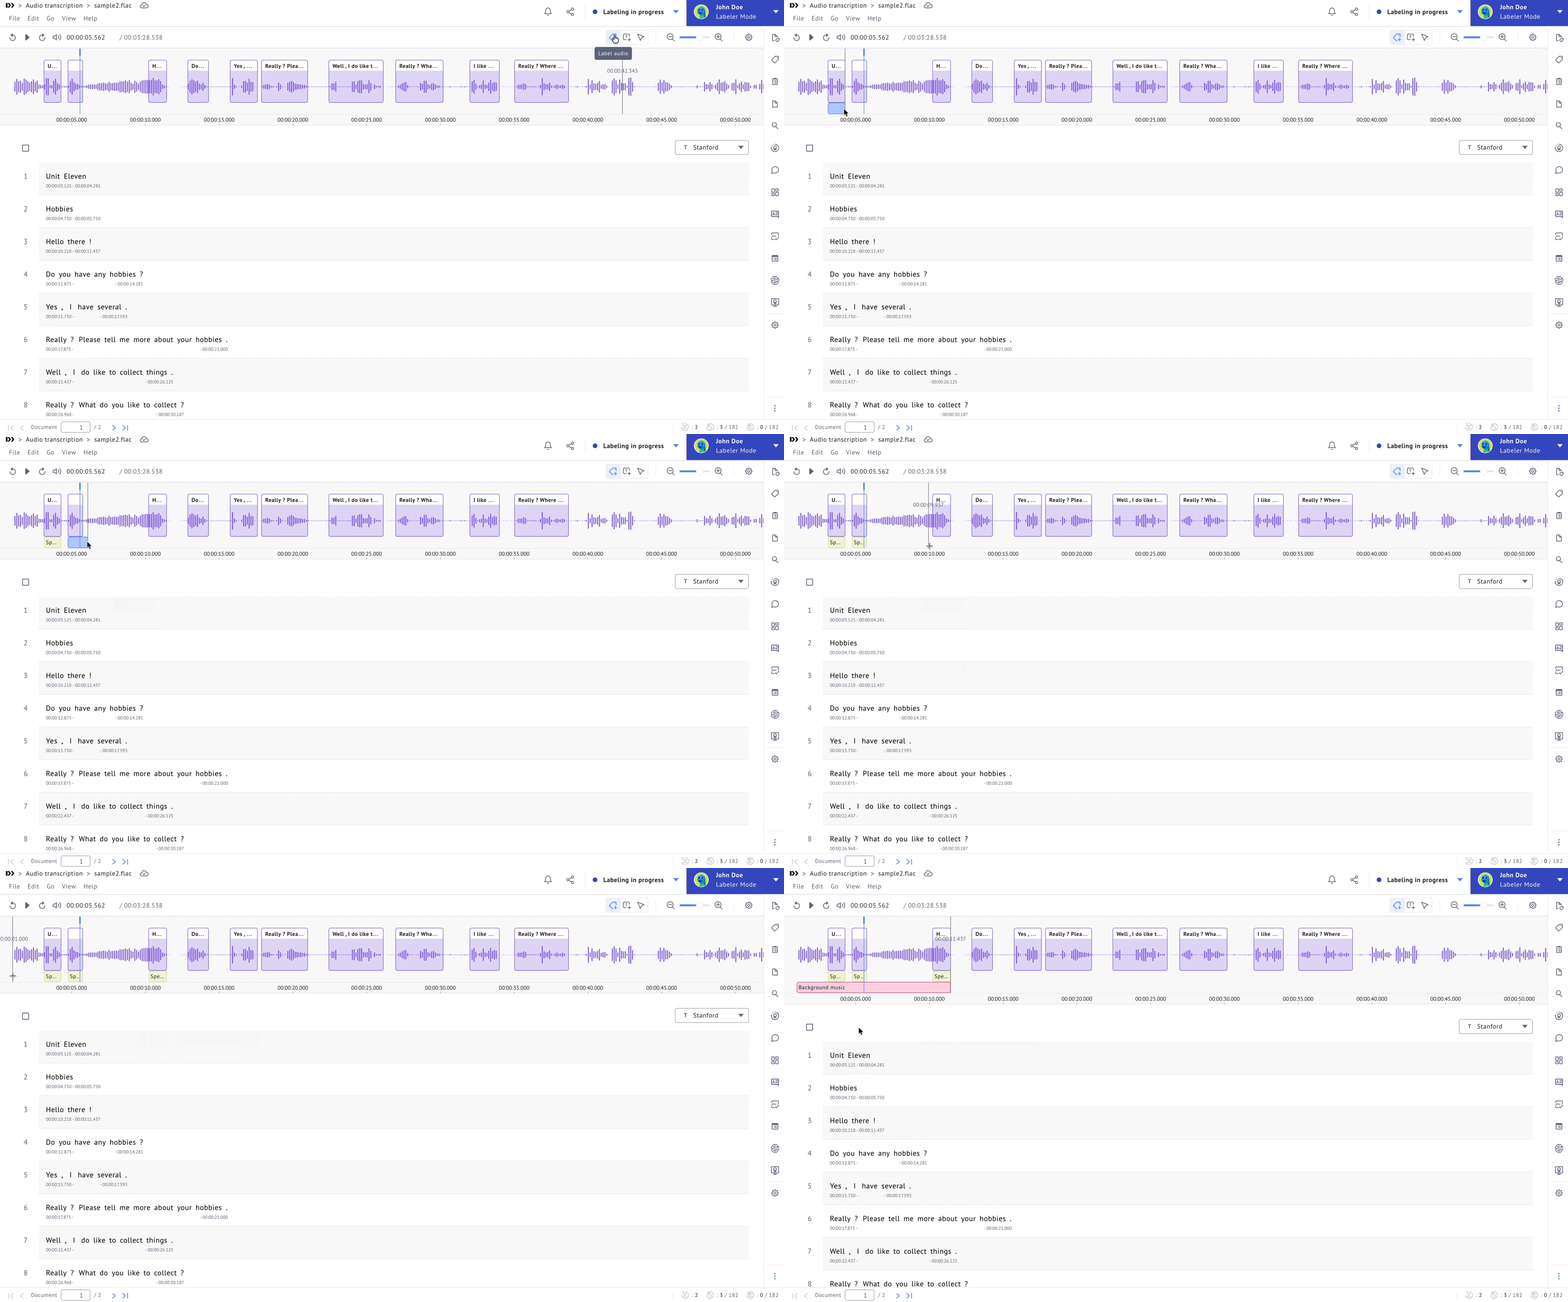
Labeling the audio lets you apply a label directly to a region of audio without linking it to any transcript. This is useful for things like speaker identity or background noise, where there's no specific text to tag.
* Click **Label audio**, next to **Transcribe audio** at the top of the audio player, and draw a region directly on the audio. Audio labels live in their own dedicated track below the waveform.
* Audio labels use your project's existing label sets. However, audio labeling has a separate label set selector from Span/Transcript Labeling, located under the audio player settings, where you can select the active label set for audio labeling.
{% hint style="info" %}
**Tip:** The same snap feature described earlier also applies here. It helps align a new audio label with the edges of existing audio-transcript links or other audio labels.
{% endhint %}
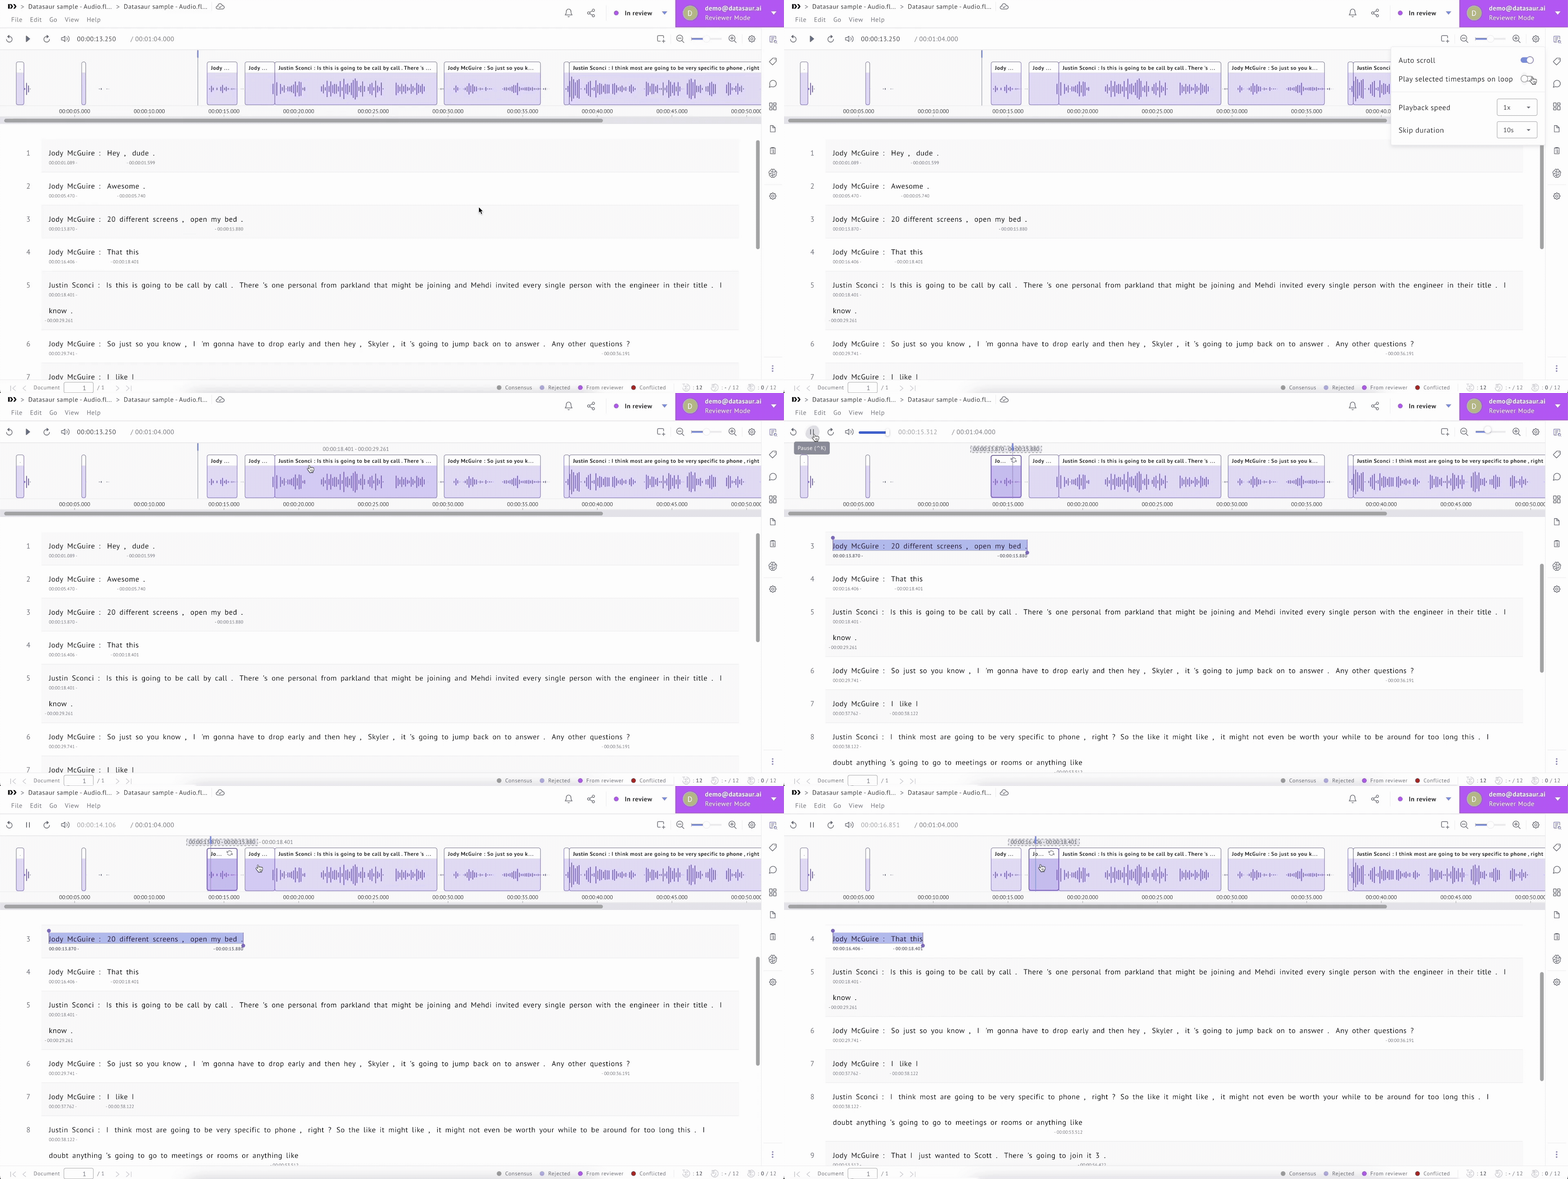
### Loop a timestamp label
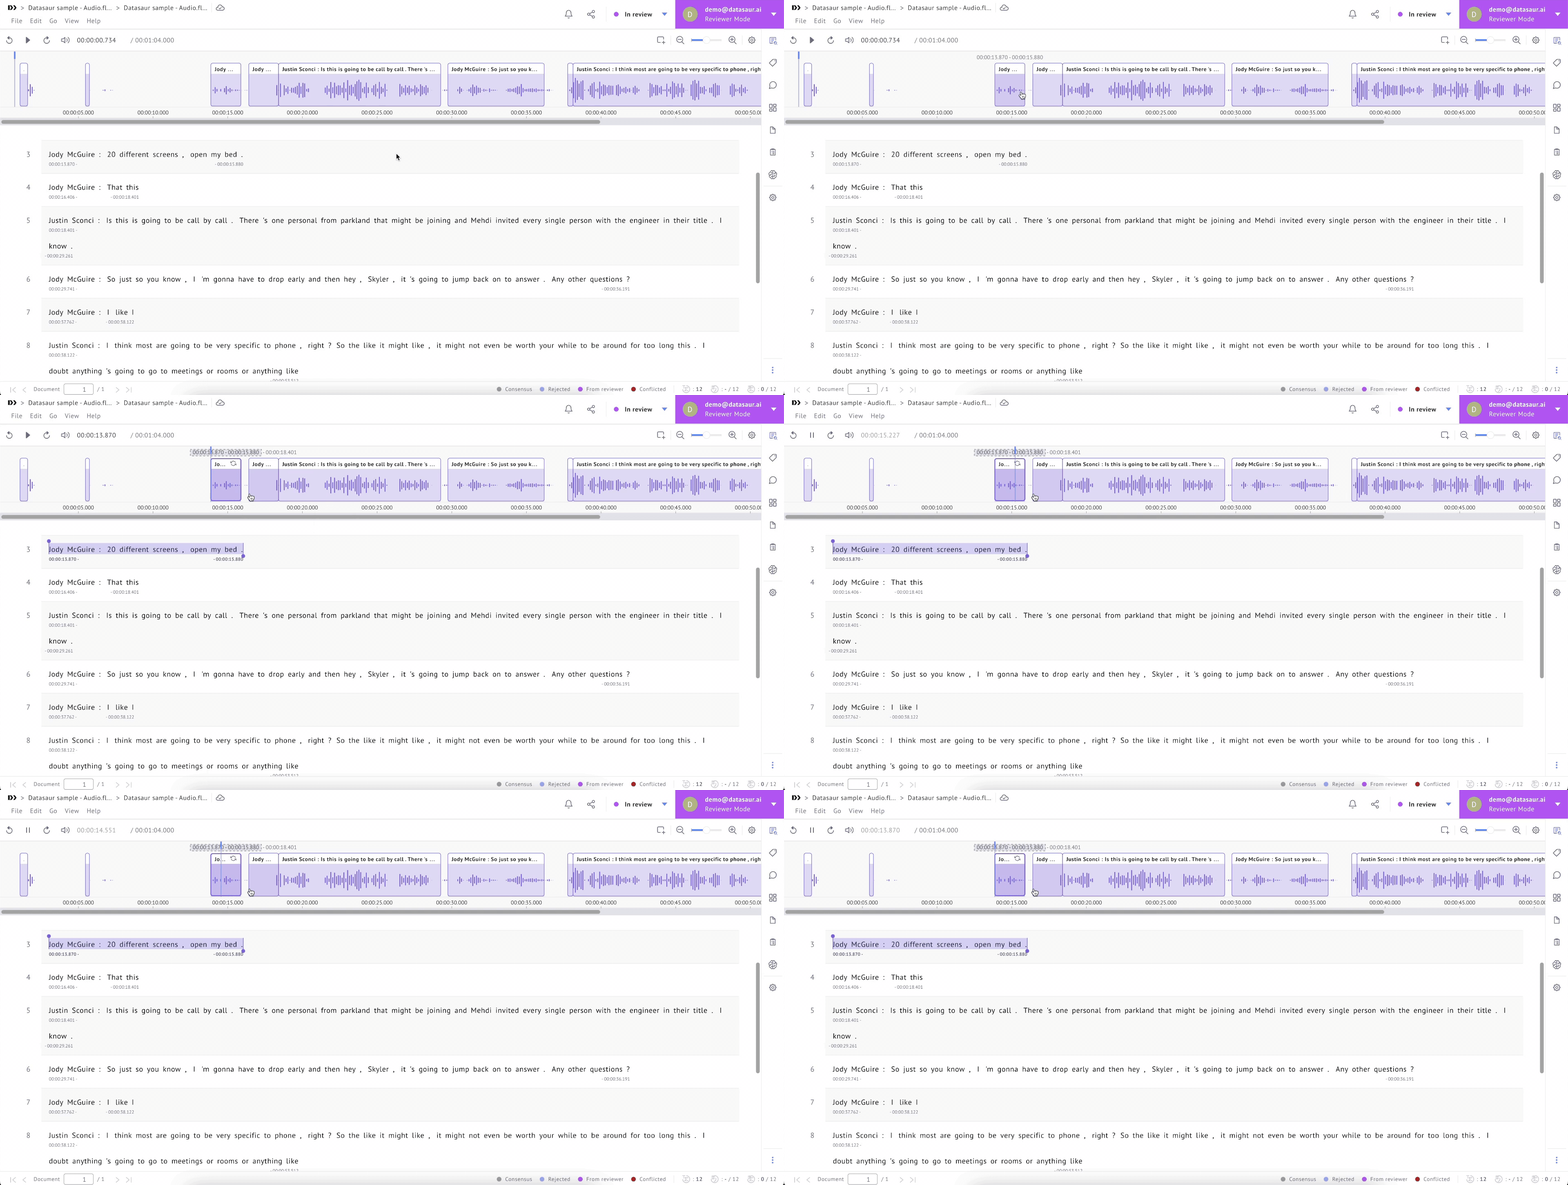
While reviewing or correcting a transcript, it's often useful to hear the same segment repeatedly rather than manually rewinding each time. You can loop playback of any timestamp label in two ways:
#### **Loop a single label on demand**
1. Right-click a timestamp label.
2. Select "Play this timestamp on loop".
3. Playback starts immediately and loops continuously between that timestamp's start and end times.
Selecting "Play this timestamp on loop" on a different label while a loop is already active stops the current loop and starts looping the newly selected label instead. Clicking a span in the transcript editor stops any active loop playback.
#### **Loop automatically when selecting a label**
1. Open **audio settings** in the audio player.
2. Enable "Play selected timestamps on loop".
With this setting on, clicking any timestamp label plays and continuously loops that segment. Clicking a different timestamp label stops the current loop and starts looping the new one.
### Edit sentences in audio project
When editing transcriptions, the system adjusts timestamp behavior based on how much the text changes.
* If the similarity between the original transcription and the edited version is **above 70%**, the timestamp labels are kept, and you only need to adjust the corresponding text.
* If the similarity falls **below 70%**, the timestamp labels may be removed. This happens when the edited text differs significantly from the original. The threshold ensures that timestamp labels remain for minor edits but are removed for more major changes.
For example, after editing the sentence in the first line, the timestamp labels will disappear because the similarity between the original and edited sentence is below 70%.
{% hint style="info" %}
If you upload an empty transcription, placeholder lines with **`-`** will be created and automatically associated with timestamps. Editing the placeholder content will remove the timestamp label, and you will need to create it again manually.
{% endhint %}
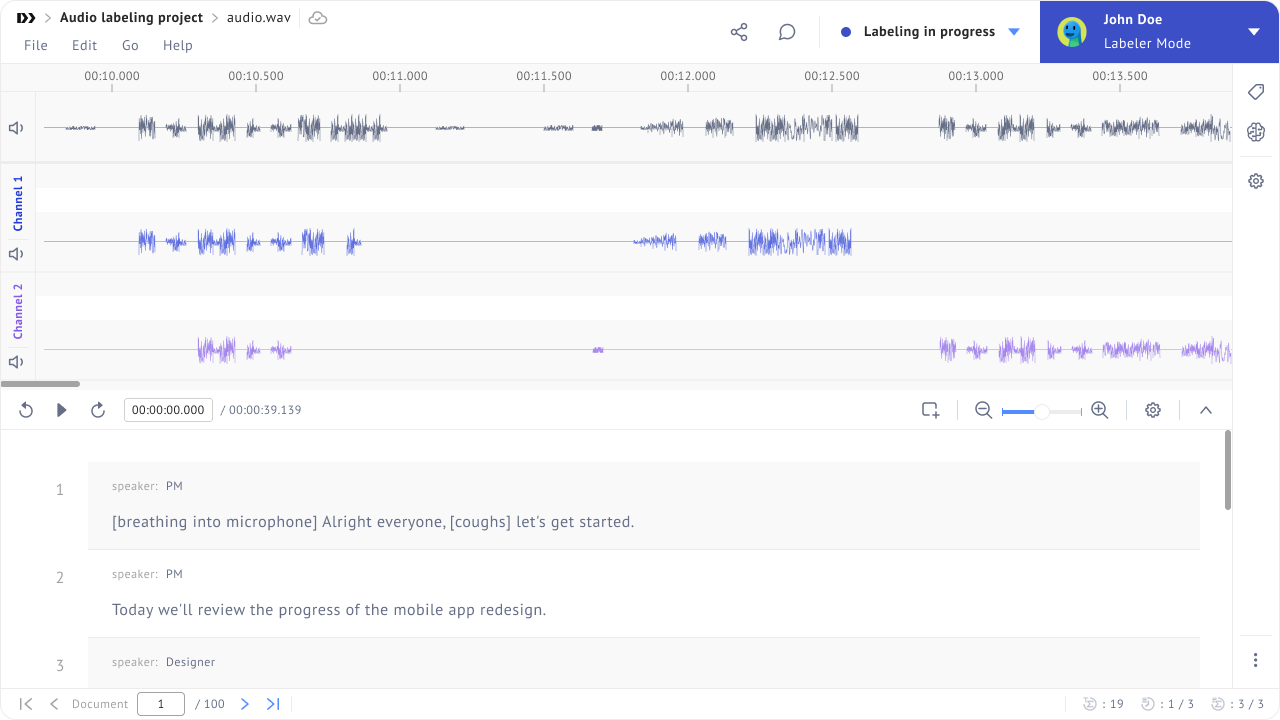
### Multi-channel audio
Audio projects can include files with multiple channels, enabling labeling across different audio sources within the same file.
* If the audio file does not contain channels, only the **main audio track** is displayed.
* If an uploaded audio file contains multiple channels, the interface displays:
* A **main audio track** (combined view).
* Up to **2 individual channels.** Any additional channels in the source file are not shown.
**Timestamp labeling behavior**
* **Single-channel audio:**
* Timestamp labels can be created **directly on the main audio track.**
* Channel-specific labeling is not applicable.
* **Multi-channel audio:**
* Timestamp labels can be created **only within individual channels.**
* Labels created in channels are **reflected in the main audio track.**
* The **main audio track does not support direct timestamp labeling.**
This behavior keeps labeling structured at the channel level while maintaining a unified view in the main audio track.
You can use the sample file below to test multi-channel audio.
{% file src="/files/VkKAqaUBfDLmtPVz9m2Z" %}
.png?alt=media)