> For the complete documentation index, see [llms.txt](https://docs.datasaur.ai/llms.txt). Markdown versions of documentation pages are available by appending `.md` to page URLs; this page is available as [Markdown](https://docs.datasaur.ai/workspace-management/project-management/manage-documents-in-an-ongoing-project.md).
# Manage Documents in an Ongoing Project
In some cases, you may need to update the documents inside an ongoing labeling project. You can manage project documents without creating a new project. This includes adding new documents and deleting existing ones.
To learn which roles can add or delete project documents, see [Role & Permission](/workspace-management/role-and-permission.md).
## Add new documents
To add new documents to an existing project:
1. Go to the **Projects** page.
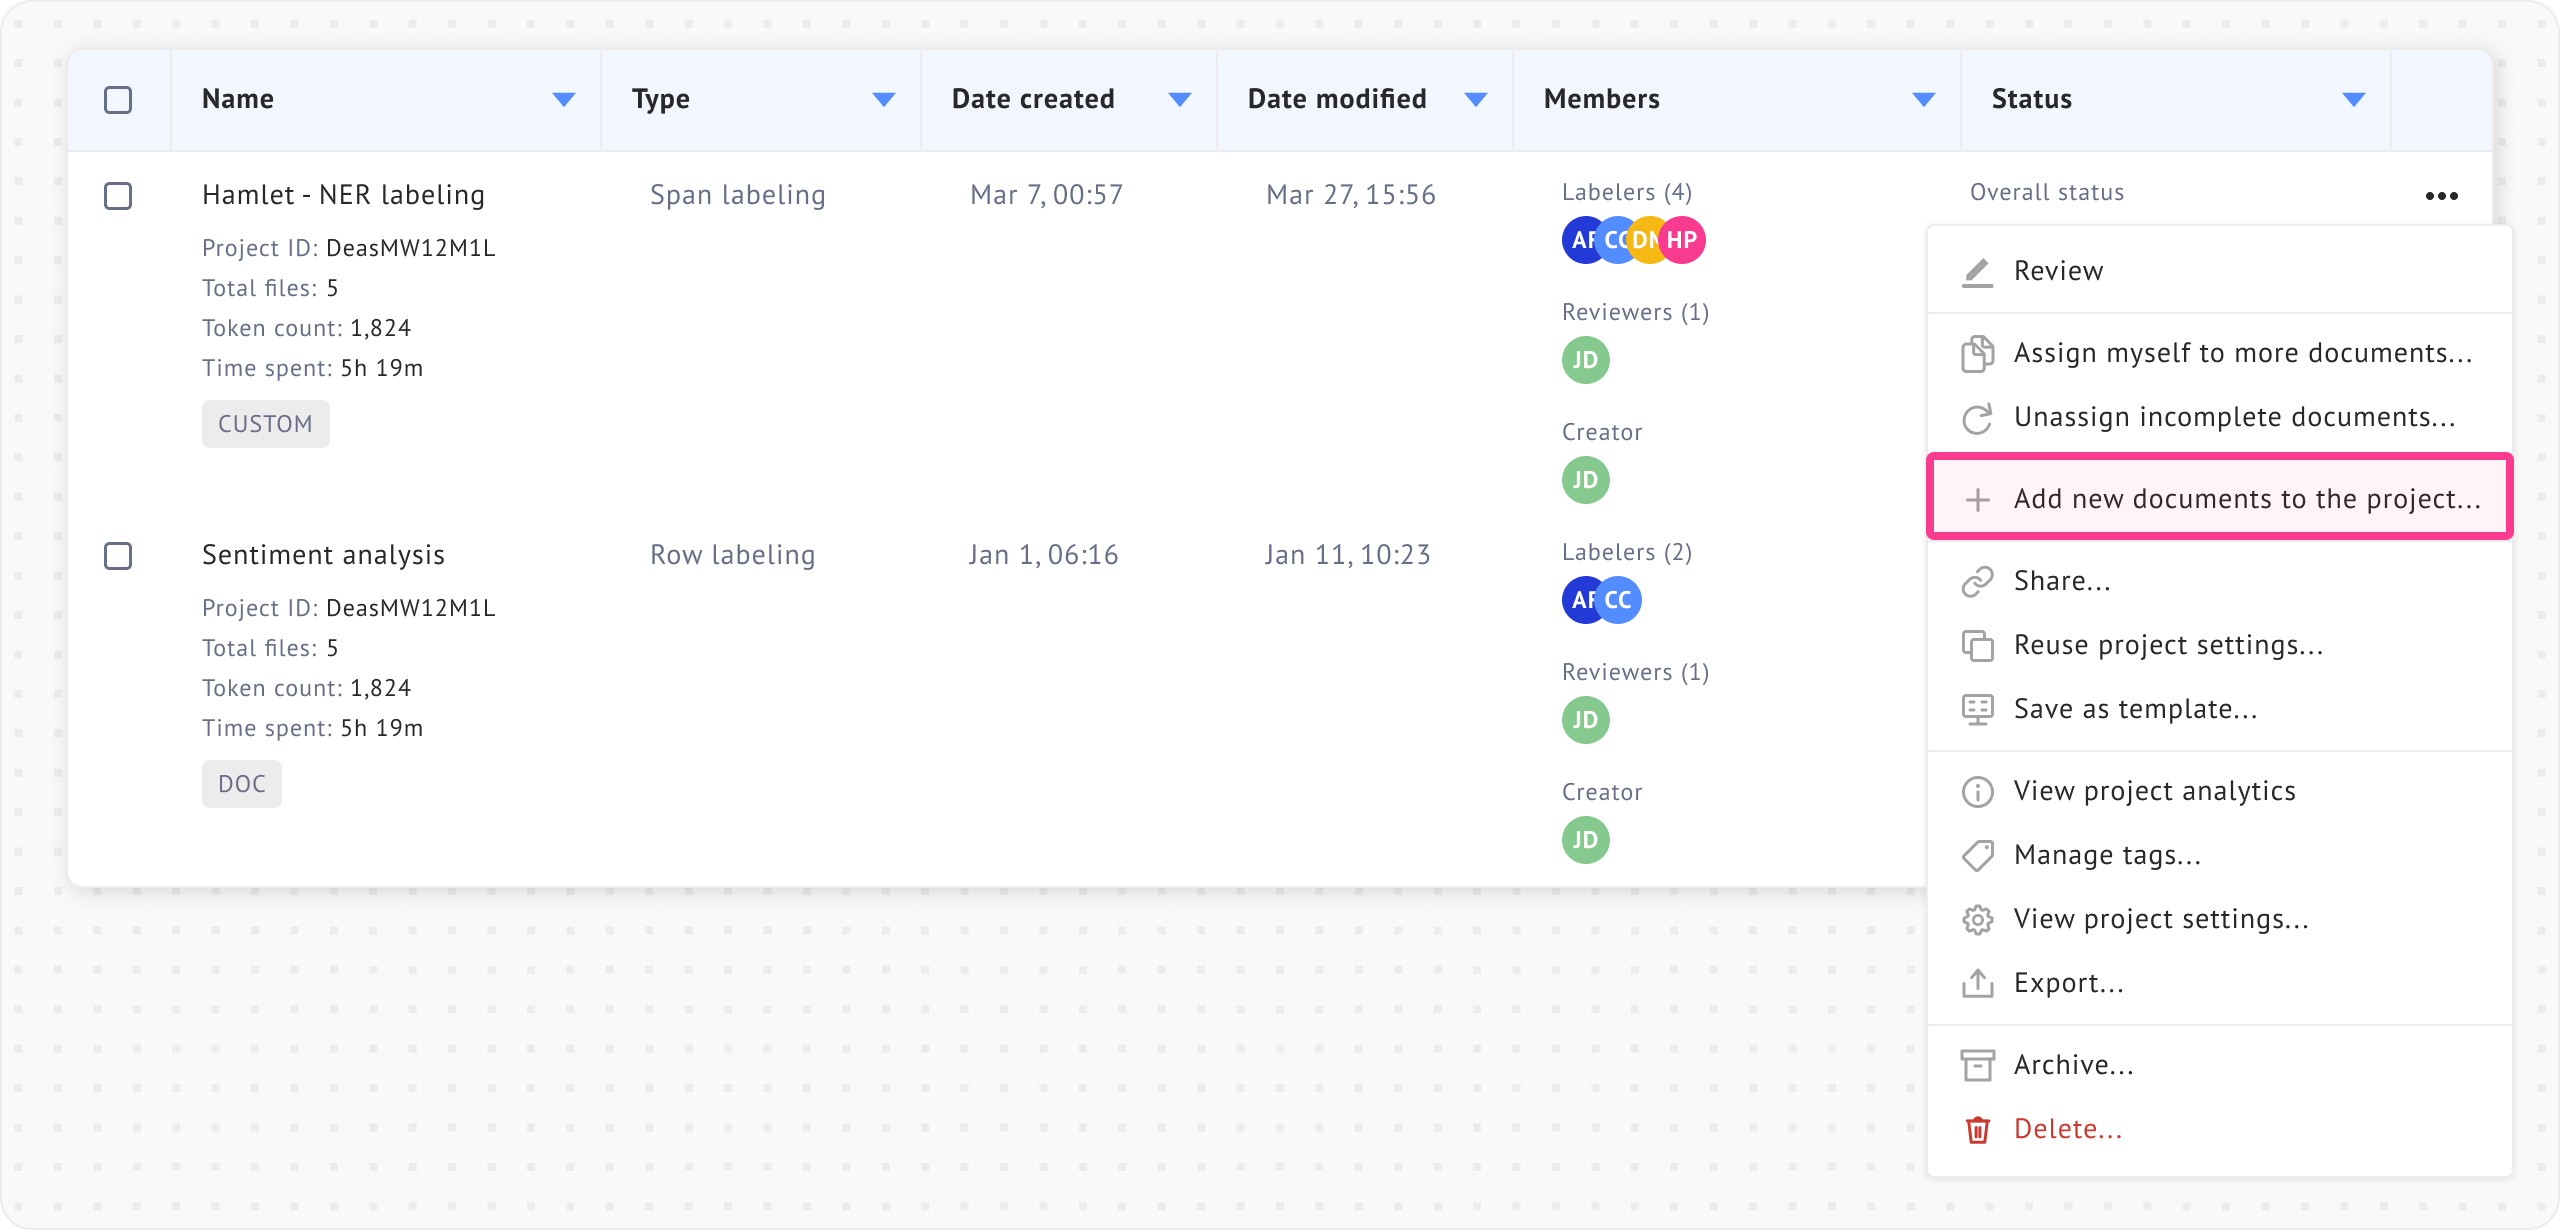
2. Click the three-dot menu on the project you want to update.
3. Select **Add new documents to the project.**
4. You will be directed to the file upload page.
There are three steps in the file upload page: upload, assign, and preview.
### **Upload files**
Upload your new files and make sure the file types match the original project setup.
### **Assign documents**
Assign team members to the uploaded documents. Assignments apply to the entire batch of documents, not individual documents. If you need more granular control, you can skip this step and assign documents later in **File** → **Settings** → **Assignment** after the upload is complete.
Role options may be limited based on a member’s previous assignment in the project. The table below shows how previously assigned roles map to available options.
#
Previous Assigned Role
Available Roles
1
Not assigned
Labeler, Reviewer, Labeler and Reviewer
2
Labeler
Labeler, Labeler and Reviewer
3
Reviewer
Reviewer, Labeler and Reviewer
4
Labeler and Reviewer
Labeler and Reviewer
For example, if a member was assigned as a labeler during project creation, they can only be assigned as **Labeler** or **Labeler and Reviewer** for newly uploaded documents.
Available roles also depend on the workspace role. For example, if a workspace admin has not been assigned to the project and you try to assign them to newly uploaded document, only **Reviewer** and **Labeler and Reviewer** will be available, since a team admin cannot be assigned as a labeler only.
### **Preview files**
You can preview the files you uploaded before completing the process. This lets you check whether the correct files were added.
## Delete documents
You can delete documents from an ongoing project in two ways.
#### Delete from the Projects page
To delete documents from the **Projects** page:
1. Go to the **Projects** page.
2. Open **Manage documents** for the project.
3. Delete documents in one of these ways:
* Click the **Delete** button for a specific file to remove that file only.
* Use the checkboxes to select multiple files, then delete them in bulk.
#### Delete from inside a project
To delete documents from inside a project:
1. Open the project in **Reviewer mode**.
2. Open the **List of files** extension.
3. Delete documents in one of these ways:
* Right-click a specific file and select **Delete**.
* Use the checkboxes to select multiple files, then delete them in bulk.
## Additional information
* Project status:
* Adding or deleting documents does not change the [project status](/workspace-management/project-management/project-status-workflow.md).
* If you assign new documents to users who already completed their work, their labeling status changes back to **In progress**.
* Webhook events — Instead of implementing a new webhook event for adding documents, we are reusing the project created event. We are also planning to implement a separate event before rolling this out for general release.
.png?alt=media)
.png?alt=media)
.png?alt=media)