> For the complete documentation index, see [llms.txt](https://docs.datasaur.ai/llms.txt). Markdown versions of documentation pages are available by appending `.md` to page URLs; this page is available as [Markdown](https://docs.datasaur.ai/llm-projects/knowledge-base/file-properties.md).
# File Properties
File properties act as metadata for your files. They let you add details such as type, category, or other attributes that describe the file. This metadata helps organize your knowledge base and makes the retrieval process more accurate and efficient in the future.
## Create file properties
In a knowledge base, you can create file properties from:
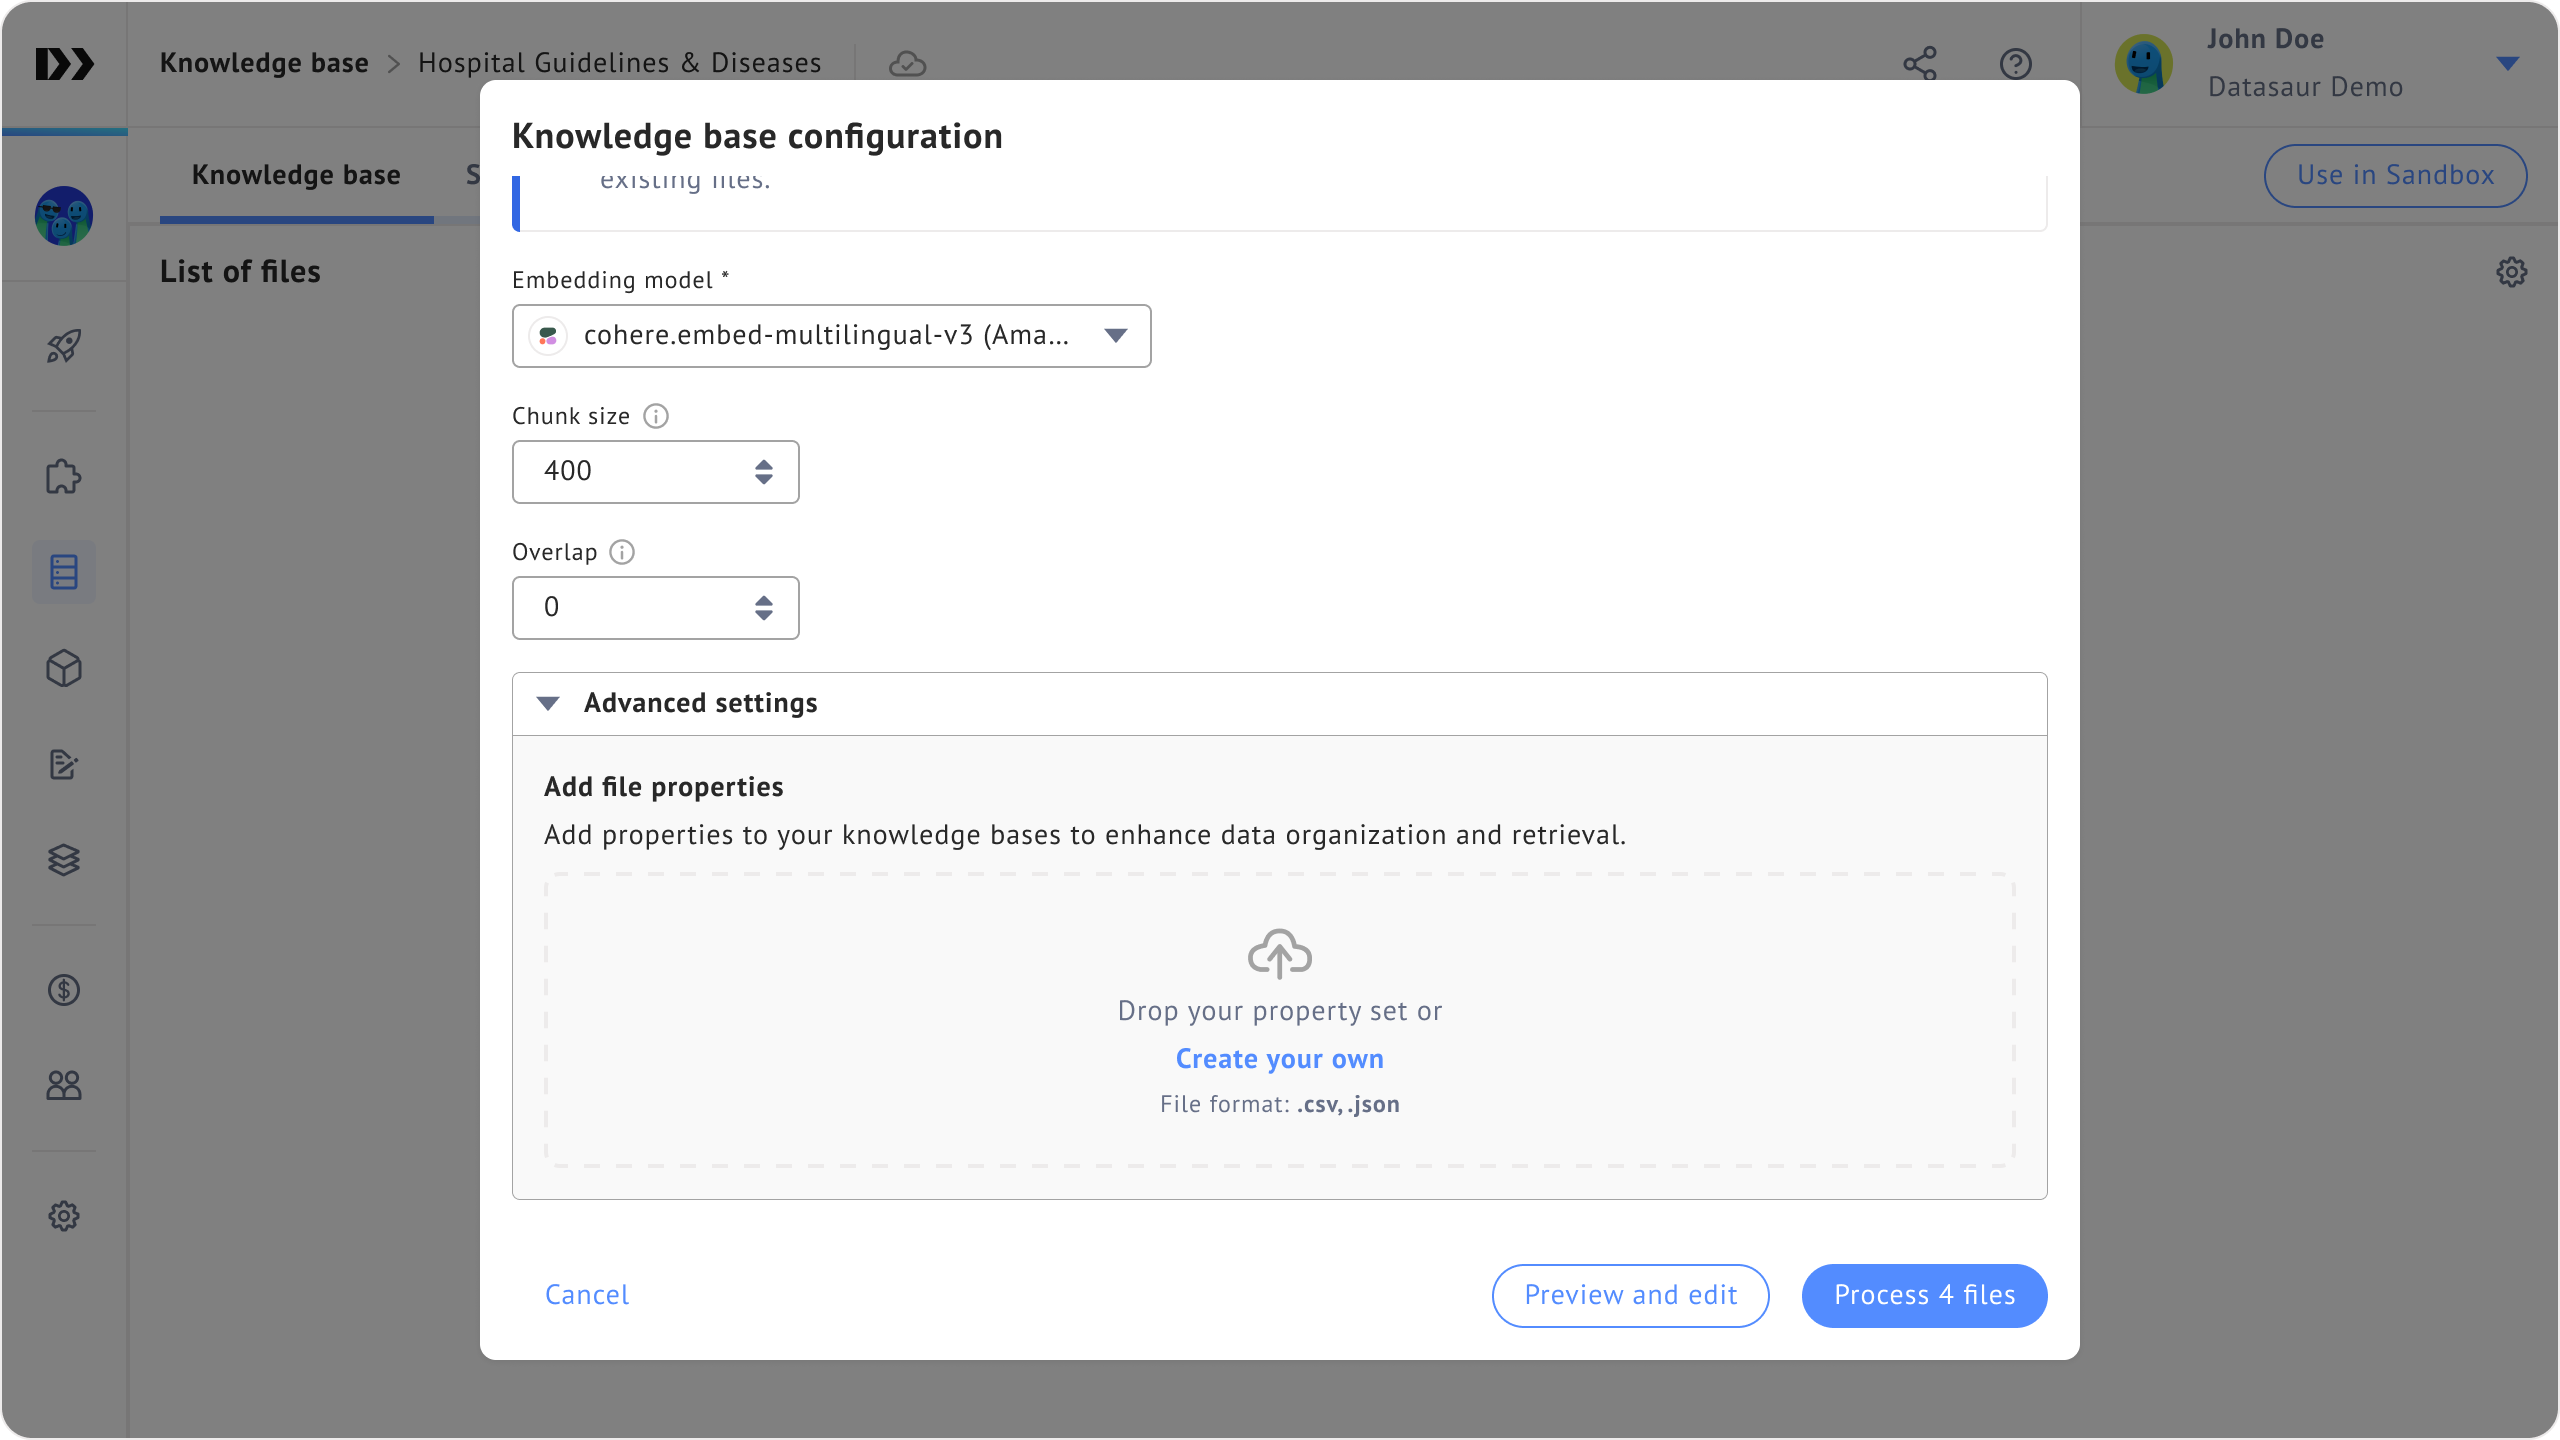
* **Knowledge base configuration dialog:** Open the **Advanced settings** accordion and create them there.
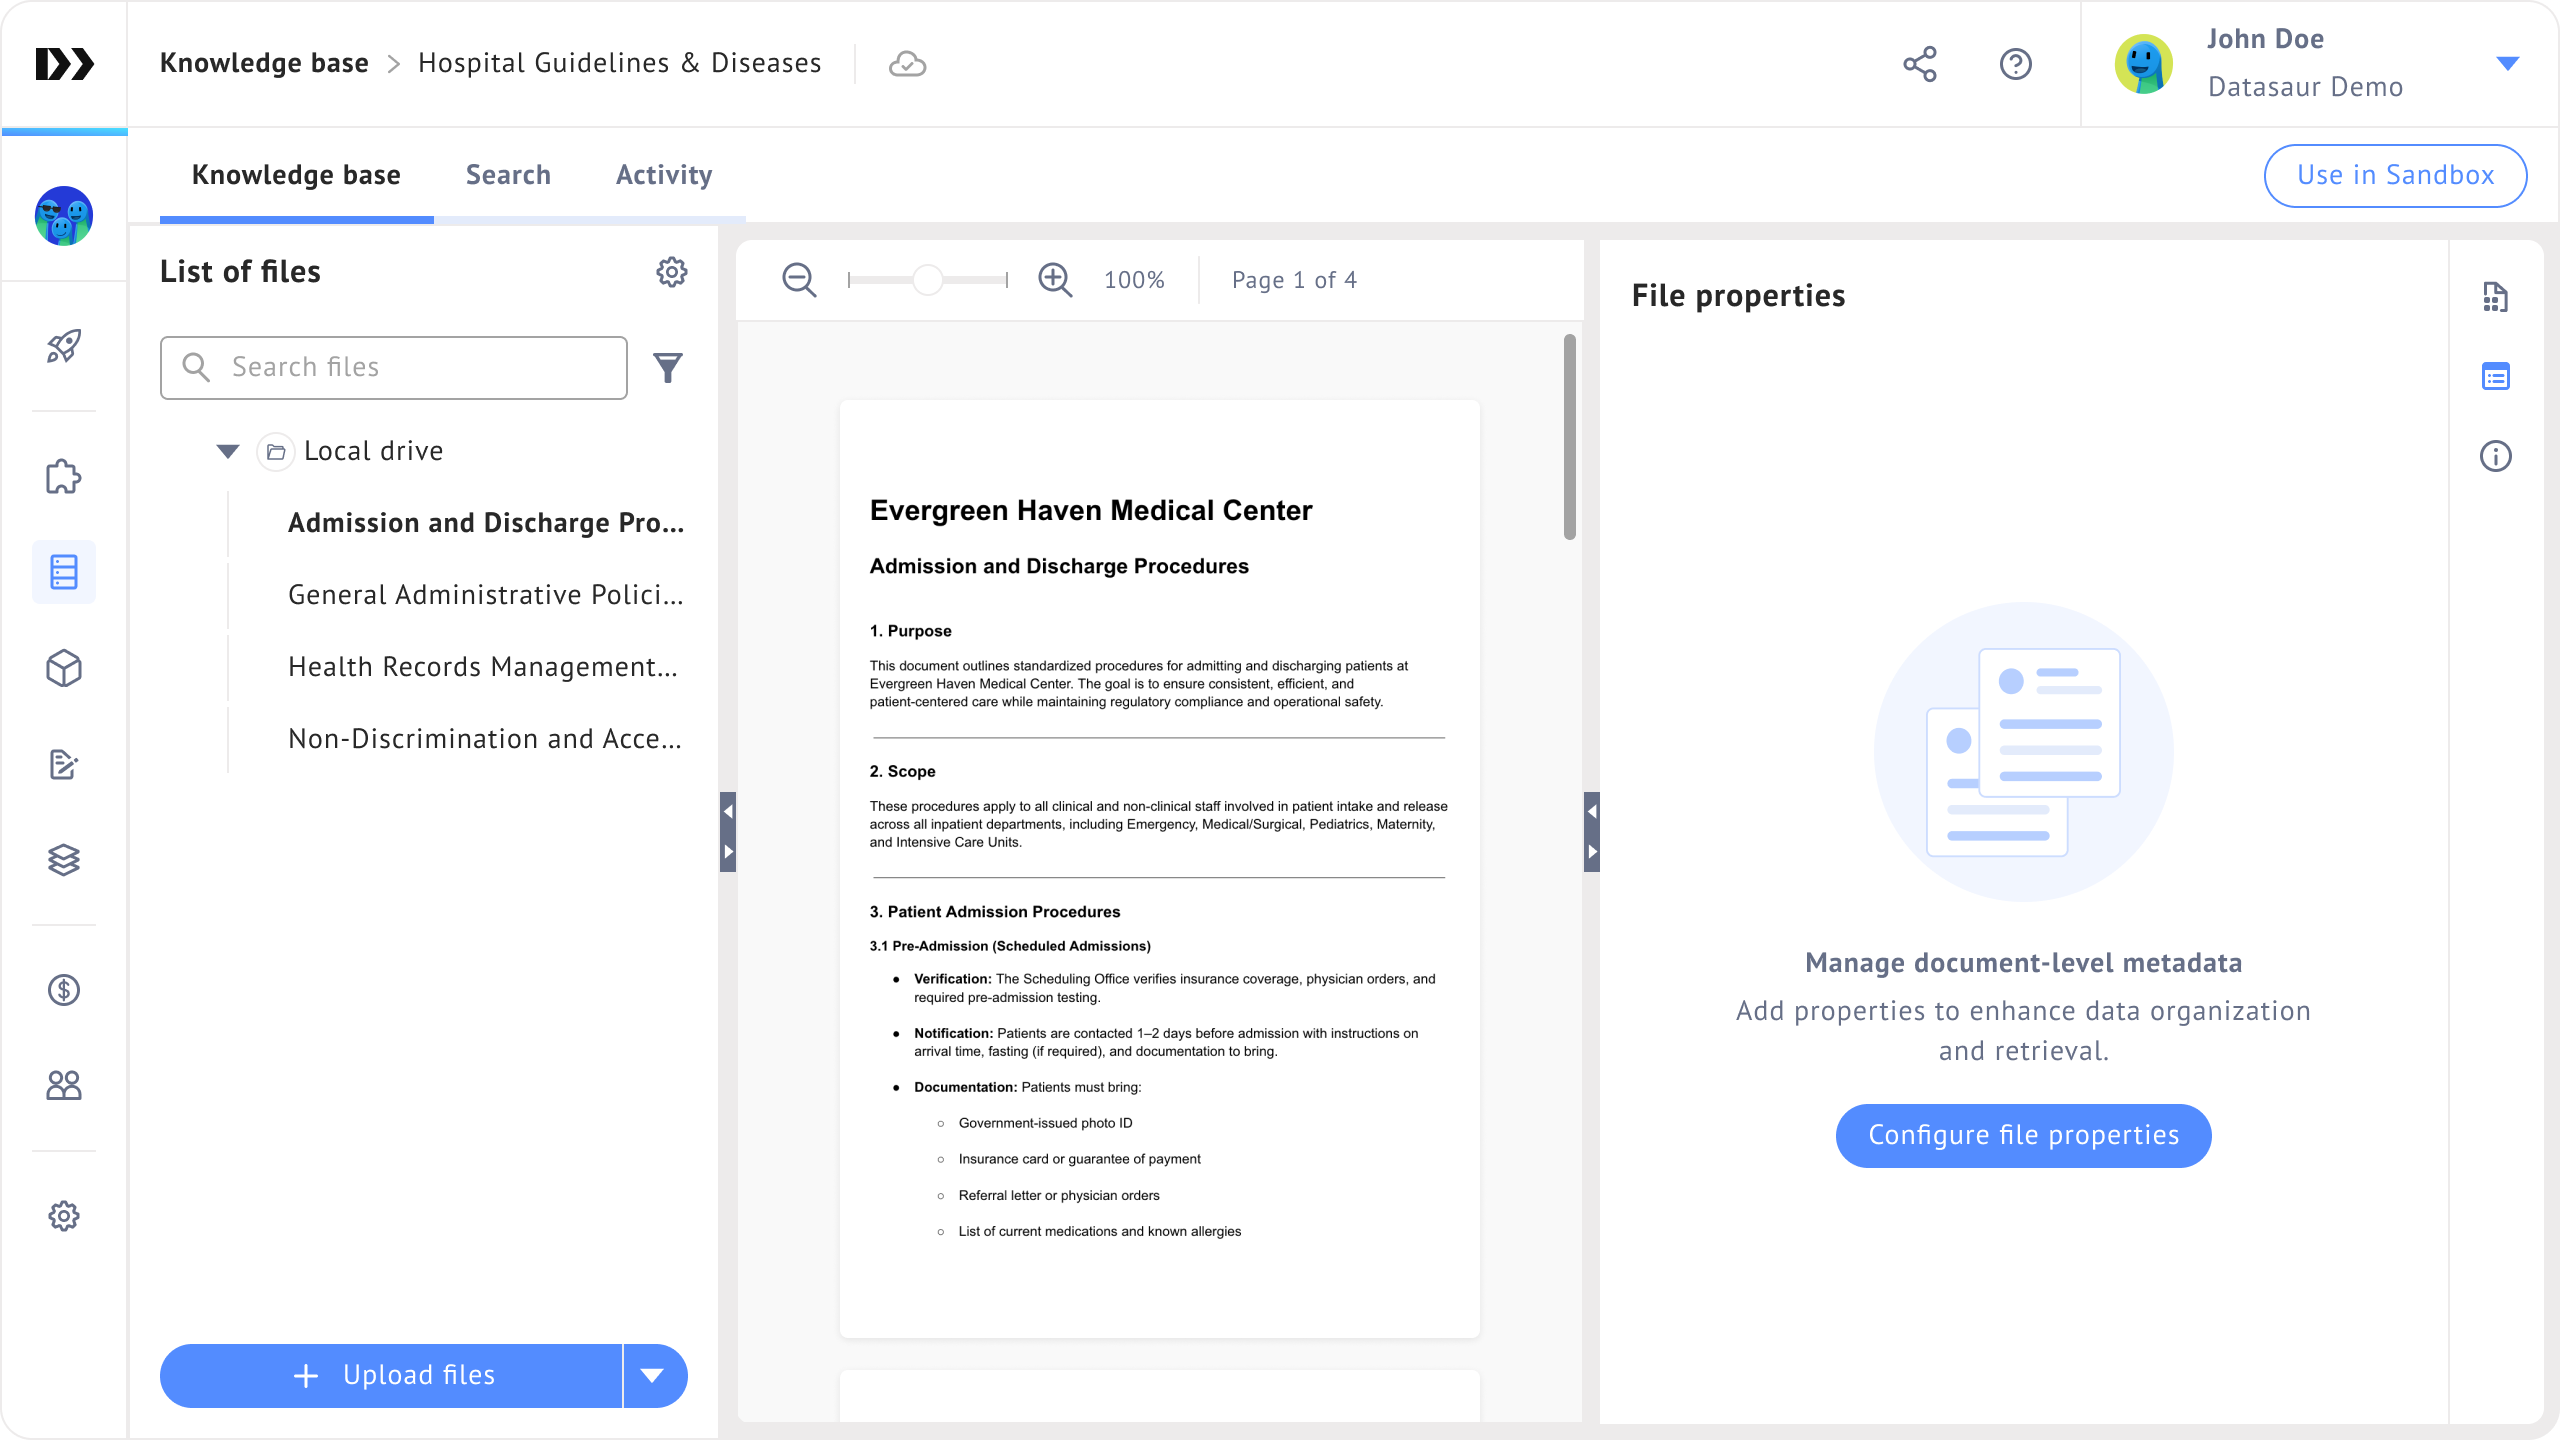
* **File properties section:** Open this section in the right sidebar and create them there.
There are two ways for you to create file properties:
* **Upload a file properties file:** You can drag and drop the file into the dropdown area. Our supported formats are as follows: `.csv` and `.json`. For `.json` files, please find below a sample of our accepted format.
{% file src="/files/BGKrh4bgP8vFY9jhbwQR" %}
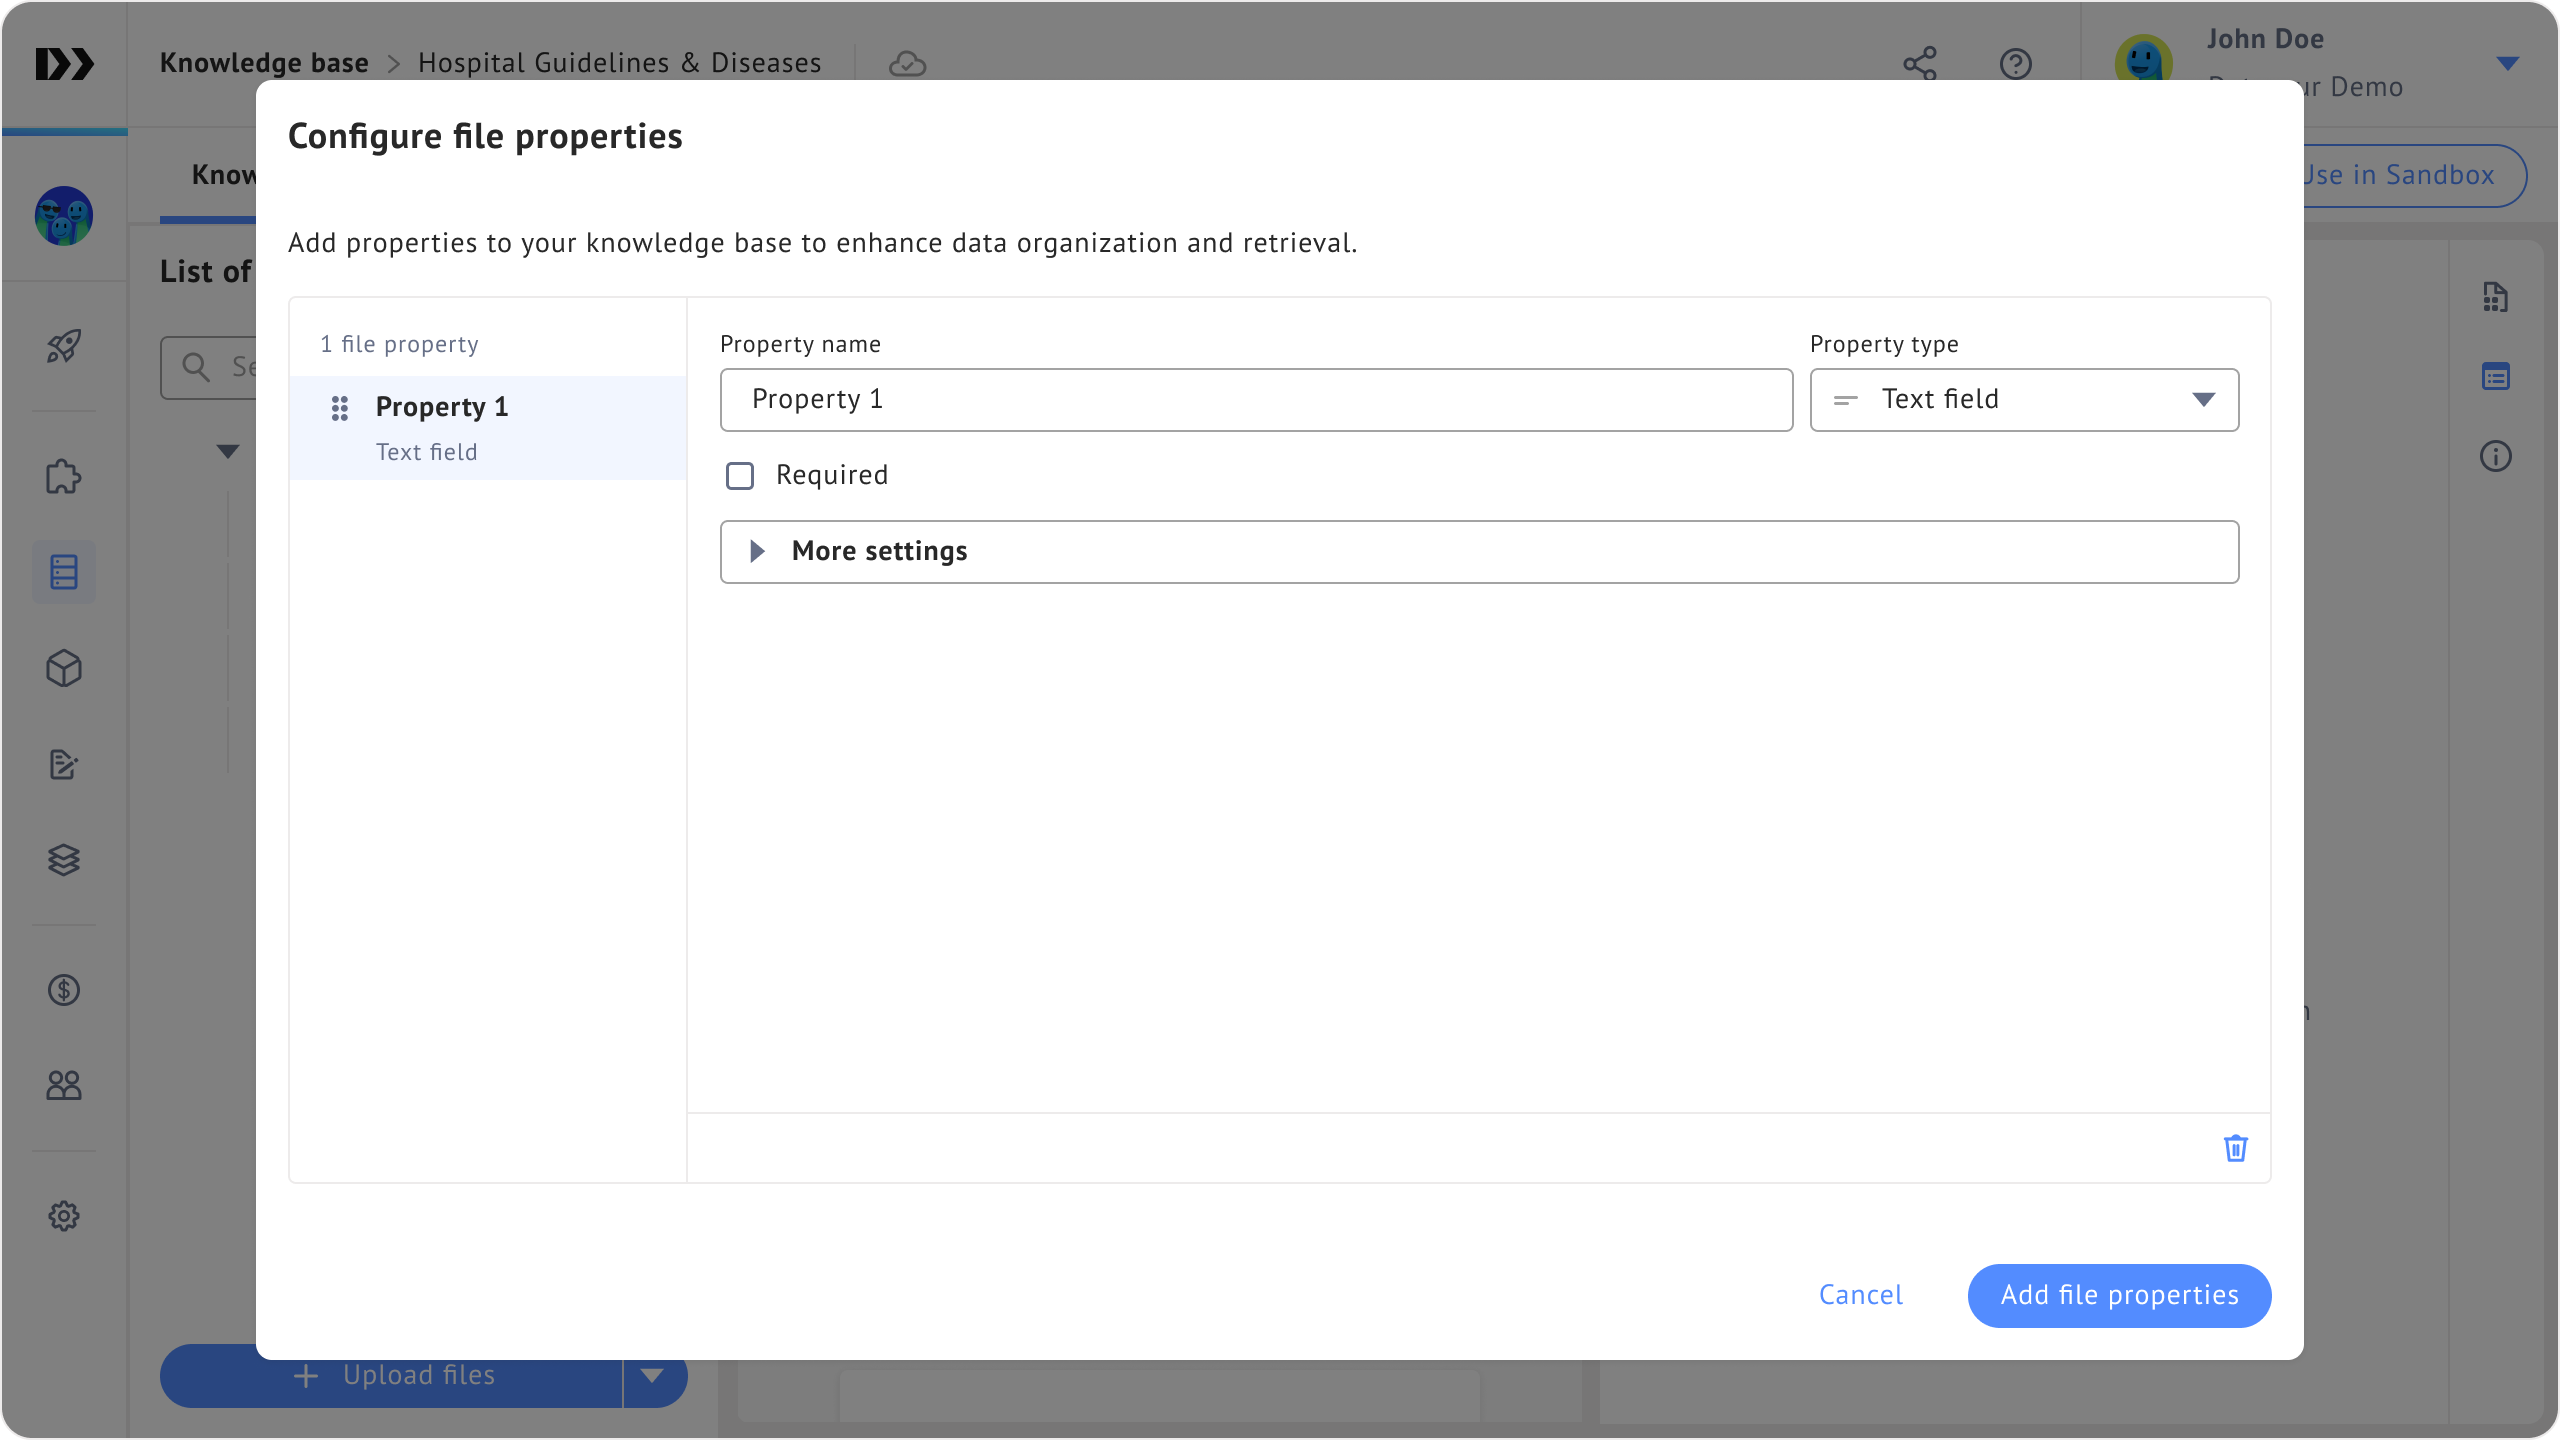
* **Create from scratch:** You can manually add a list of file property fields directly in the knowledge base.
## File property types
Let's take a look at the available types of file properties.
### Text field
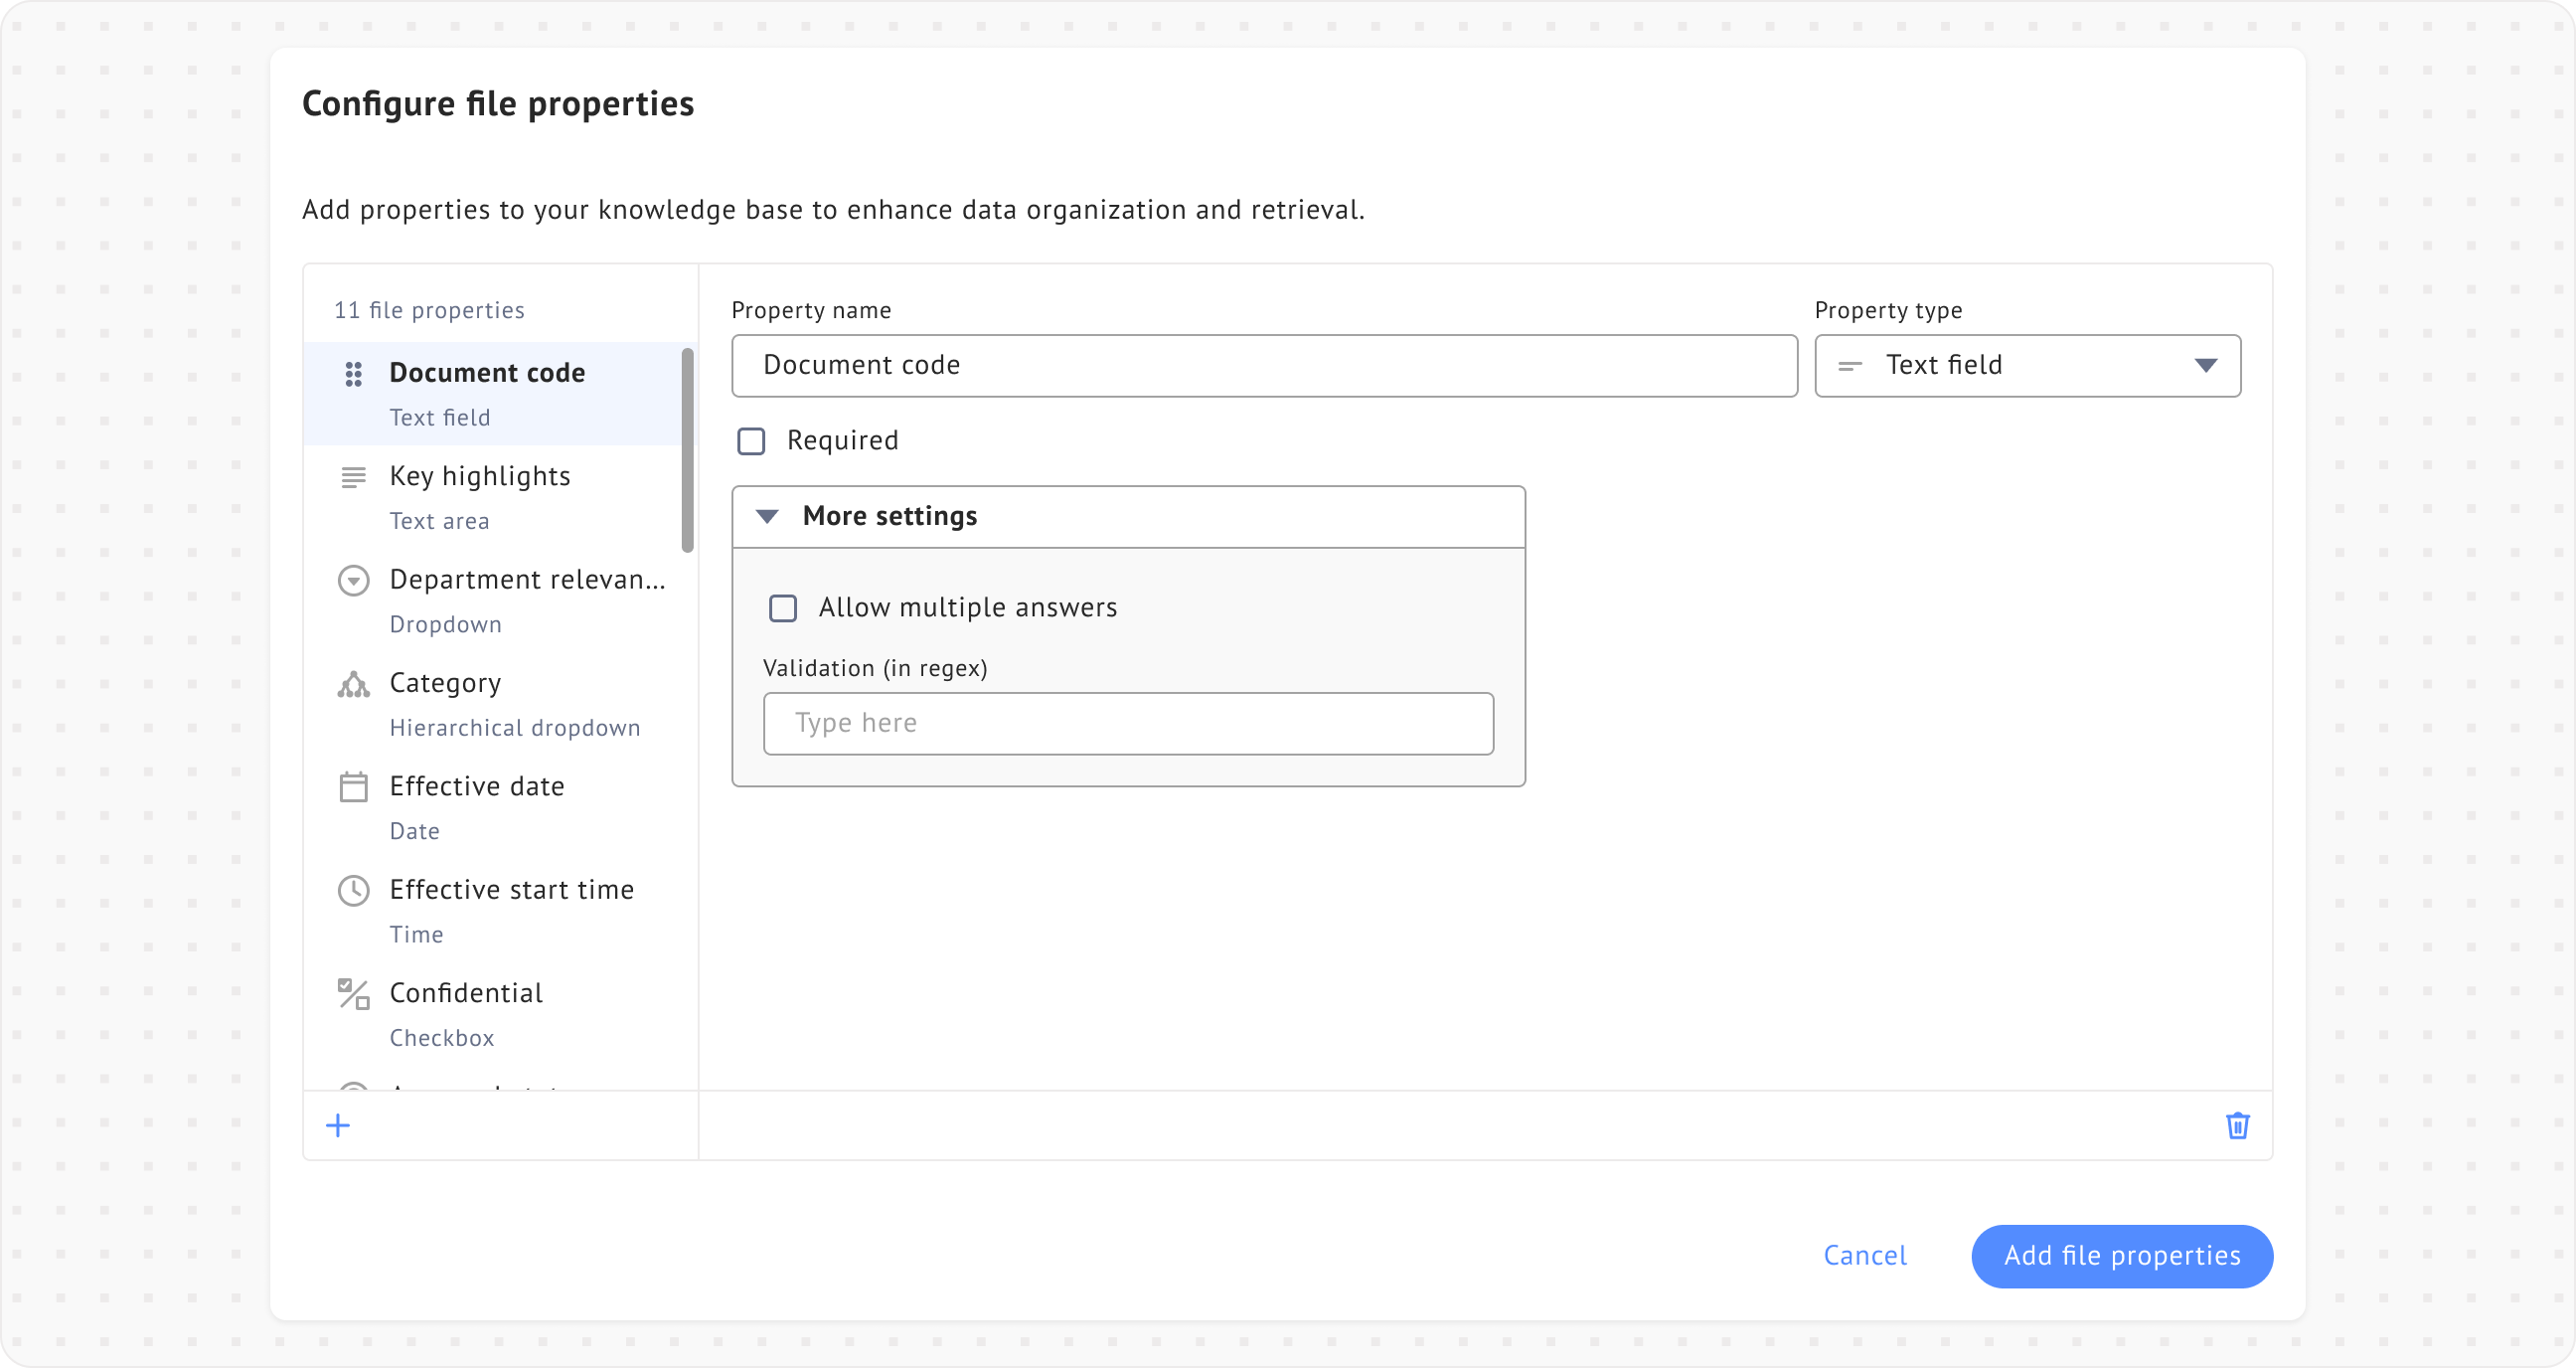
**Text field** lets you give information by typing in a short free-form text, up to a single line at a time.
During configuration, you can also configure these settings:
* **Required:** Specify whether this property must be filled.
* **Allow multiple answer:** Specify whether users can provide more than one answer.
* **Validation (in regex):** Specify patterns to ensure the input matches a specific format (example: email, phone number).
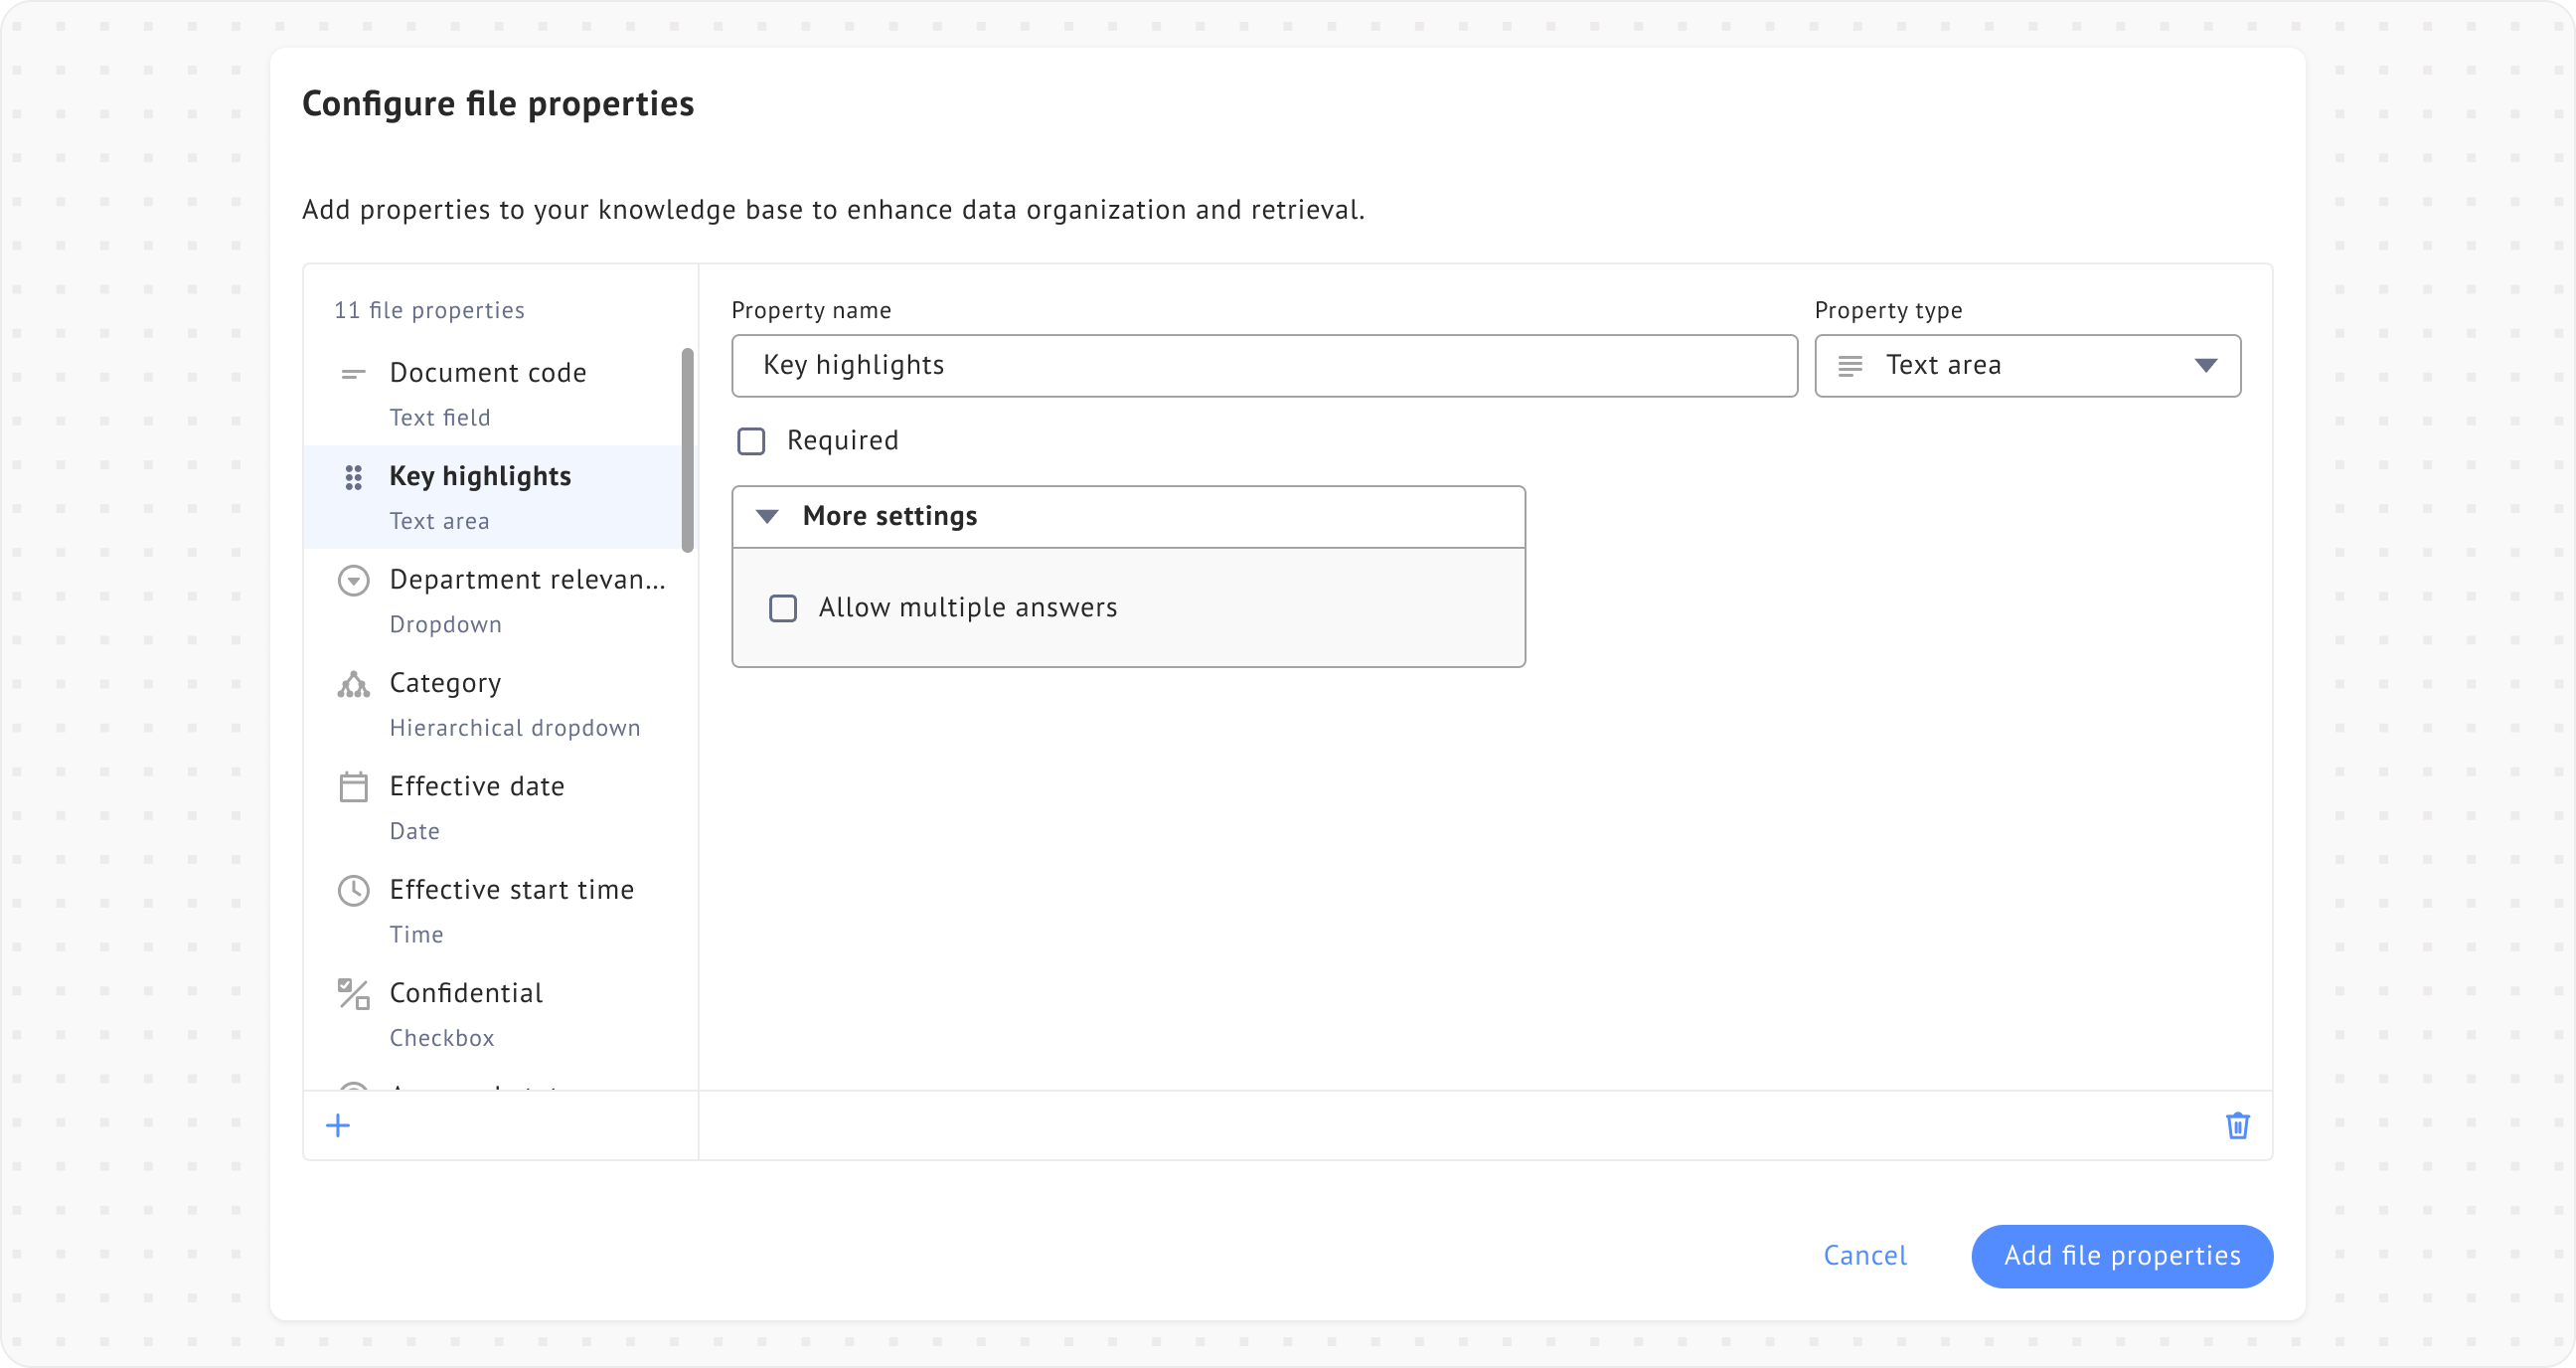
### Text area
**Text area** lets you enter multiple lines of text, making it suitable for longer responses or detailed information.
During configuration, you can also configure these settings:
* **Required:** Specify whether this property must be filled.
* **Allow multiple answer:** Specify whether users can provide more than one answer.
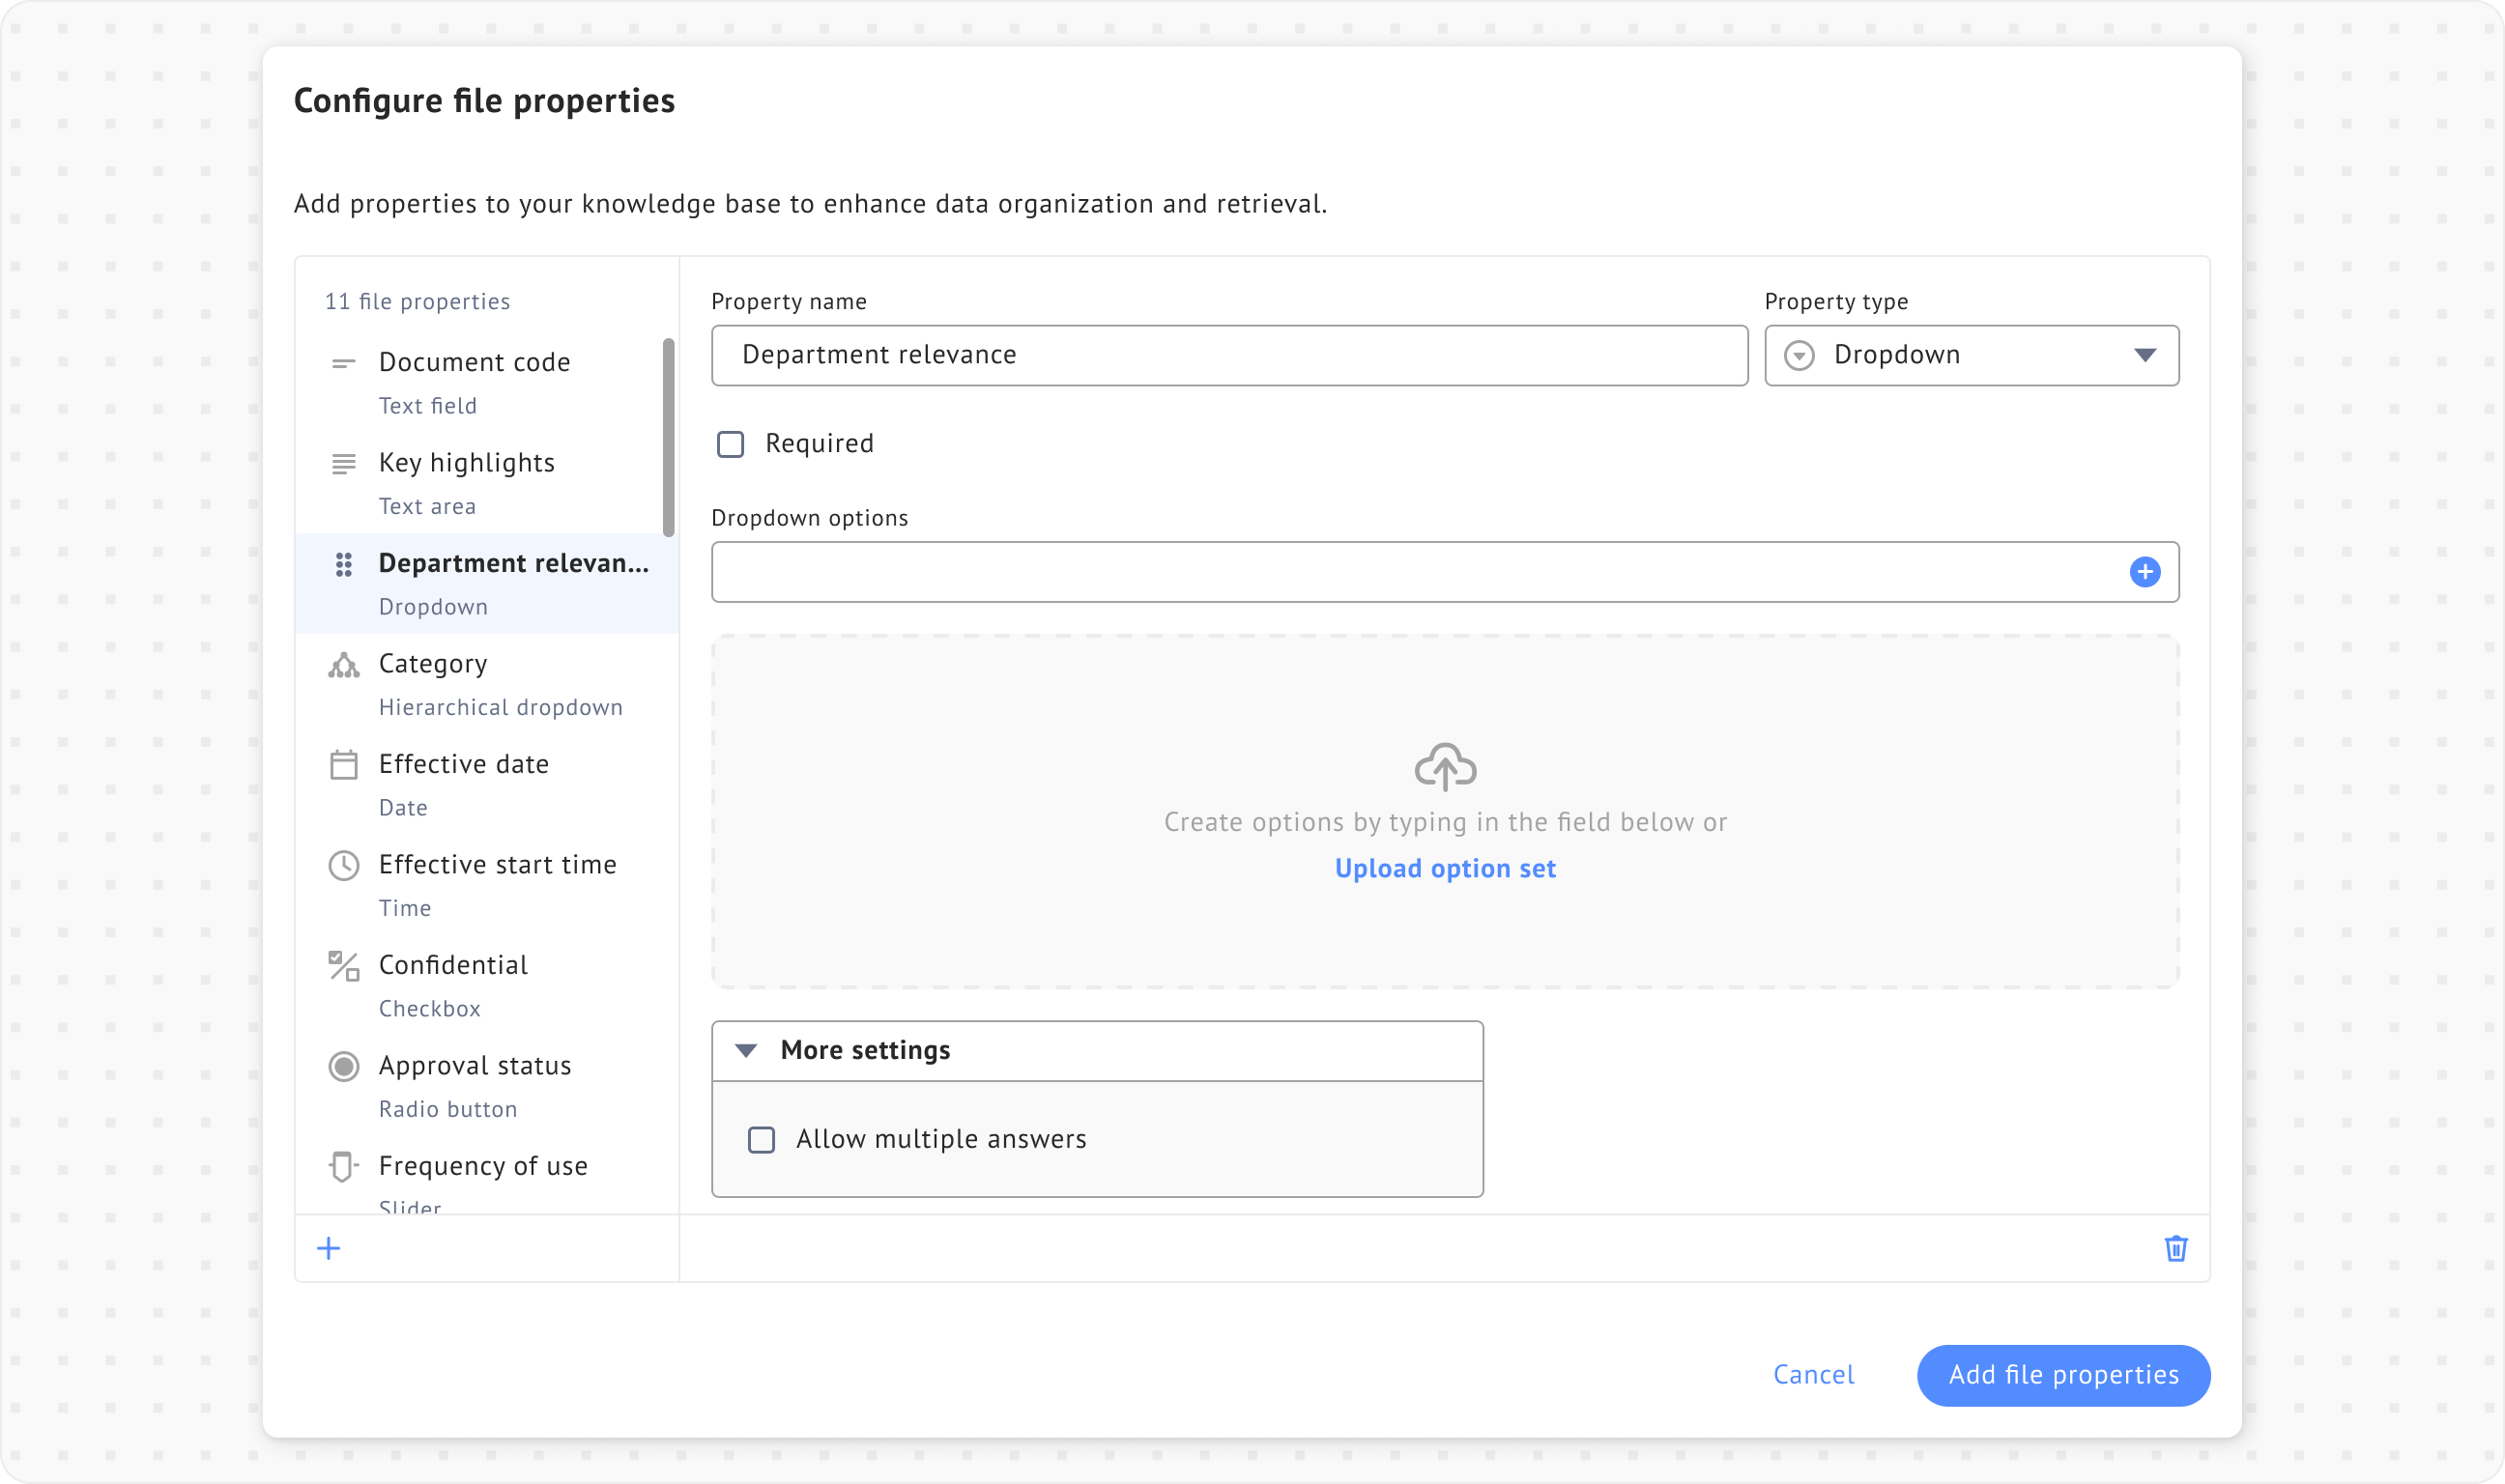
### Dropdown
**Dropdown** lets you select an option from a list. The list is hidden until they expand it.
During configuration, you can configure these settings:
* **Dropdown options:** Add a list of options. If you already have a `.csv` file with a predefined options, upload it as an option set.
* **Required:** Specify whether this property must be filled.
* **Allow multiple answer:** Specify whether users can provide more than one answer.
* You can also allow selecting multiple answers by enabling **Allow multiple answers**.
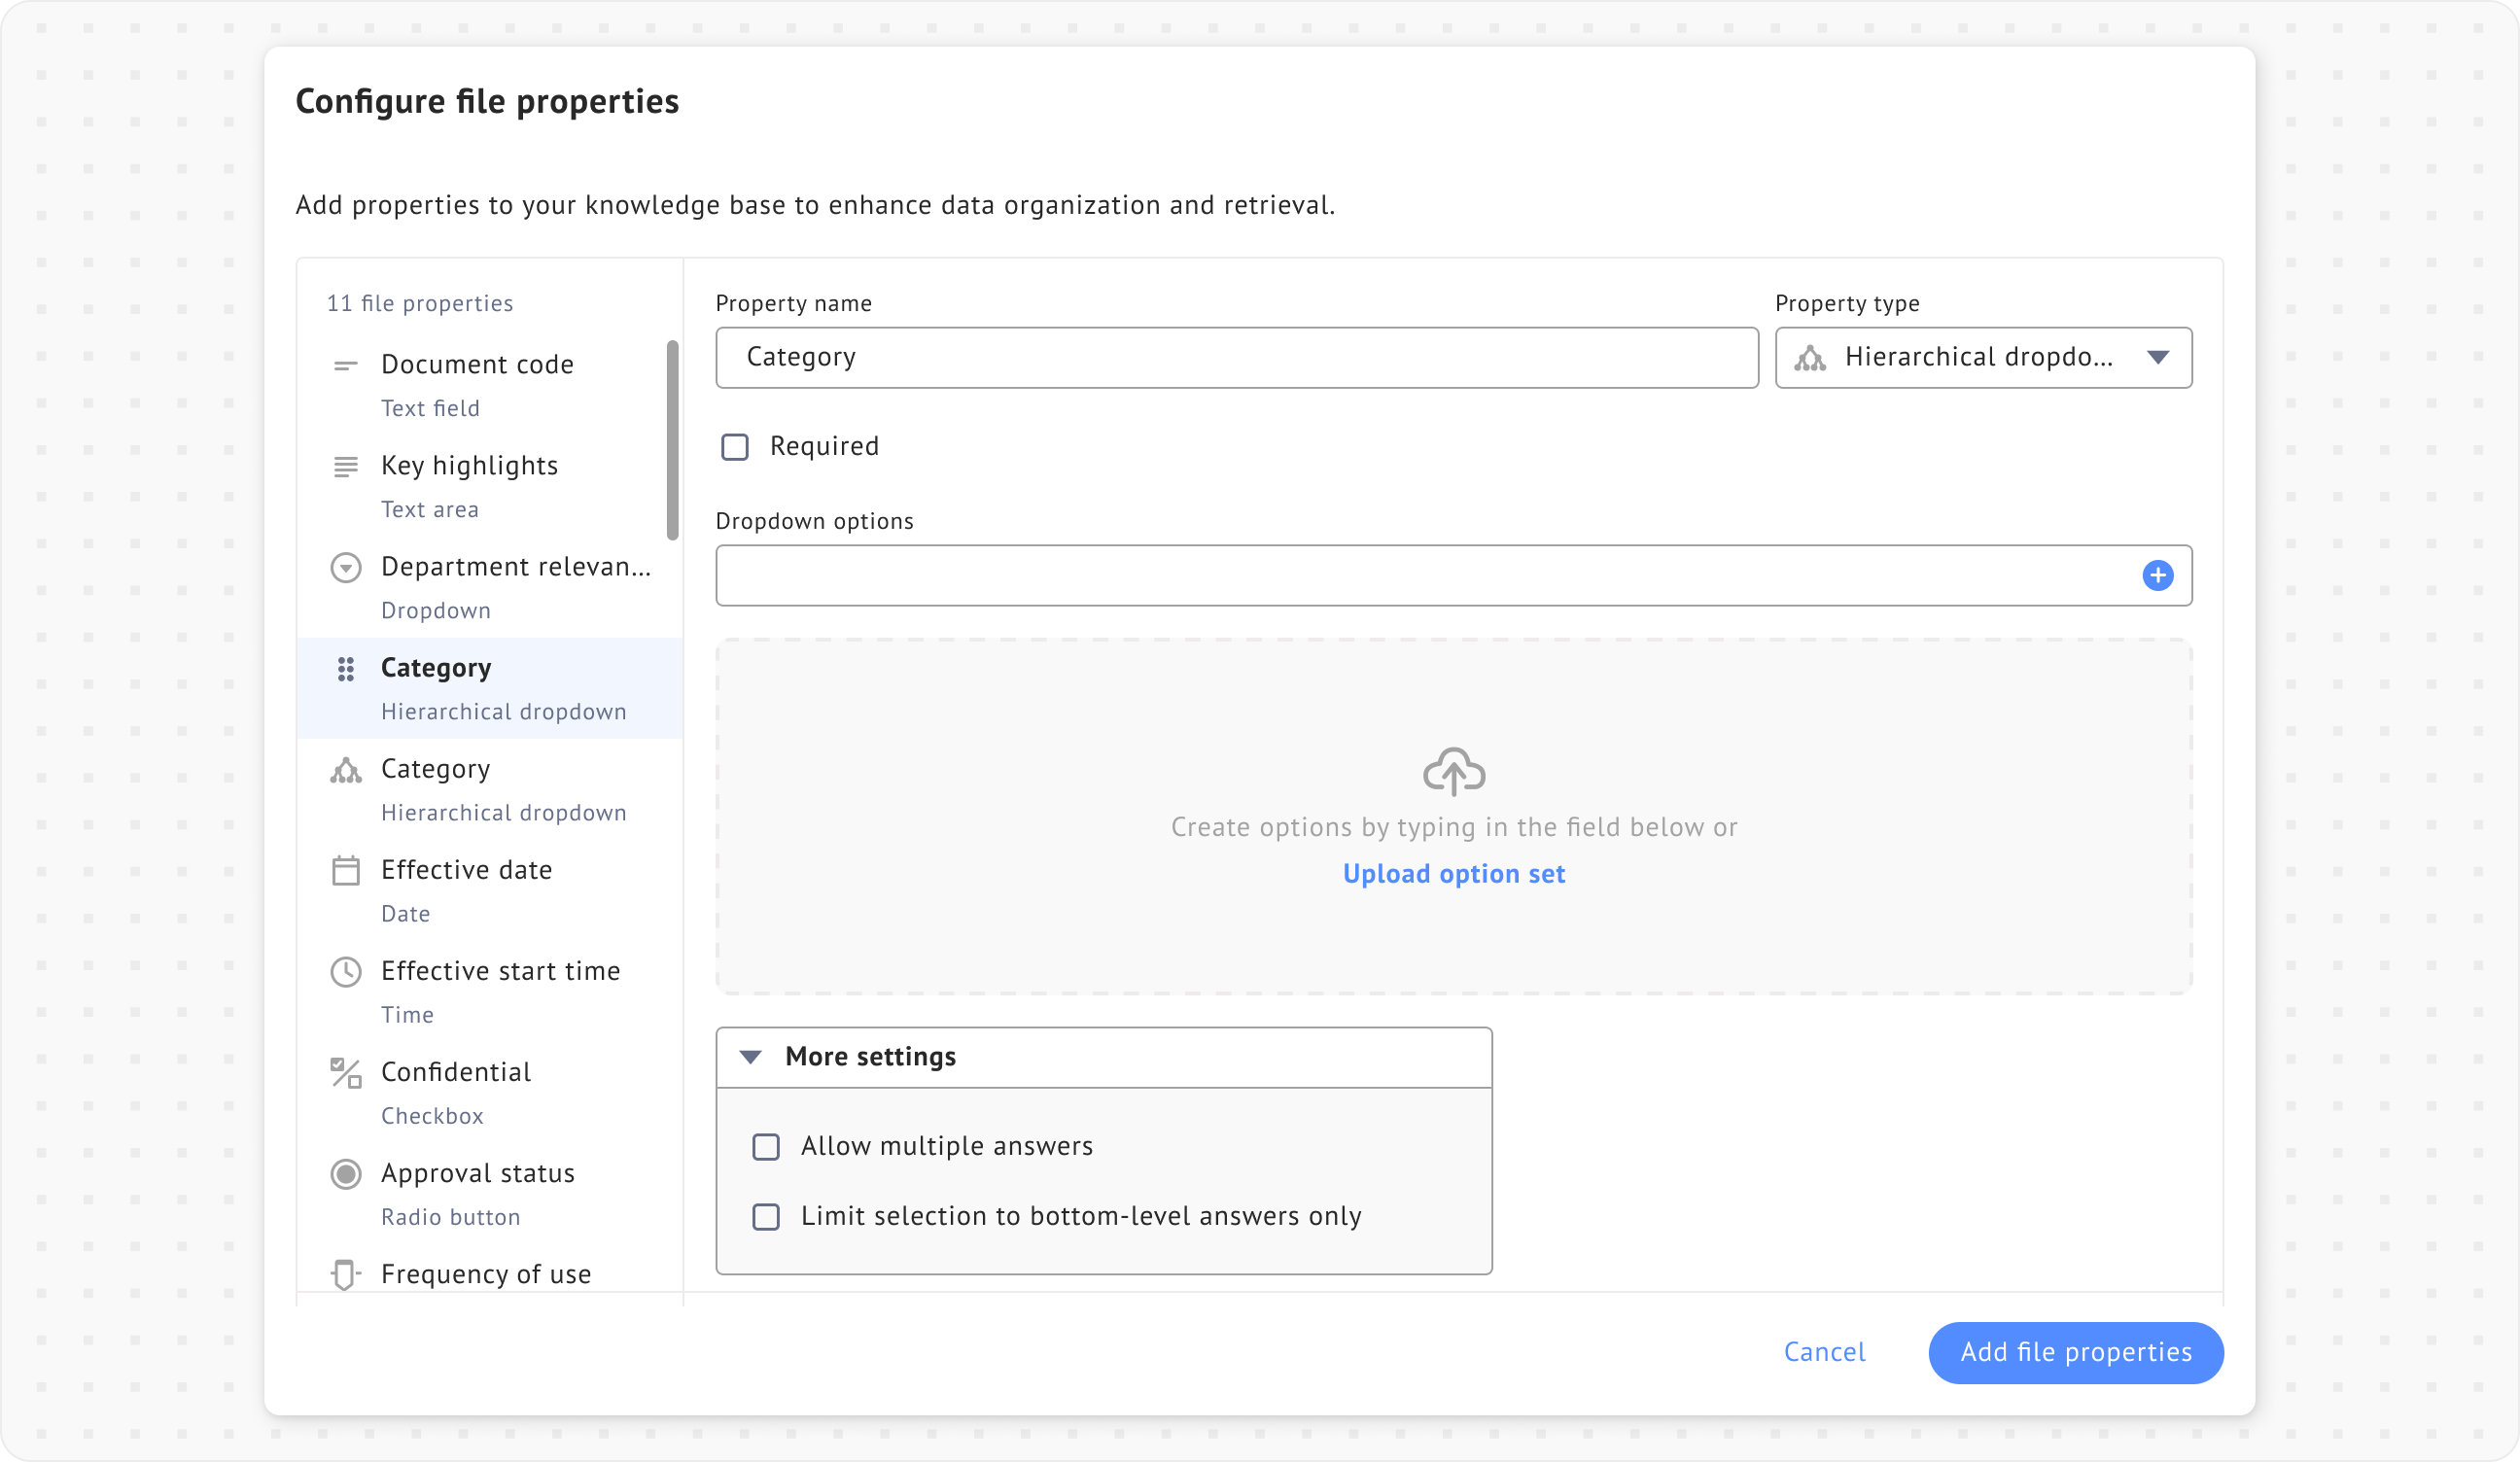
### Hierarchical Dropdown
**Hierarchical dropdown** lets you select options from categories and subcategories. The list stays hidden until expanded.
During configuration, you can configure these settings:
* **Dropdown options:** Add a list of options. If you already have a `.csv` file with a predefined options, upload it as an option set. You can download the sample here: [Sample option set (Hierarchical)](https://drive.google.com/file/d/1ZsSTZ138Ld2Kkcs_BHPLksP4StPrDbLY/view?usp=sharing).
{% hint style="info" %}
**Option set file components**
**1. The header**
`id,label` is the header. This will always be the first row in the .csv. The first label will have `1` as the id.
**2. id format**
The id format is similar to Microsoft Word's numbering format. In the example above, `Characters` is a part of `Harry potter` and the id will be 1.1.
1. `Harry potter`: the root-level.
2. `1`: id for the root-level
3. `Characters`: the second-level.
4. `1.1`: the second-level id.
{% endhint %}
* **Required:** Specify whether this property must be filled.
* **Allow multiple answer:** Specify whether users can provide more than one answer.
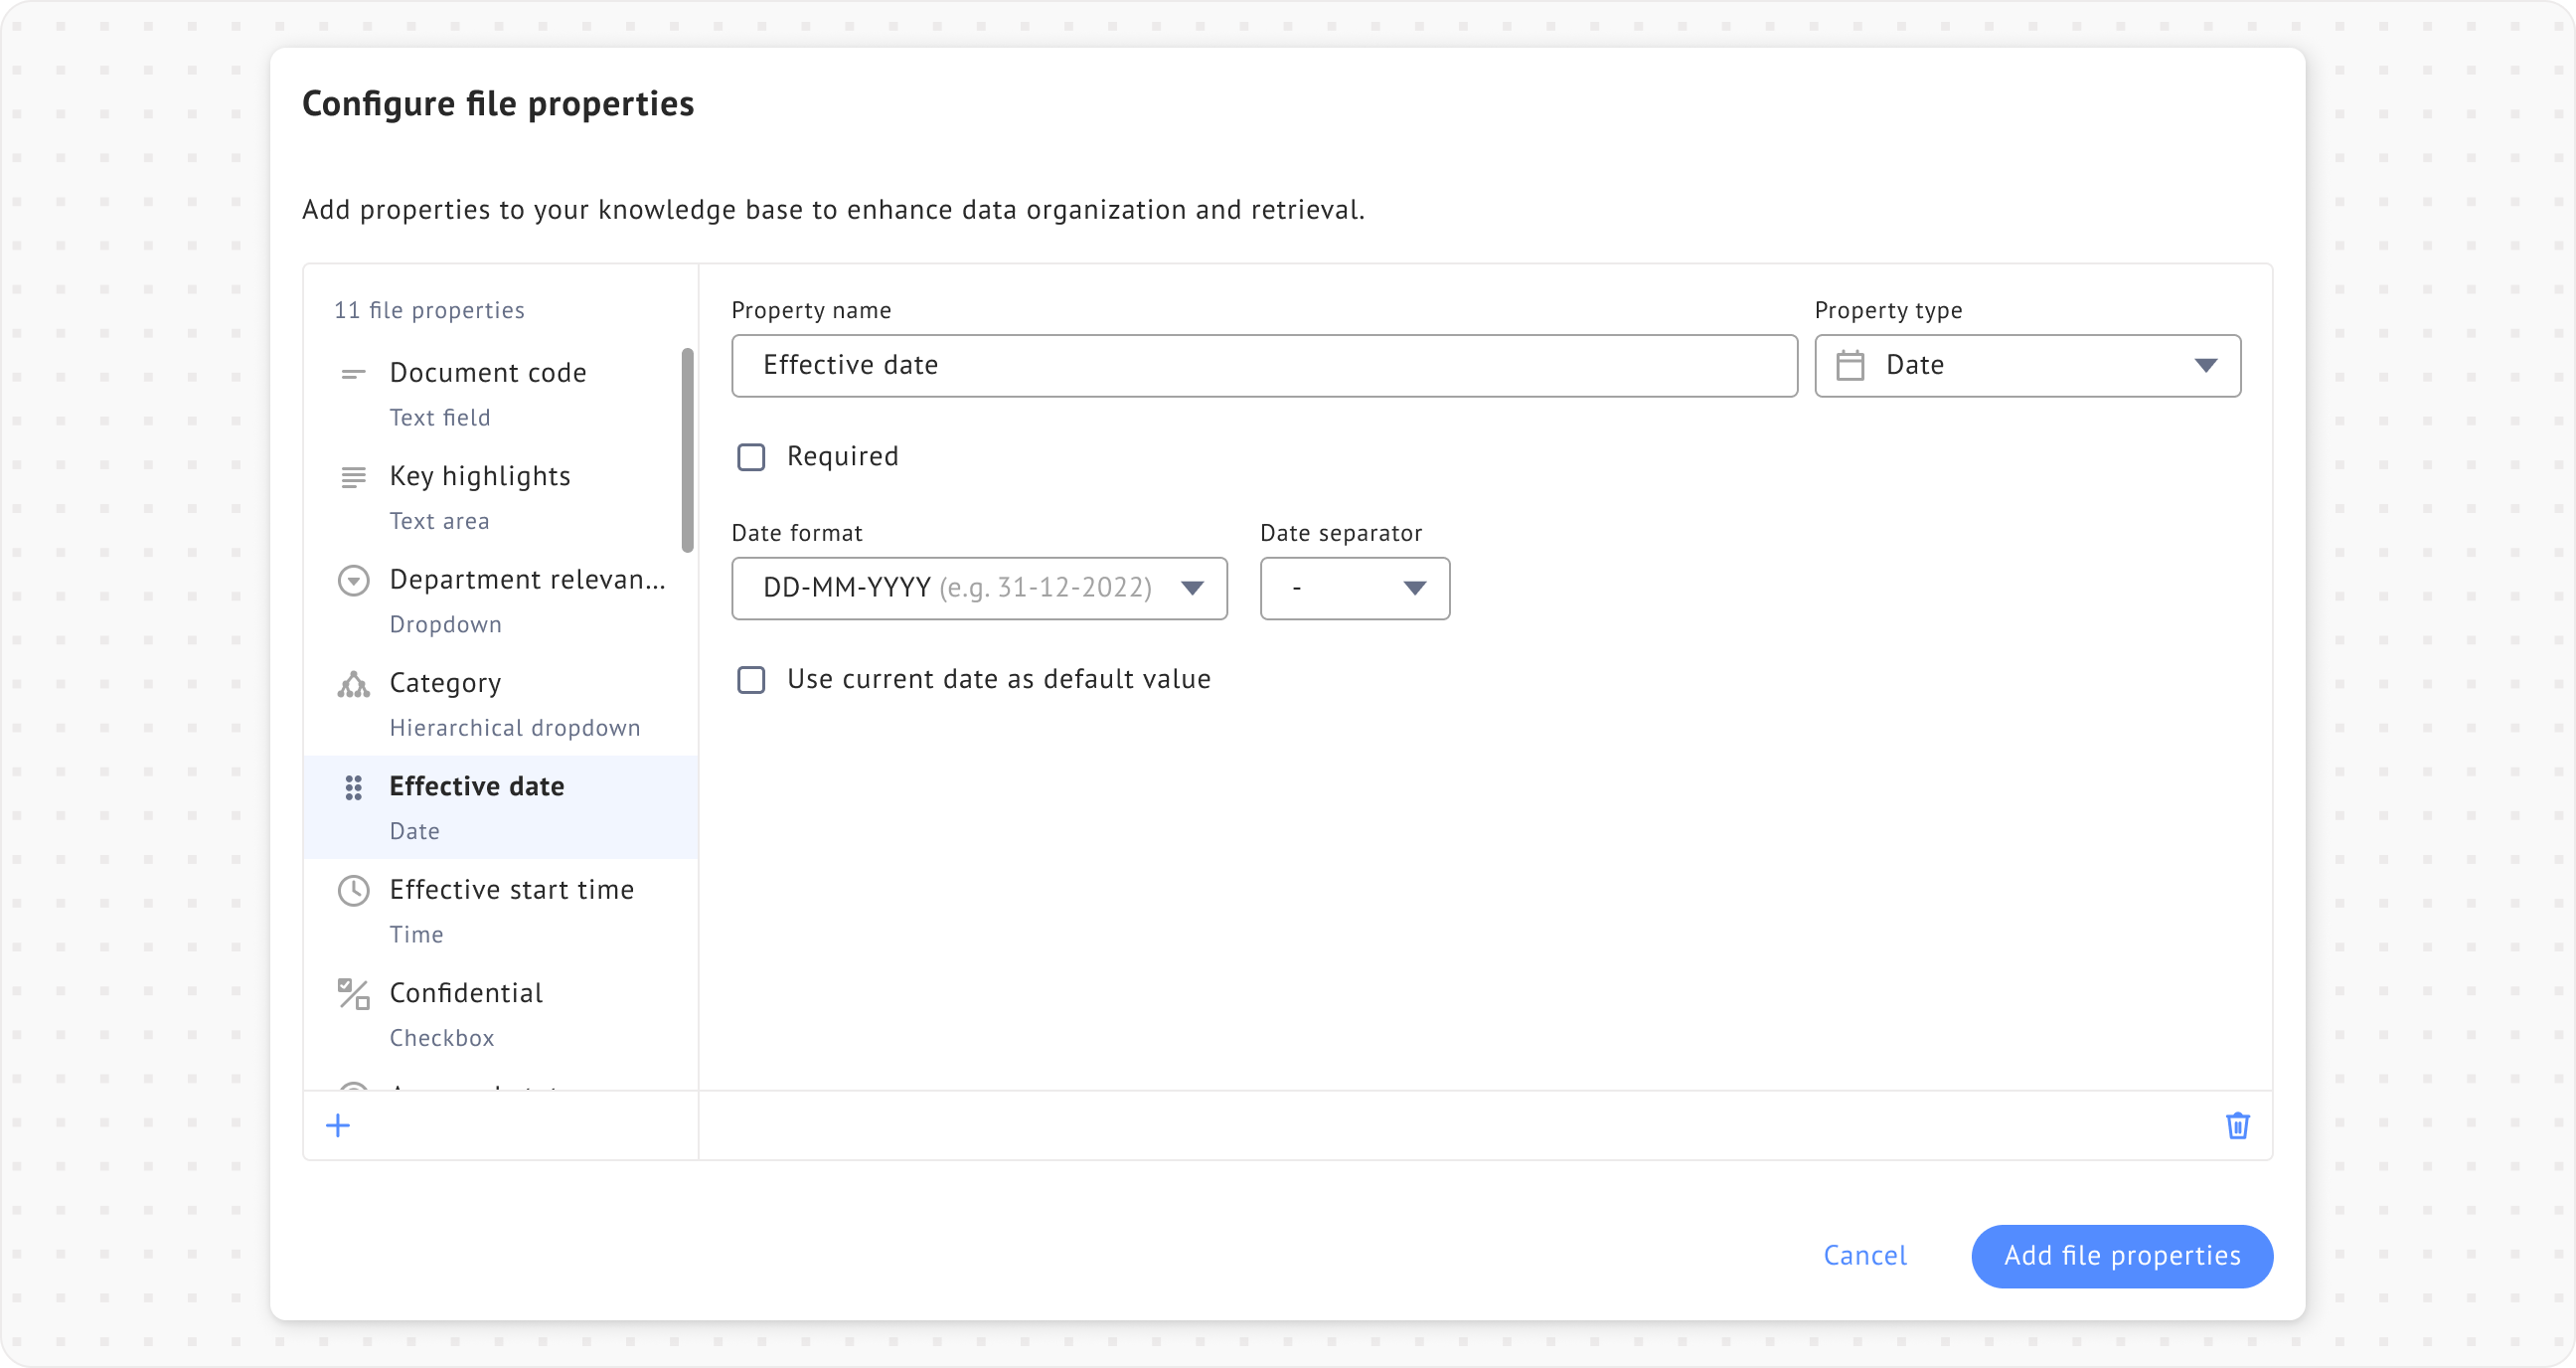
**Date** lets you select a specific date using the calendar picker or enter it manually in the required format.
During configuration, you can configure these settings:
* **Required:** Specify whether this property must be filled.
* **Date format:** Choose the format in which the date should be displayed (example: `DD-MM-YYYY`).
* **Date separator:** Select the character that separates day, month, and year ( `-` or `/`).
* **Use current date as default value:** Enable this option to automatically fill the field with the current date.
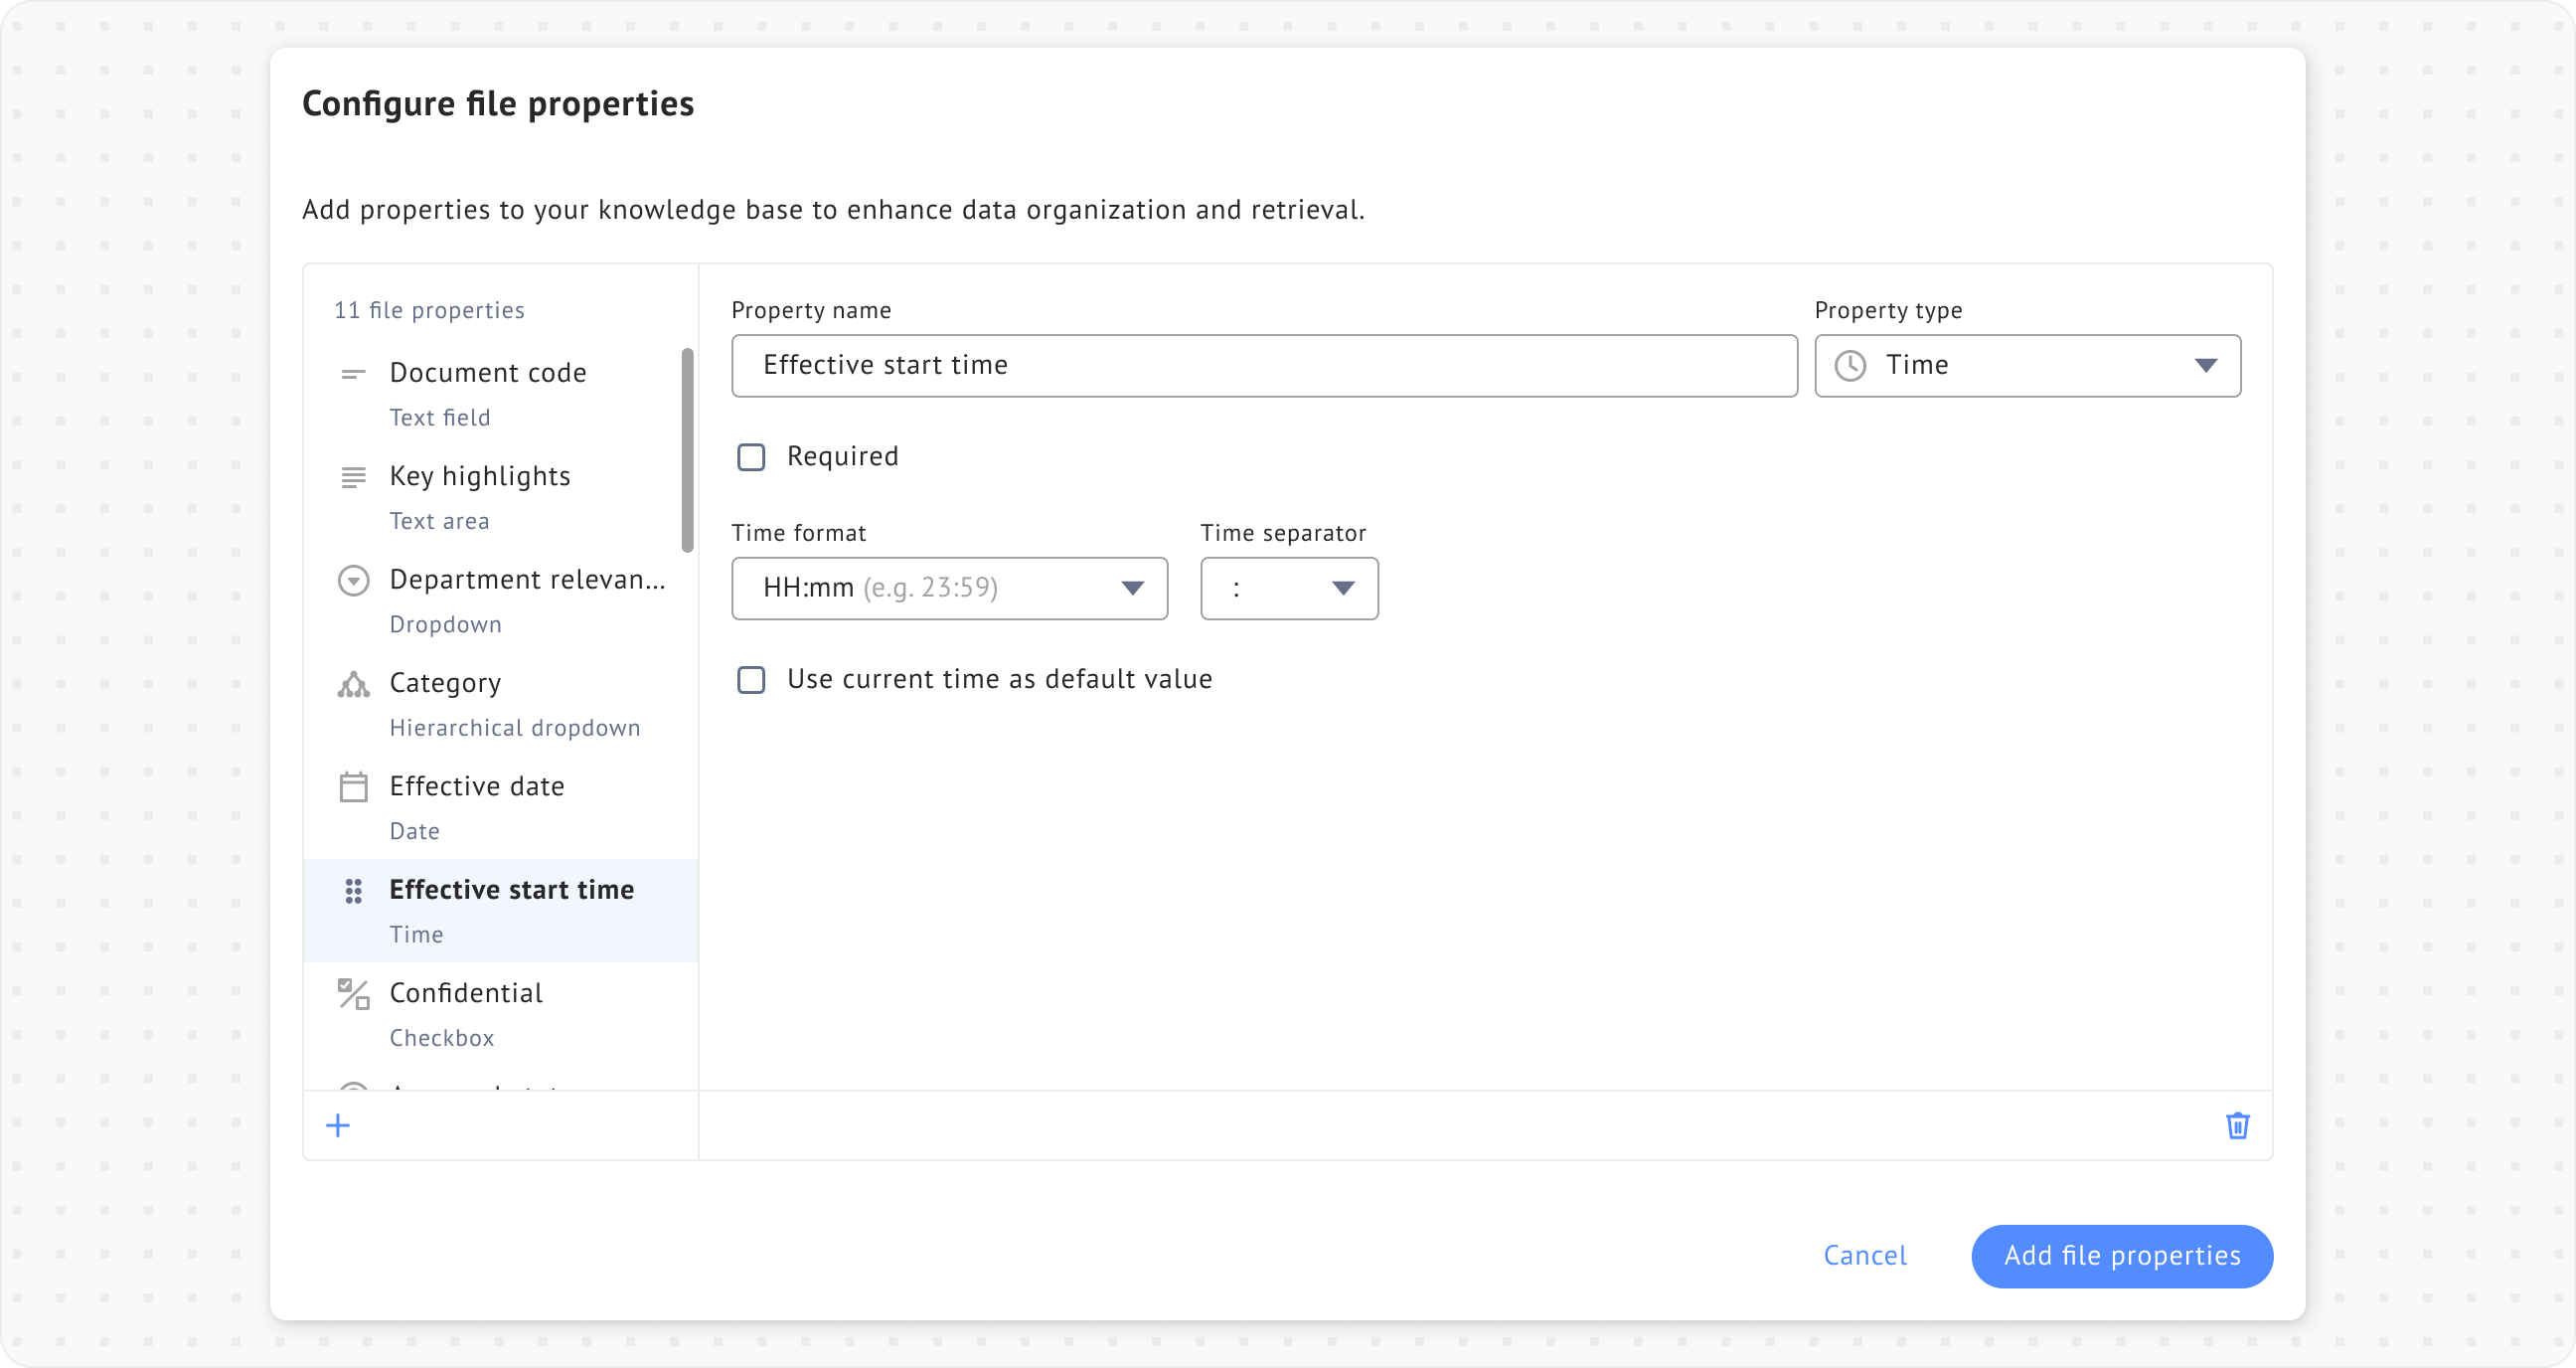
### Time
**Time** lets you select a specific time using the clock interface or enter it manually in the required format.
During configuration, you can configure these settings:
* **Required:** Specify whether this property must be filled.
* **Time format:** Choose the format in which the time should be displayed (example: `HH:mm`).
* **Time separator:** Select the character that separates hours and minutes ( `:` or `.`).
* **Use current time as default value:** Enable this option to automatically fill the field with the current time.
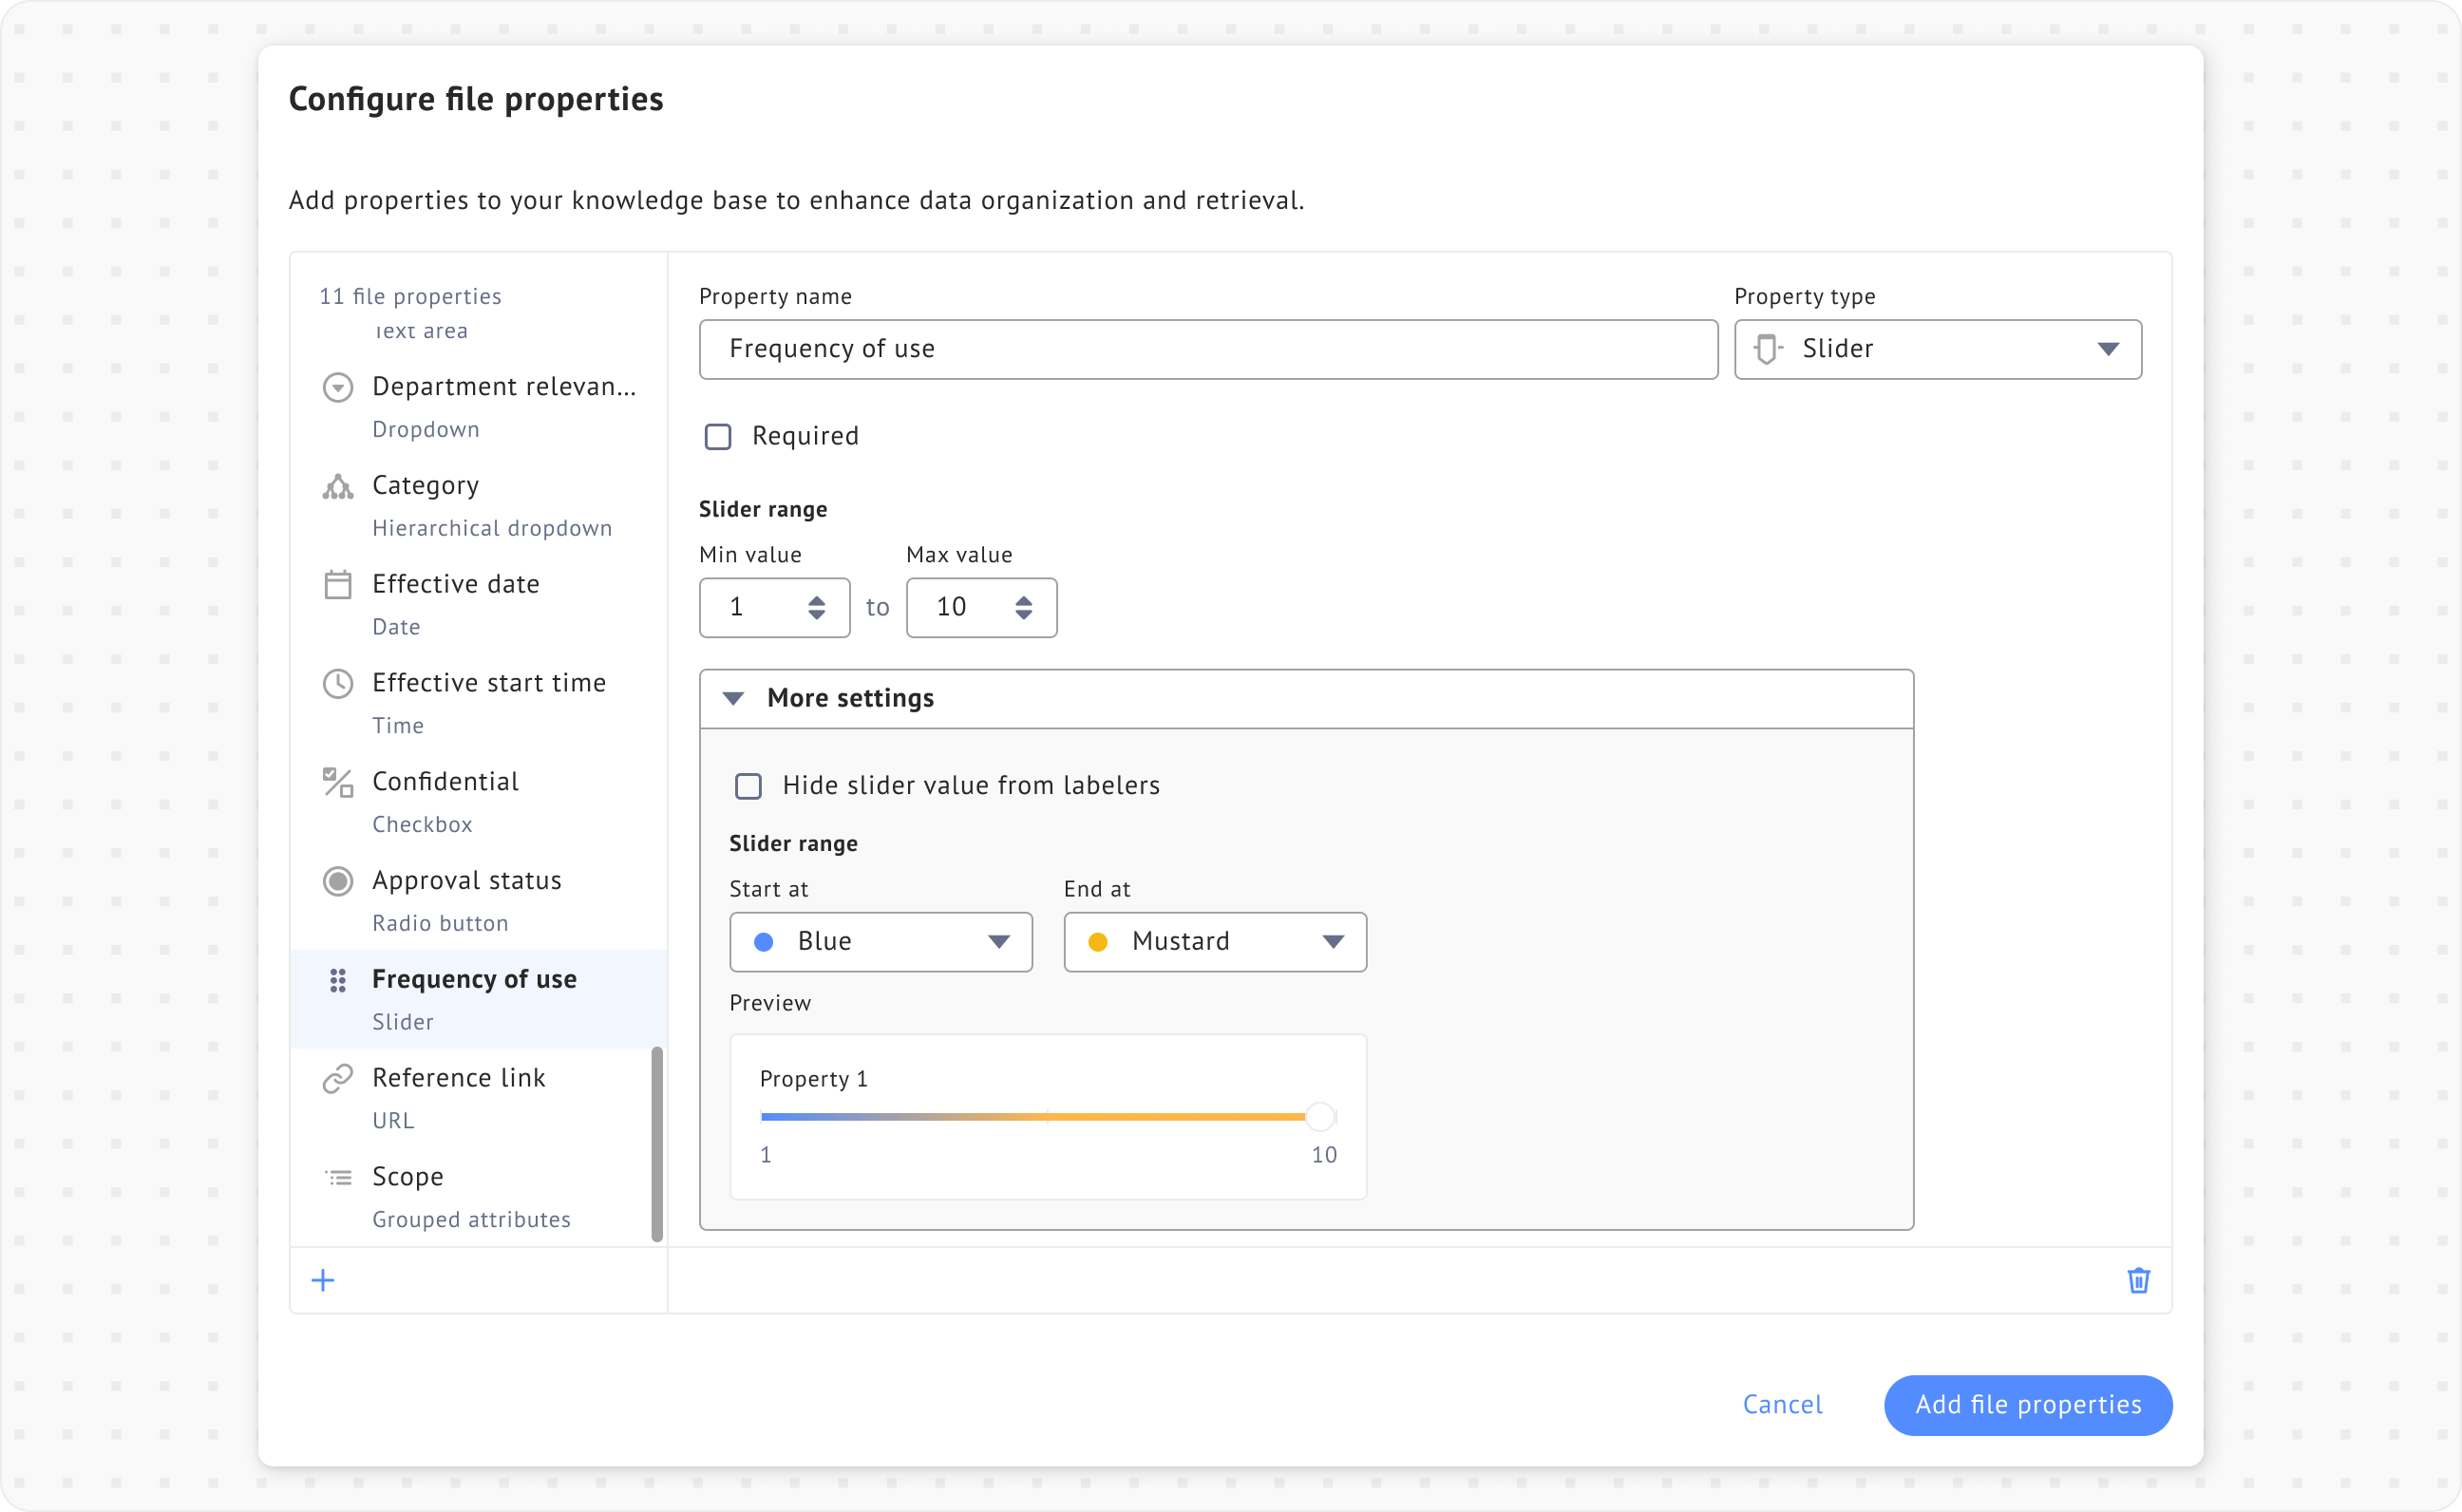
### Slider
**Slider** lets you adjust a value by sliding a handle along a bar, often used for selecting a range or level, such as volume.
During configuration, you can configure these settings:
* **Required**: Specify whether this property must be filled.
* **Slider range**: Define the minimum and maximum values for the slider.
* **Hide slider value from labelers**: Choose this option to conceal the slider value from labelers.
* **Slider range color**
* **Start at**: Select the initial color.
* **End at**: Select the final color.
* You can also preview your slider configuration.
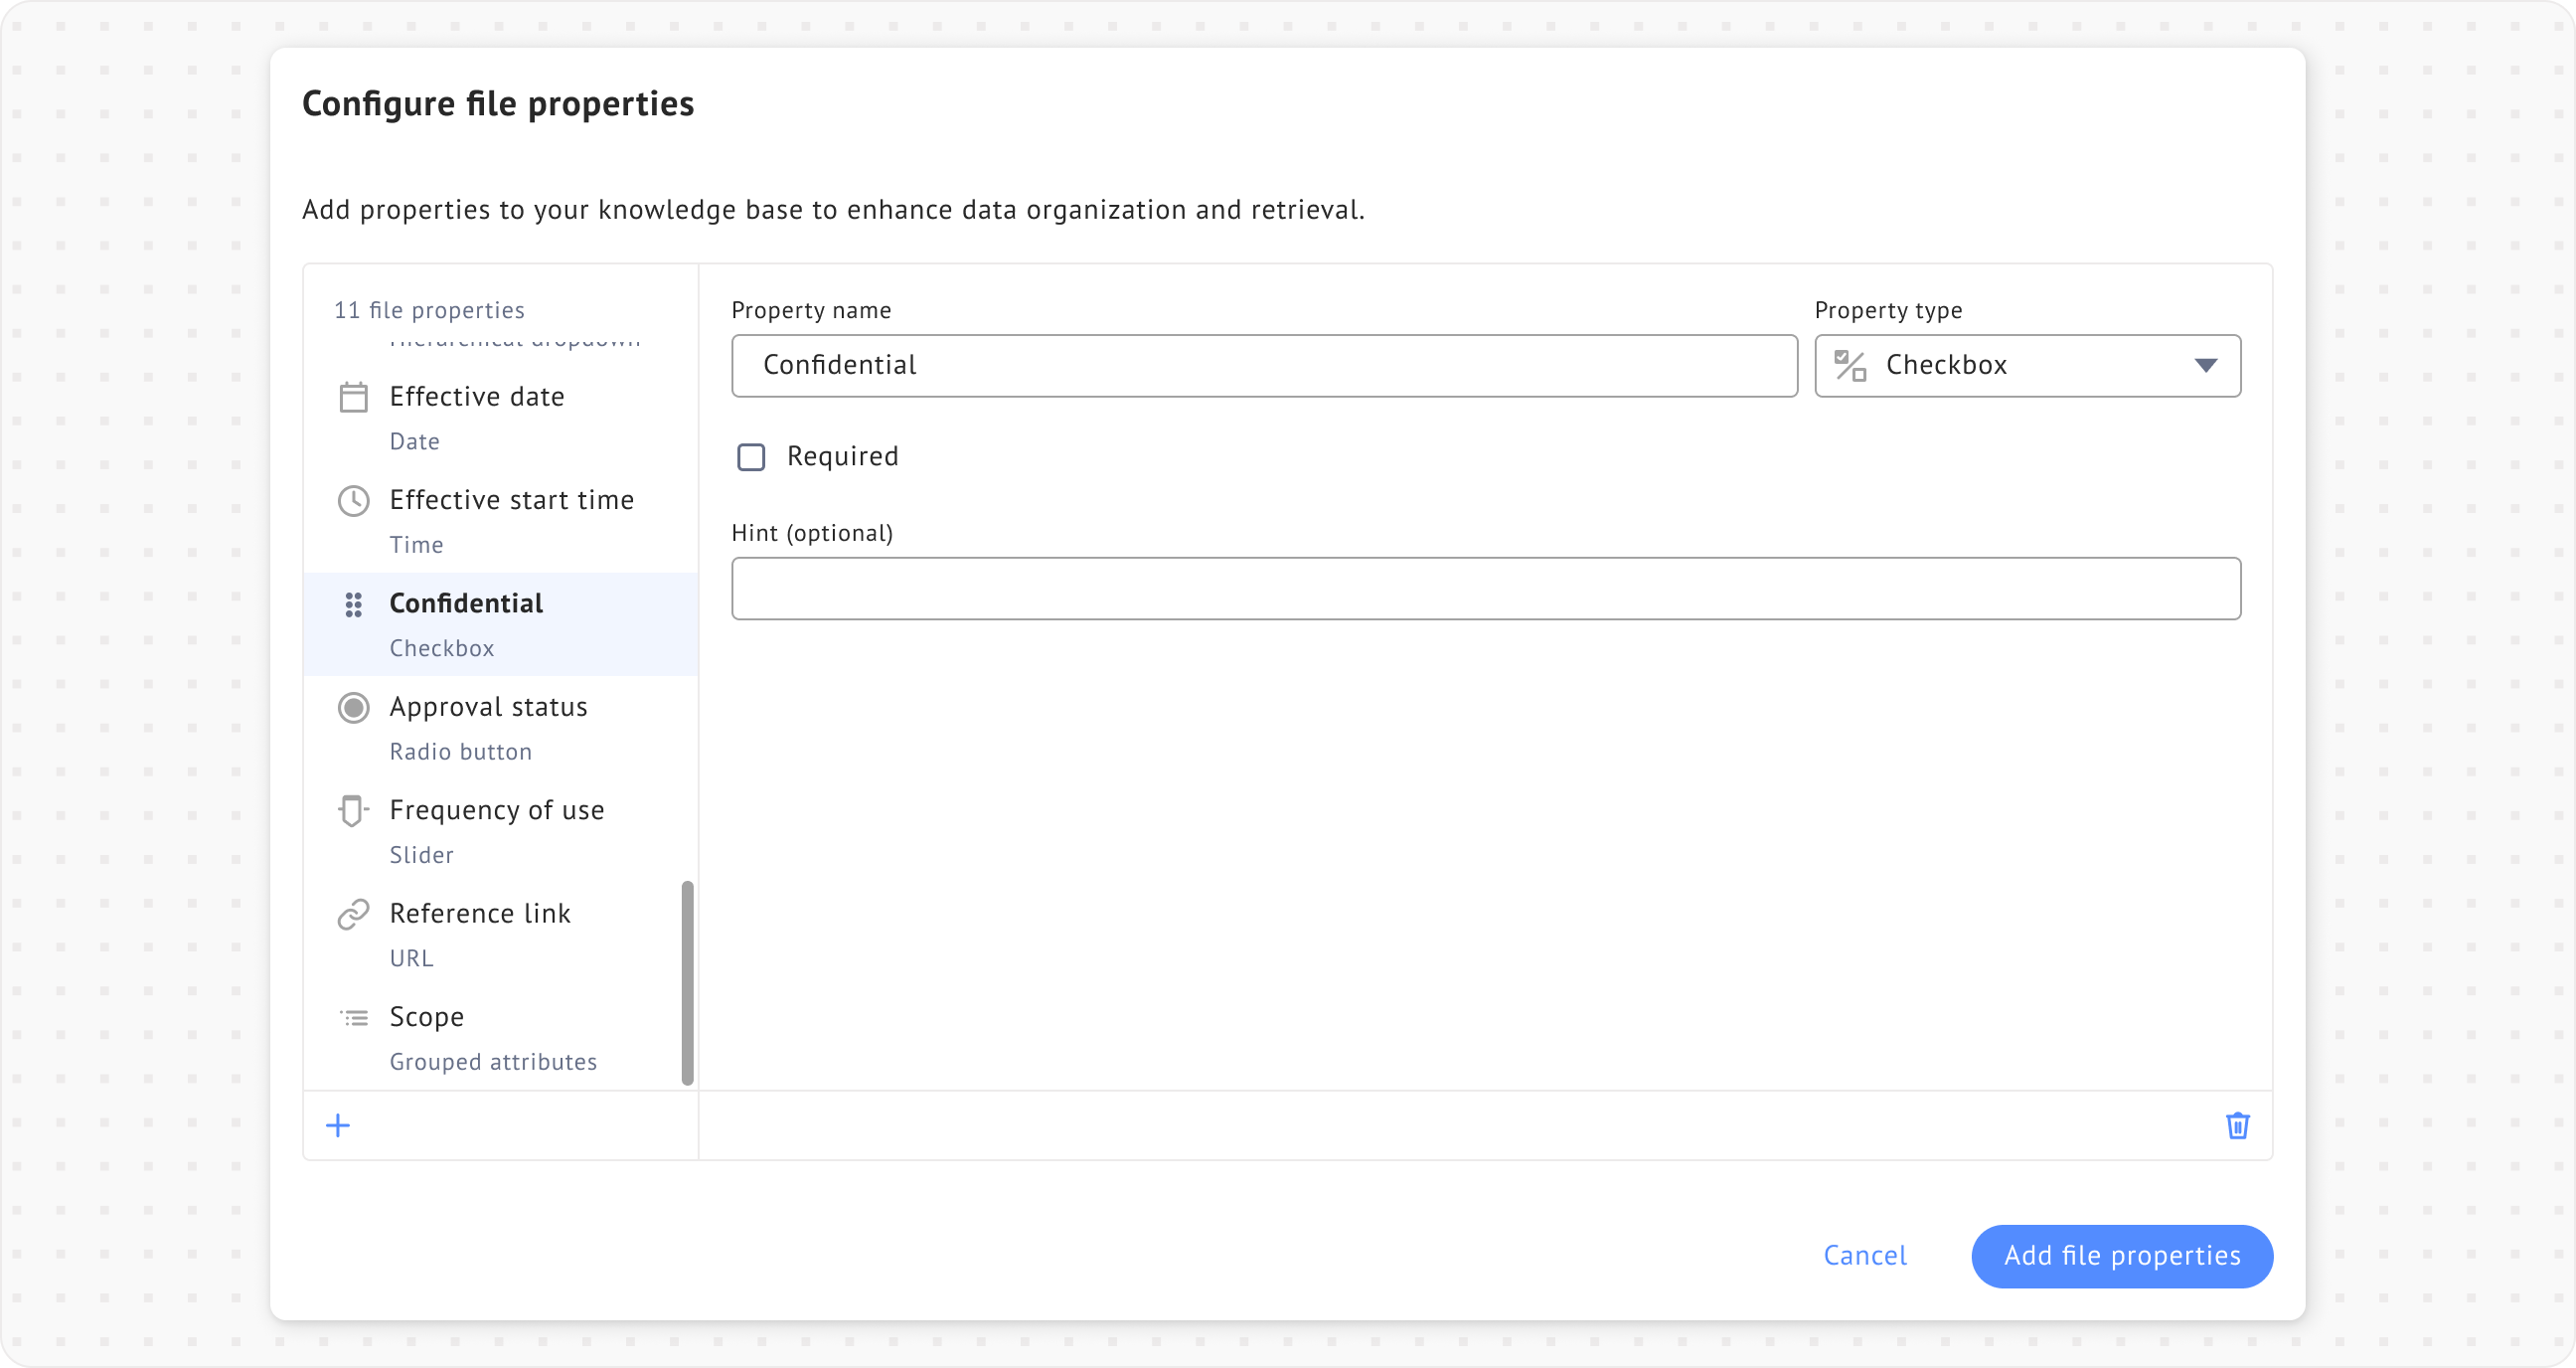
**Checkbox** is a simple box that you can check or uncheck to indicate a true or false decision.
During configuration, you can configure these settings:
* **Required**: Specify whether this property must be filled.
* **Hint**: Provide an optional hint to guide users in their input.
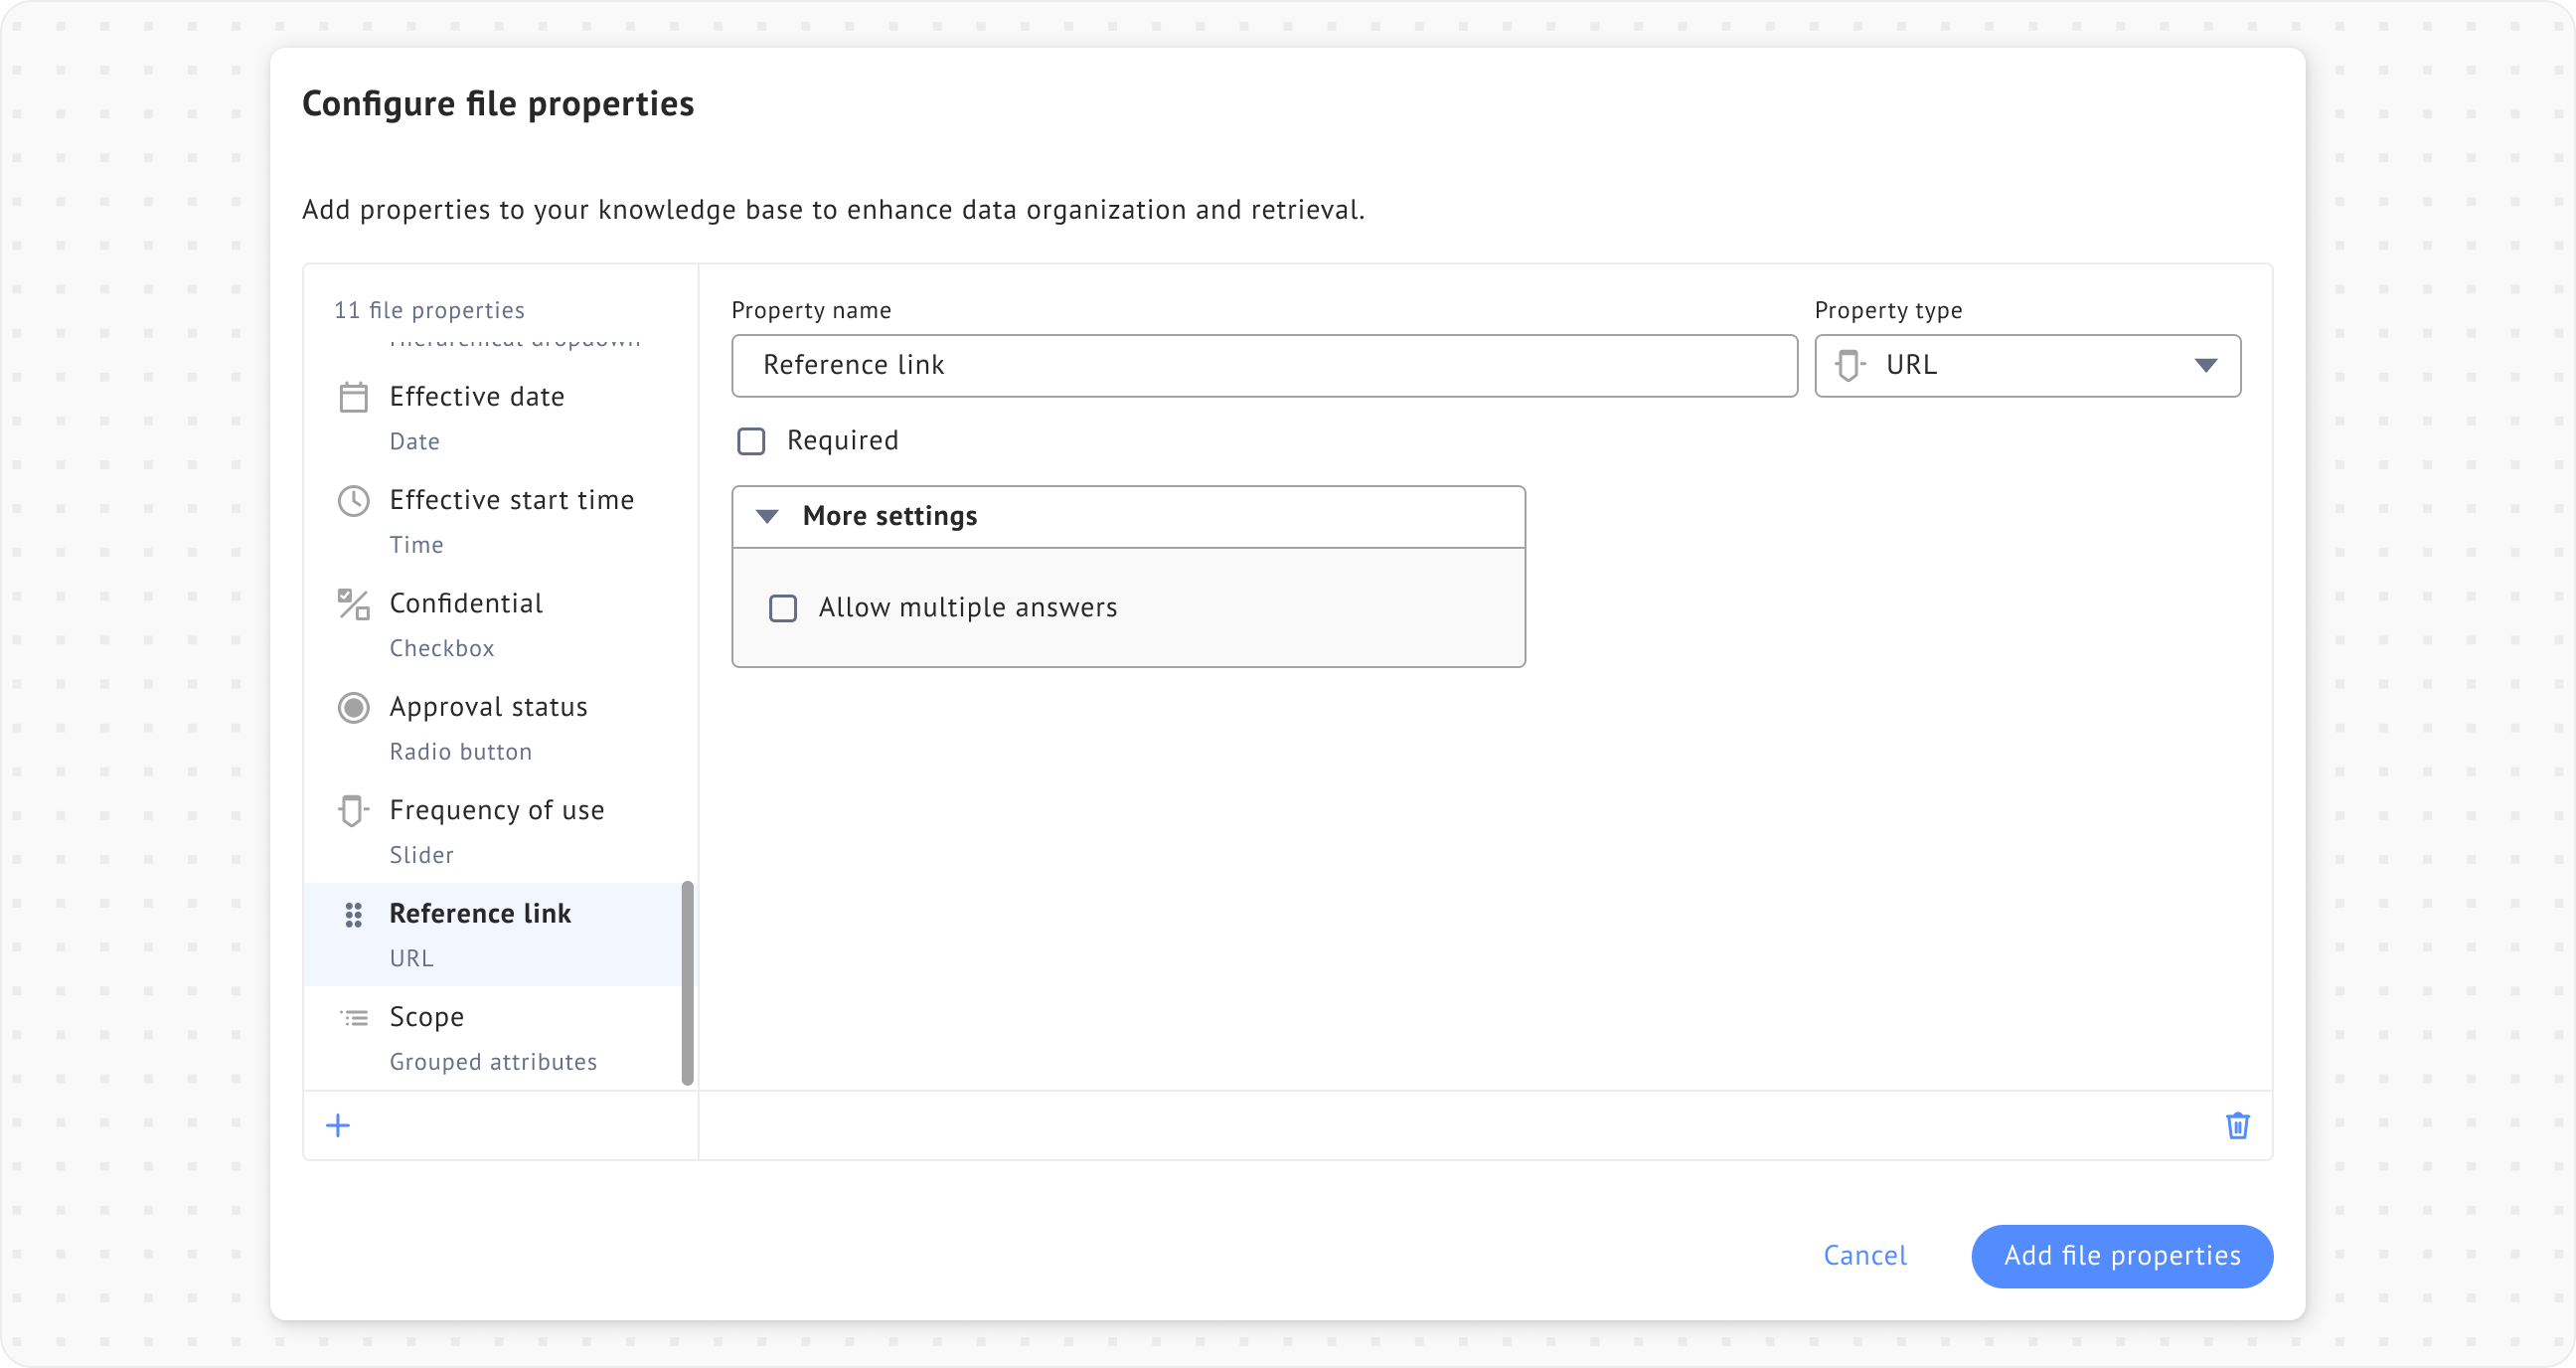
### URL
**URL** is a field specifically meant for entering web addresses.
During configuration, you can configure these settings:
* **Required:** Specify whether this property must be filled.
* **Allow multiple answer:** Specify whether users can provide more than one answer.
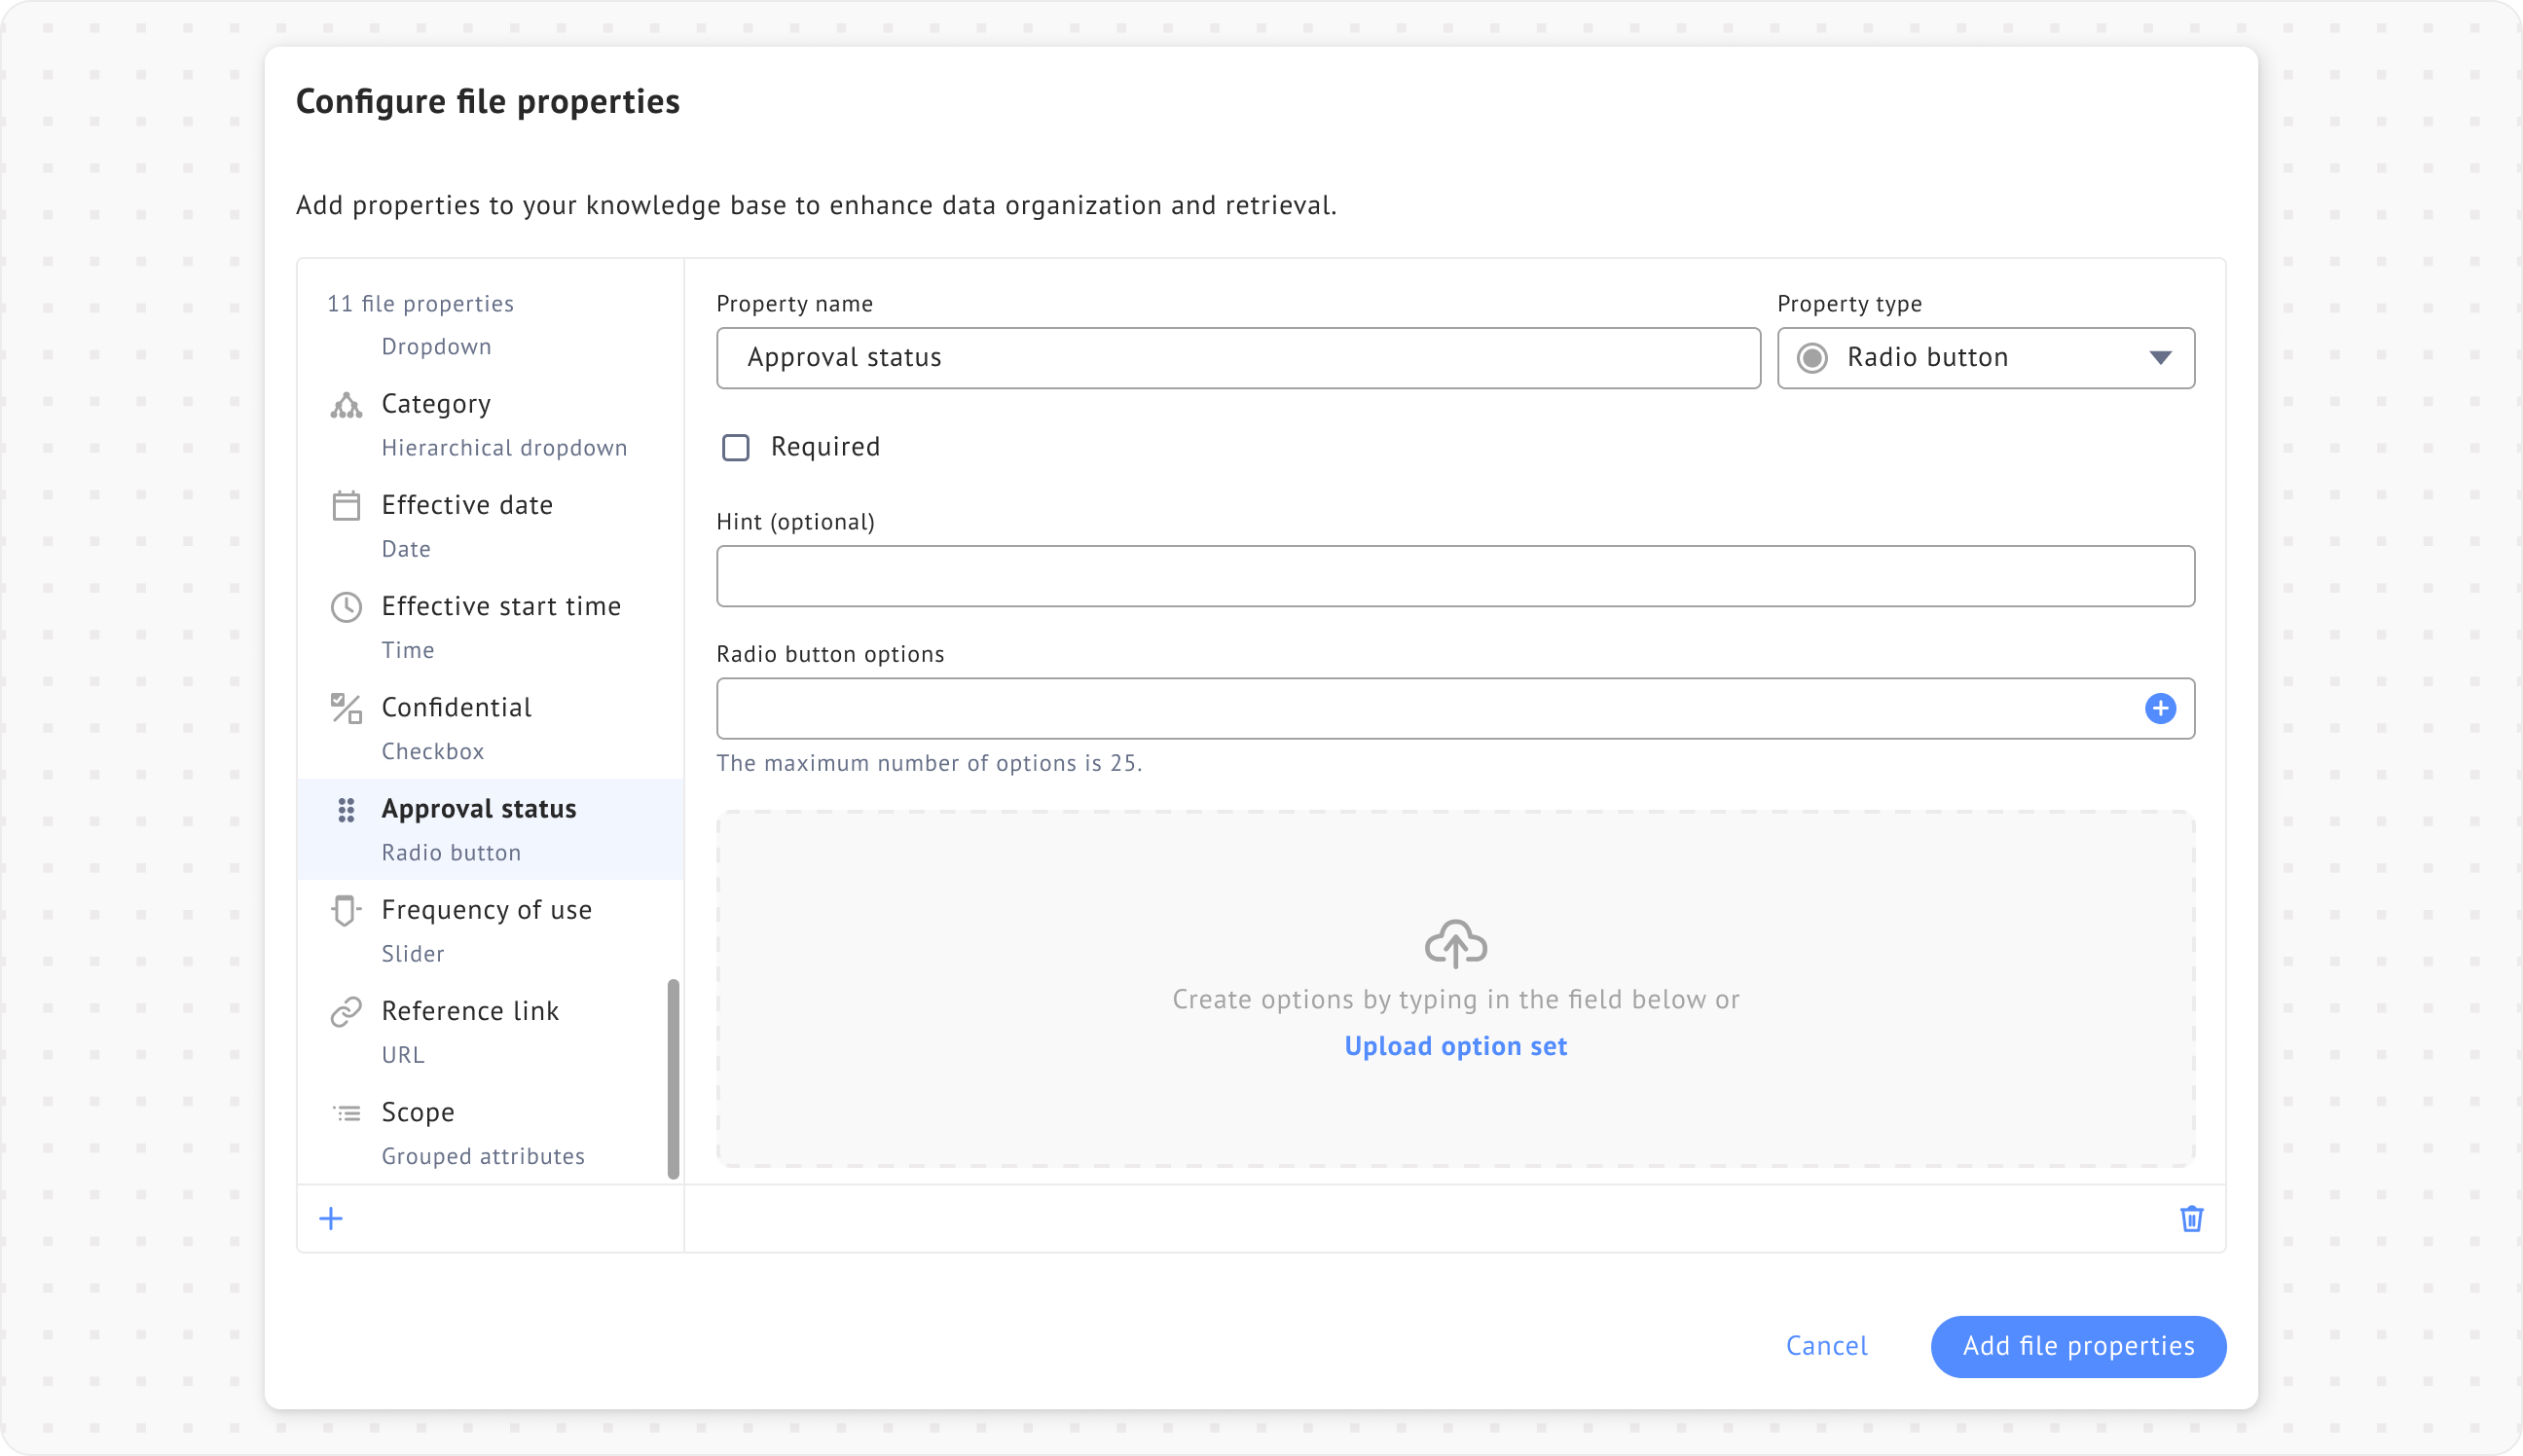
### Radio button
**Radio button** is set of options that are immediately visible, where you can select only one choice at a time.
During configuration, you can adjust the following settings:
* **Required**: Specify whether this property must be filled.
* **Hint**: Provide an optional hint to guide users in their input.
* **Radio button options**: Enter the choices available for selection. The maximum number of options is limited to 25.
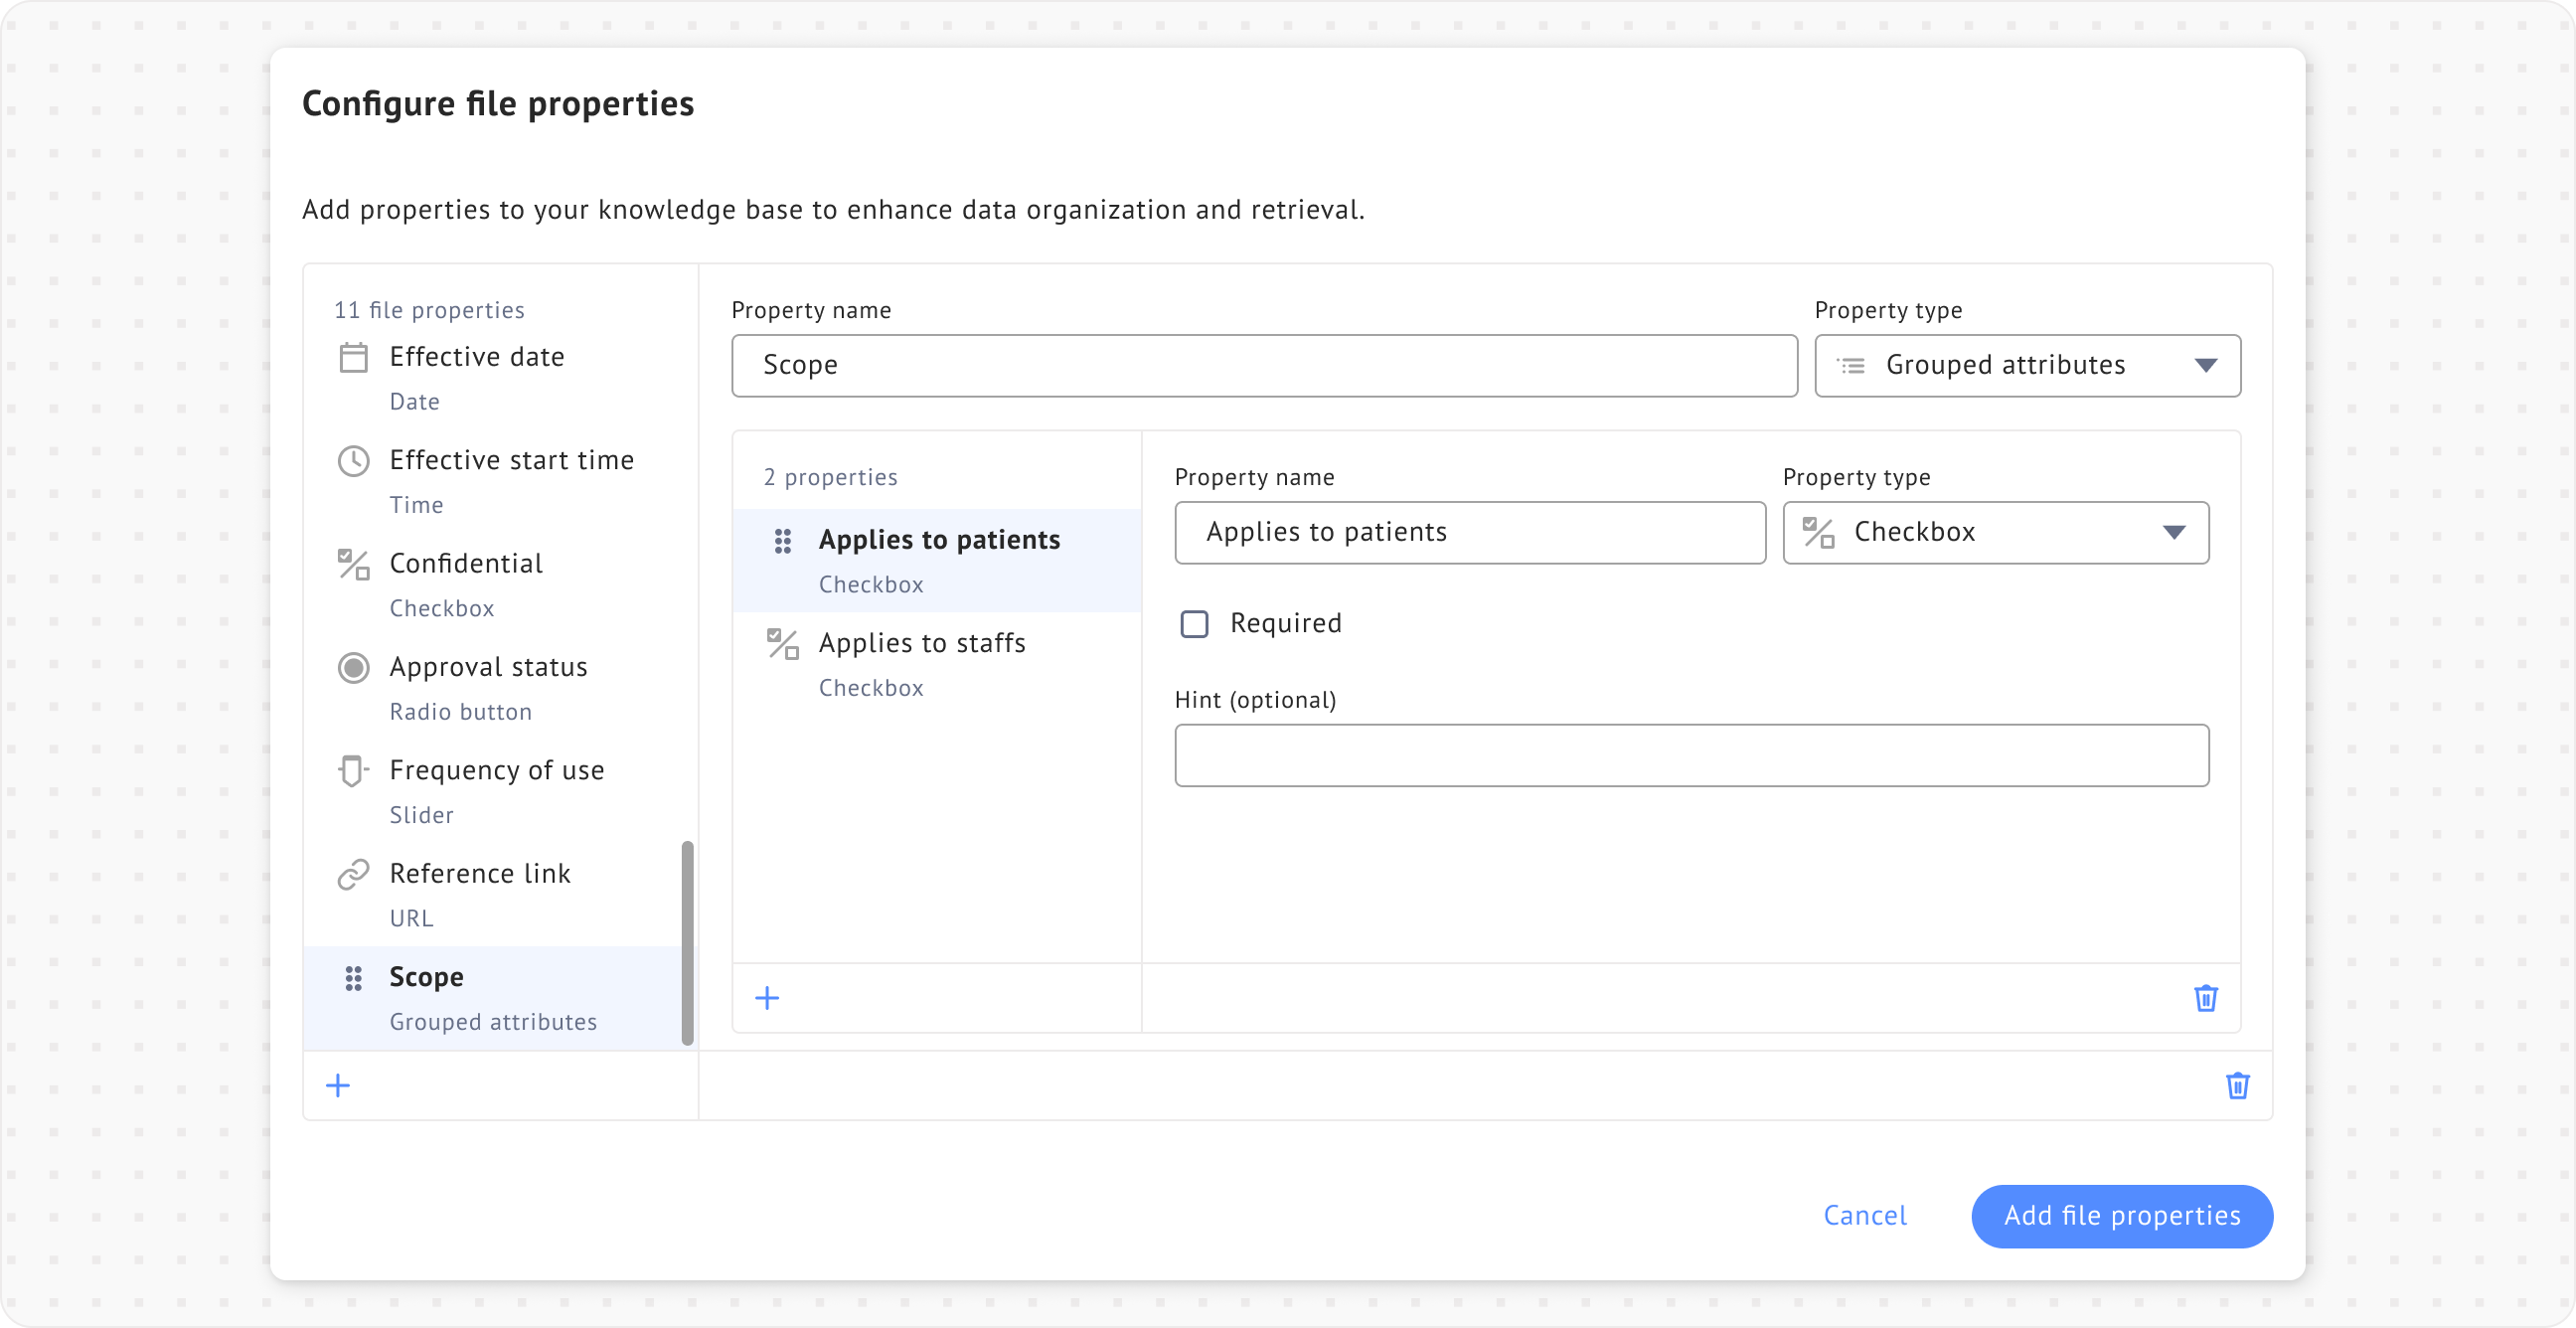
### Grouped attributes
**Grouped attributes** lets you combine multiple properties that pertain to a single group.
During configuration, you can include any of the property types listed above in grouped attributes.
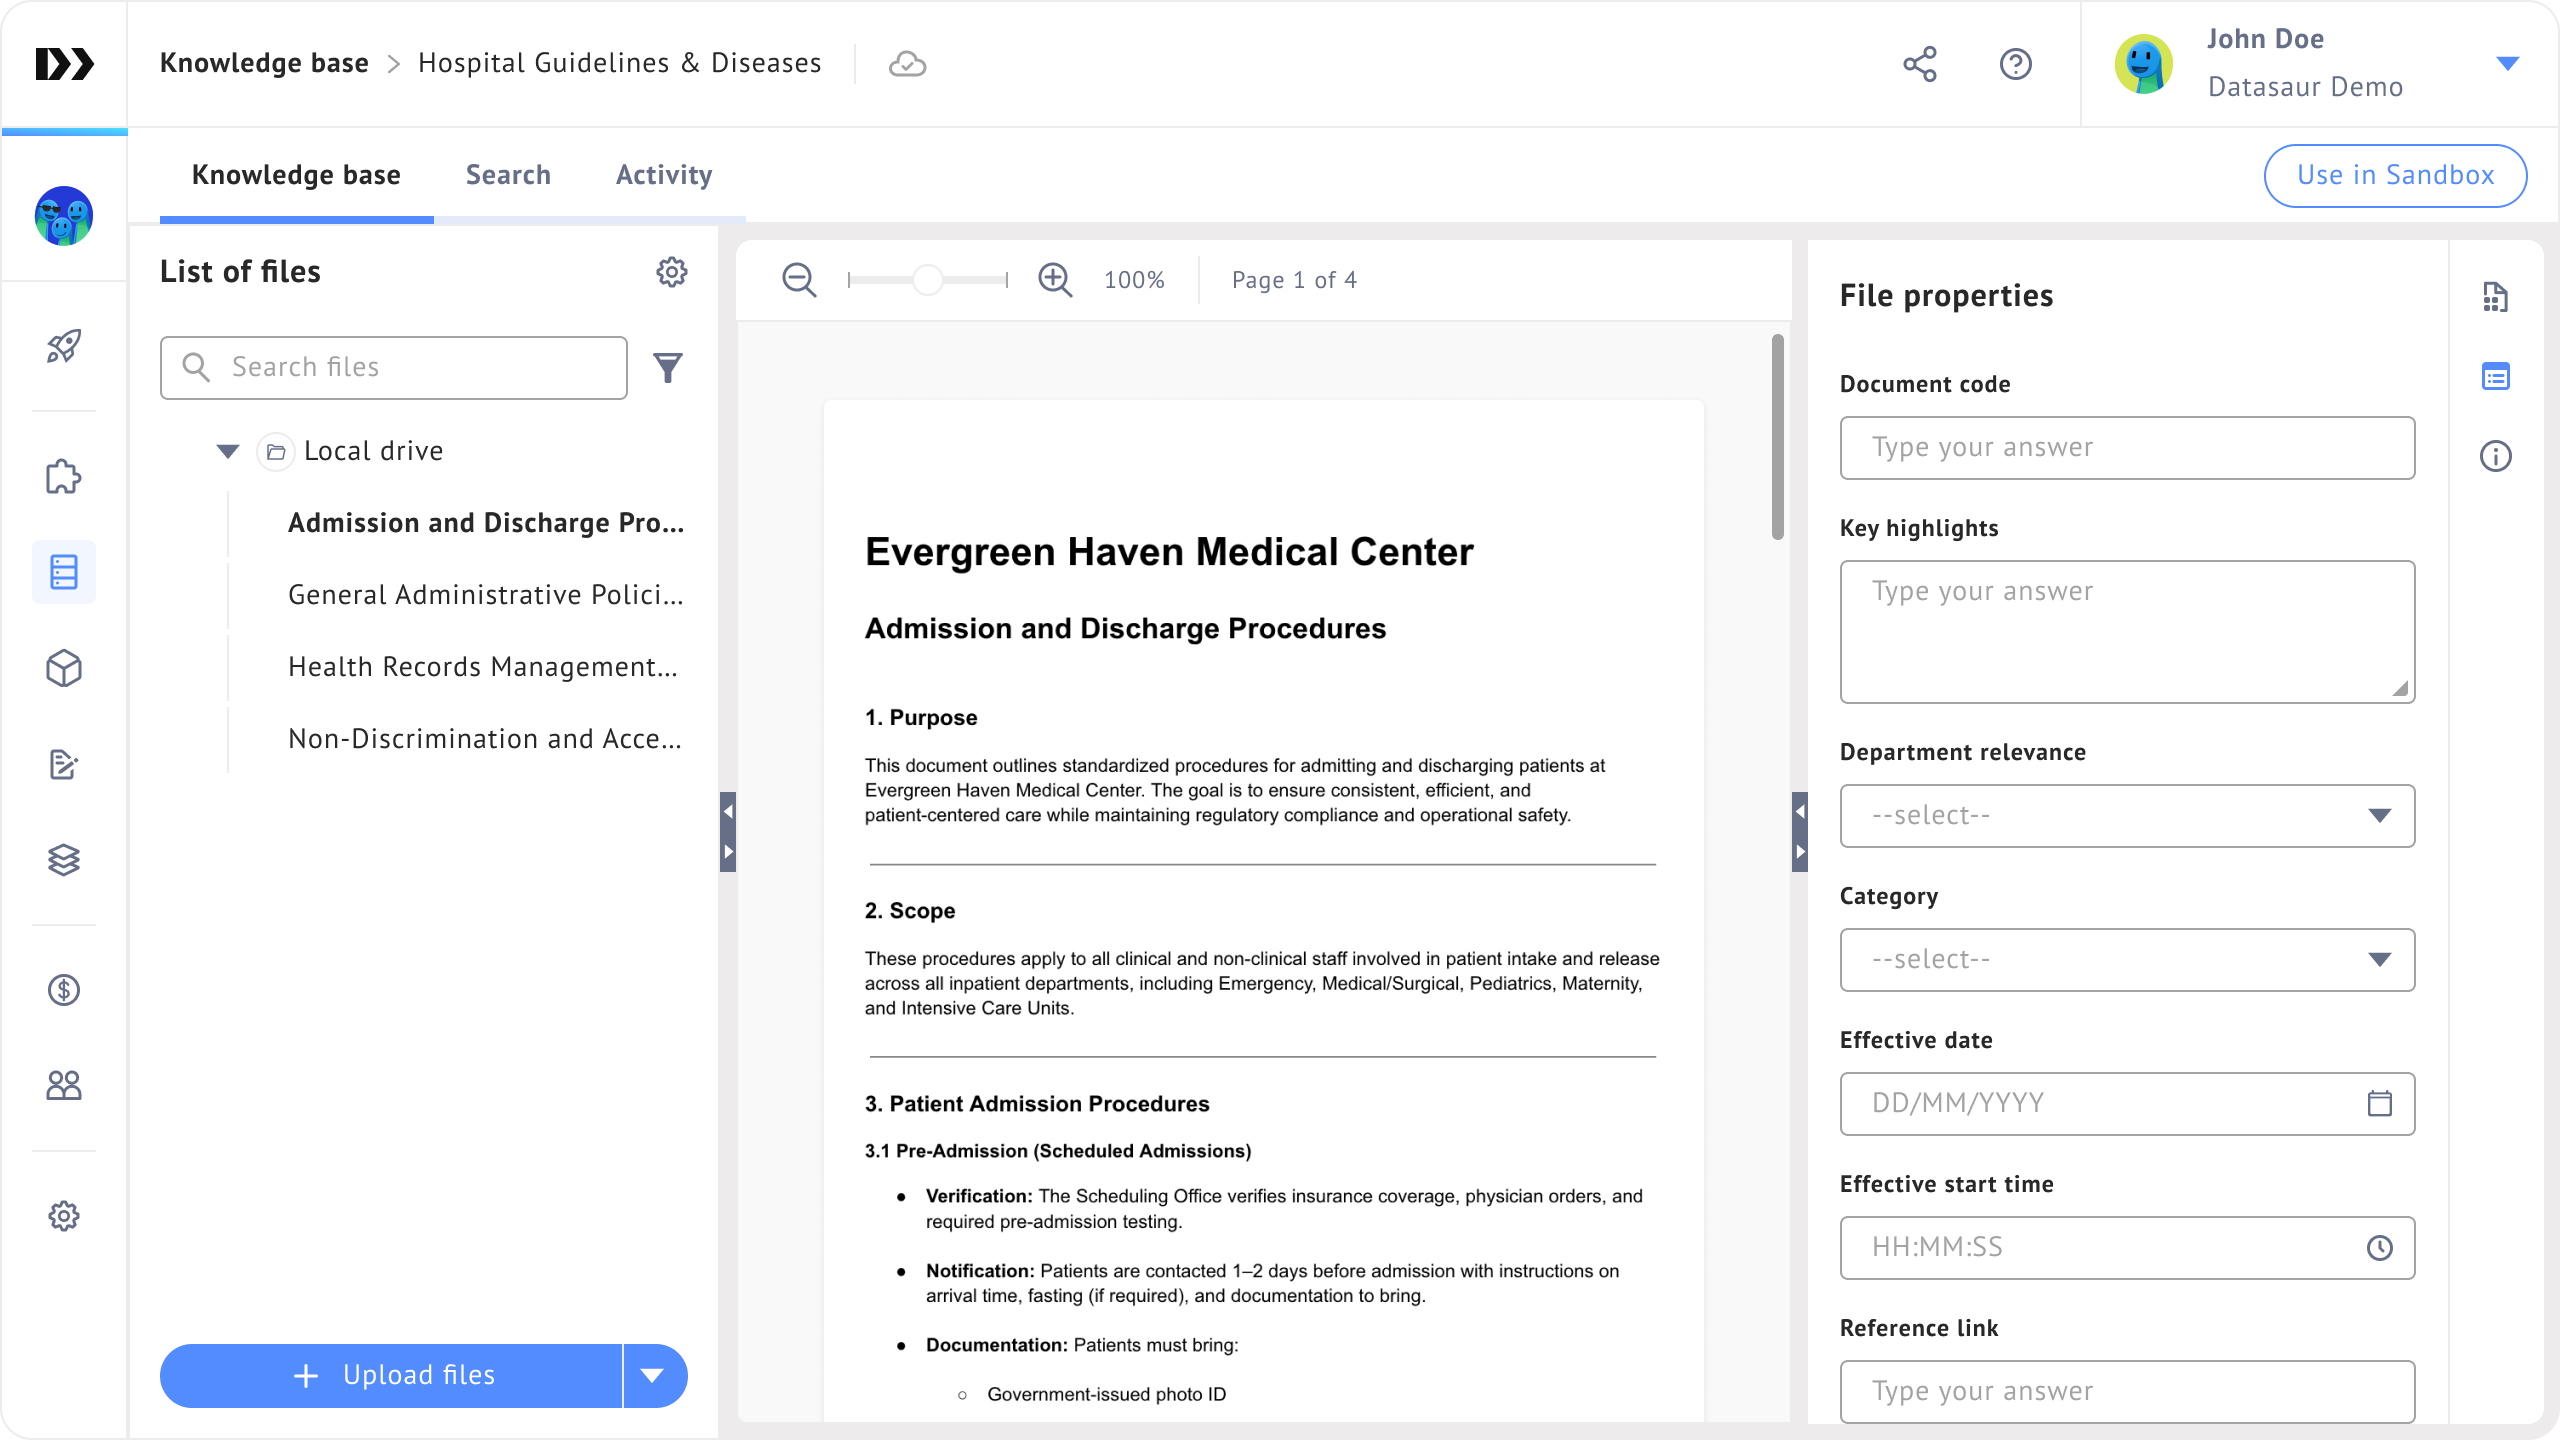
## Save file properties
After the file properties are configured, they appear on the right side of each file. From there, you can add additional information for each file for better retrieval.