> For the complete documentation index, see [llms.txt](https://docs.datasaur.ai/llms.txt). Markdown versions of documentation pages are available by appending `.md` to page URLs; this page is available as [Markdown](https://docs.datasaur.ai/assisted-labeling/ml-assisted-labeling/amazon-comprehend.md).
# Amazon Comprehend
Enable your integration with models from Amazon Comprehend.
{% hint style="info" %}
**Supported labeling types**: Row labeling.
{% endhint %}
**ML-assisted labeling** supports models from Amazon Comprehend. If you already have data and training pipelines in Amazon Comprehend, you can utilize your trained model to enhance the performance.
## Enable ML-assisted labeling extension
1. [Create a custom project](/data-studio-projects/creating-a-project.md) for row labeling.
2. Click the gear icon in the extension panel on the right to open the **Manage extensions** dialog.
3. From the **Manage extensions** dialog, enable the **ML-assisted labeling** extension.
Manage extensions dialog
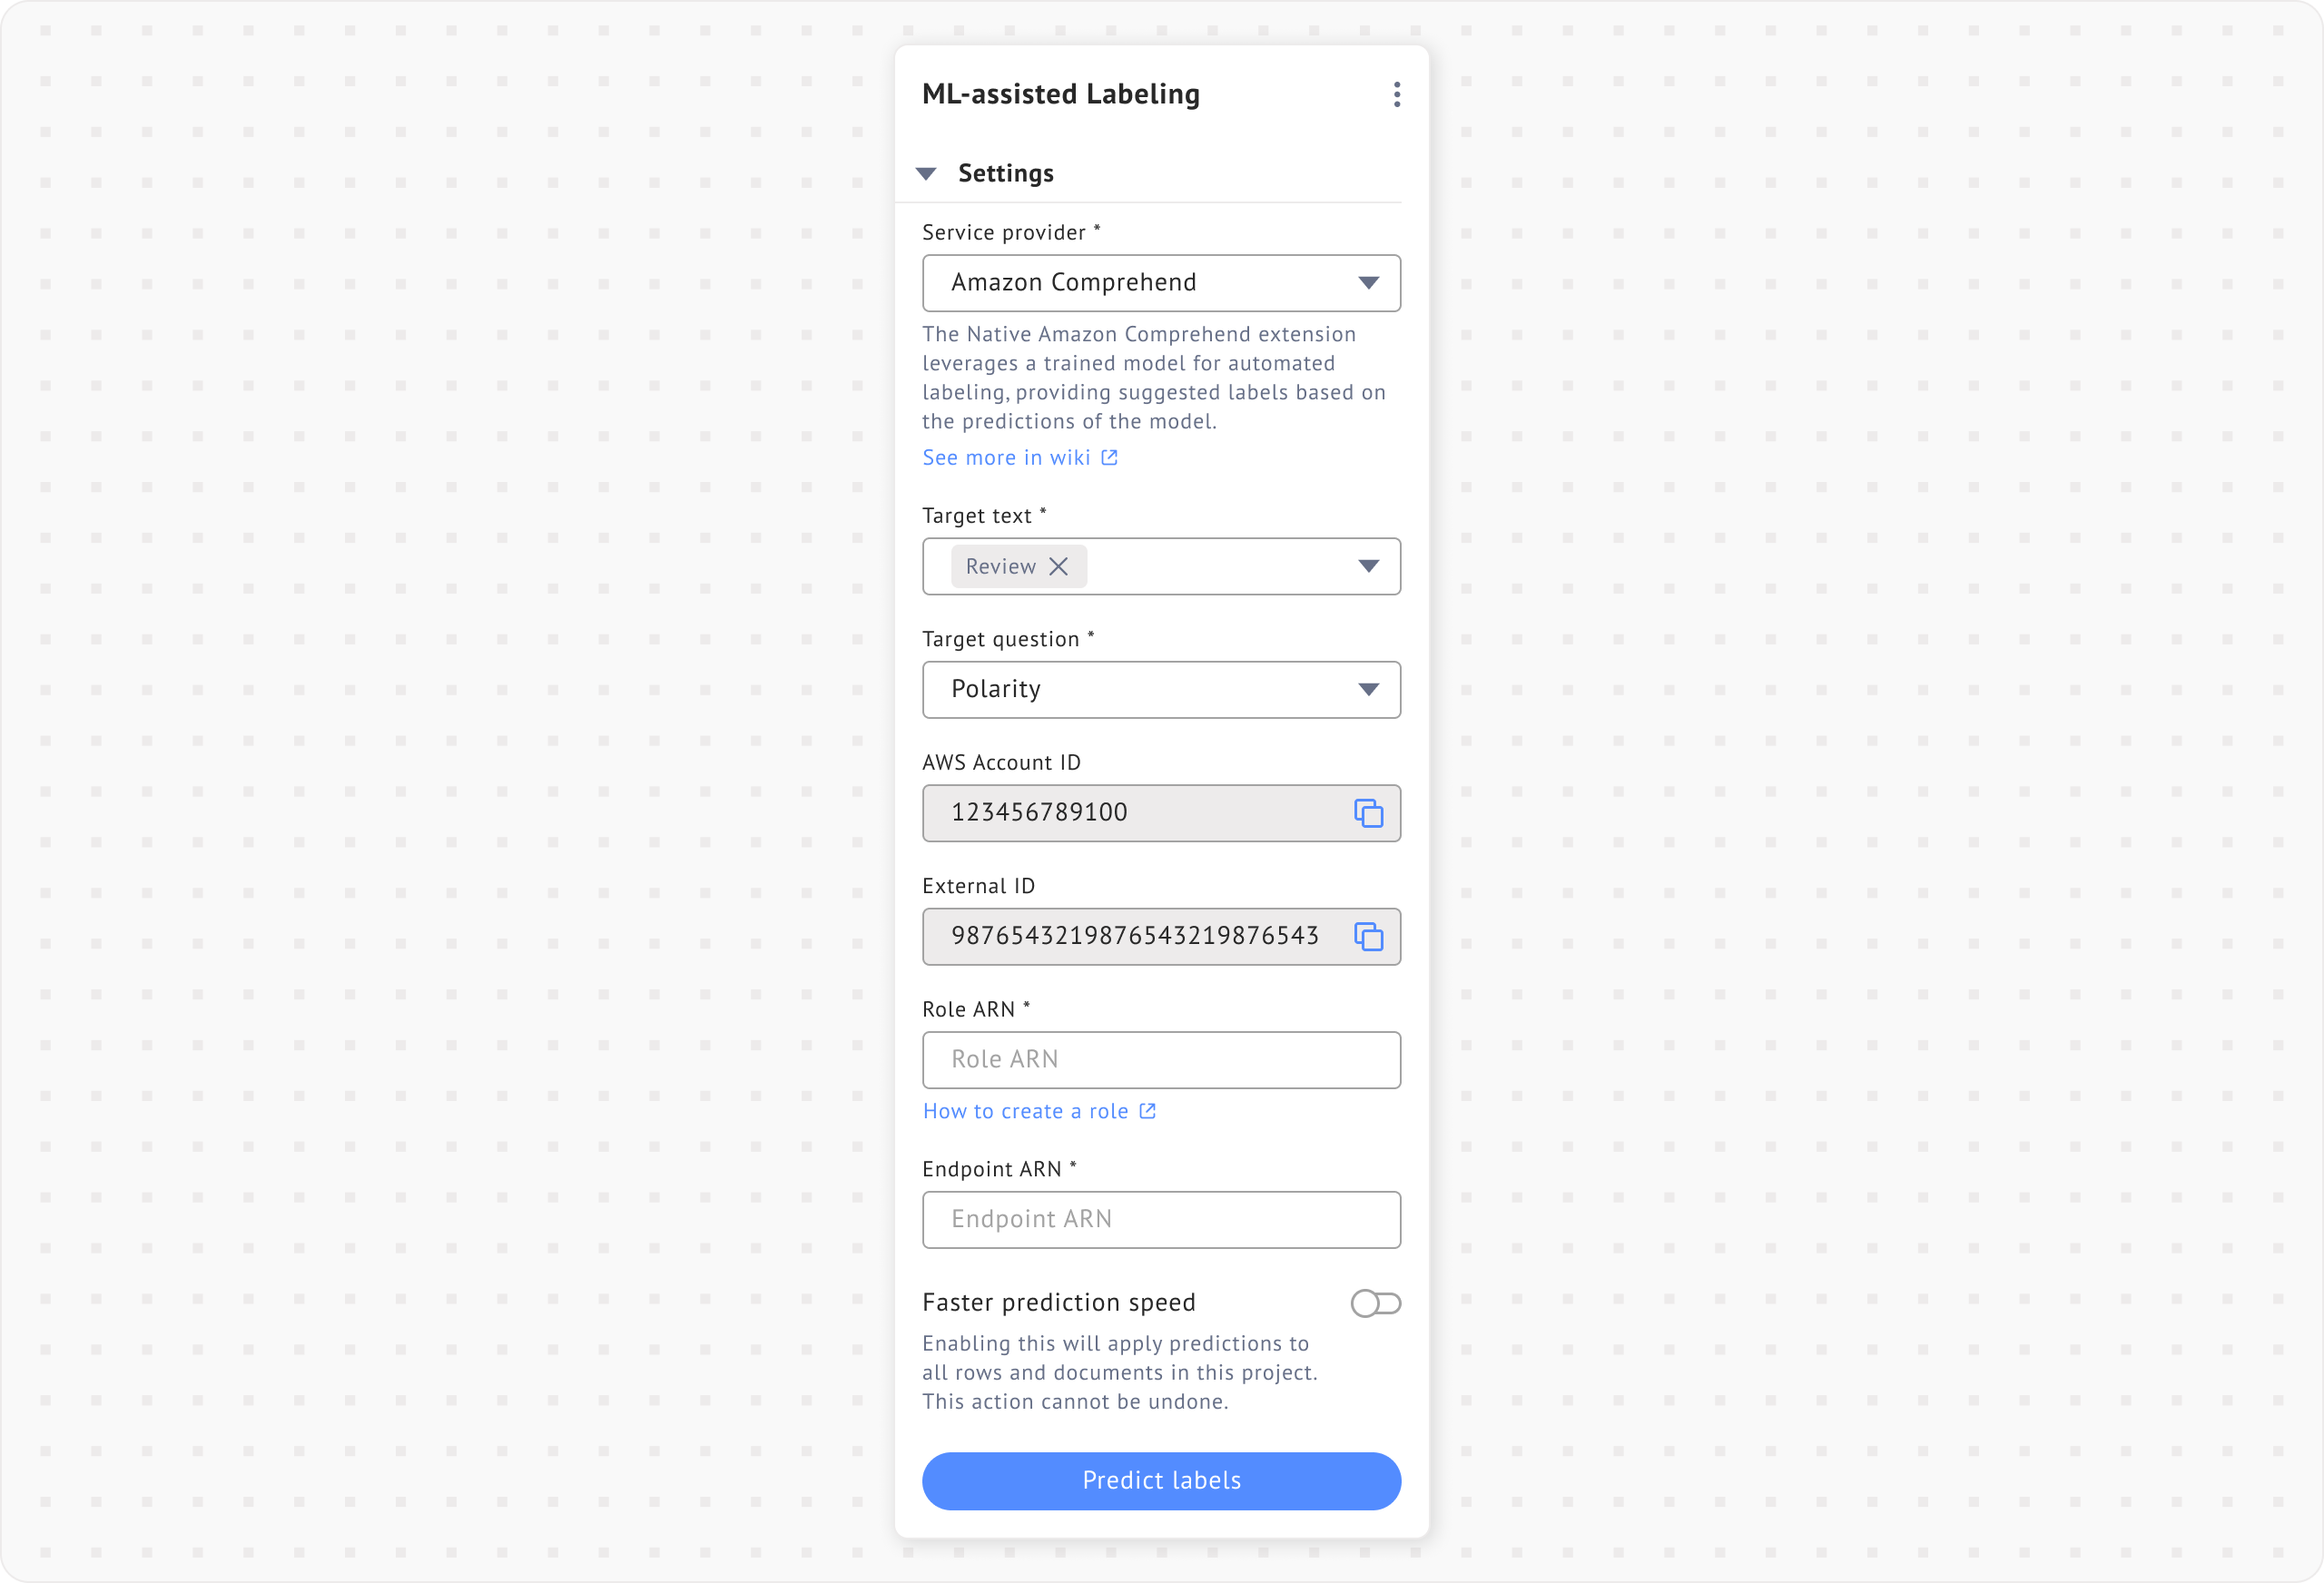
4. Once enabled, select **Amazon Comprehend** as the service provider.
## Setup role in AWS Identity and Access Management (IAM)
Before creating a role in the **IAM** page, create the required policies to define permissions for the new role.
1. Go to your **IAM** page, navigate to the **Policies** section, and then create a new policy.
2. Download the example below and add it.
{% file src="/files/xJps9ytUtC28gf1EsYXs" %}
After that, proceed to create a new role:
1. Go to the **IAM** page and navigate to the **Roles** section.
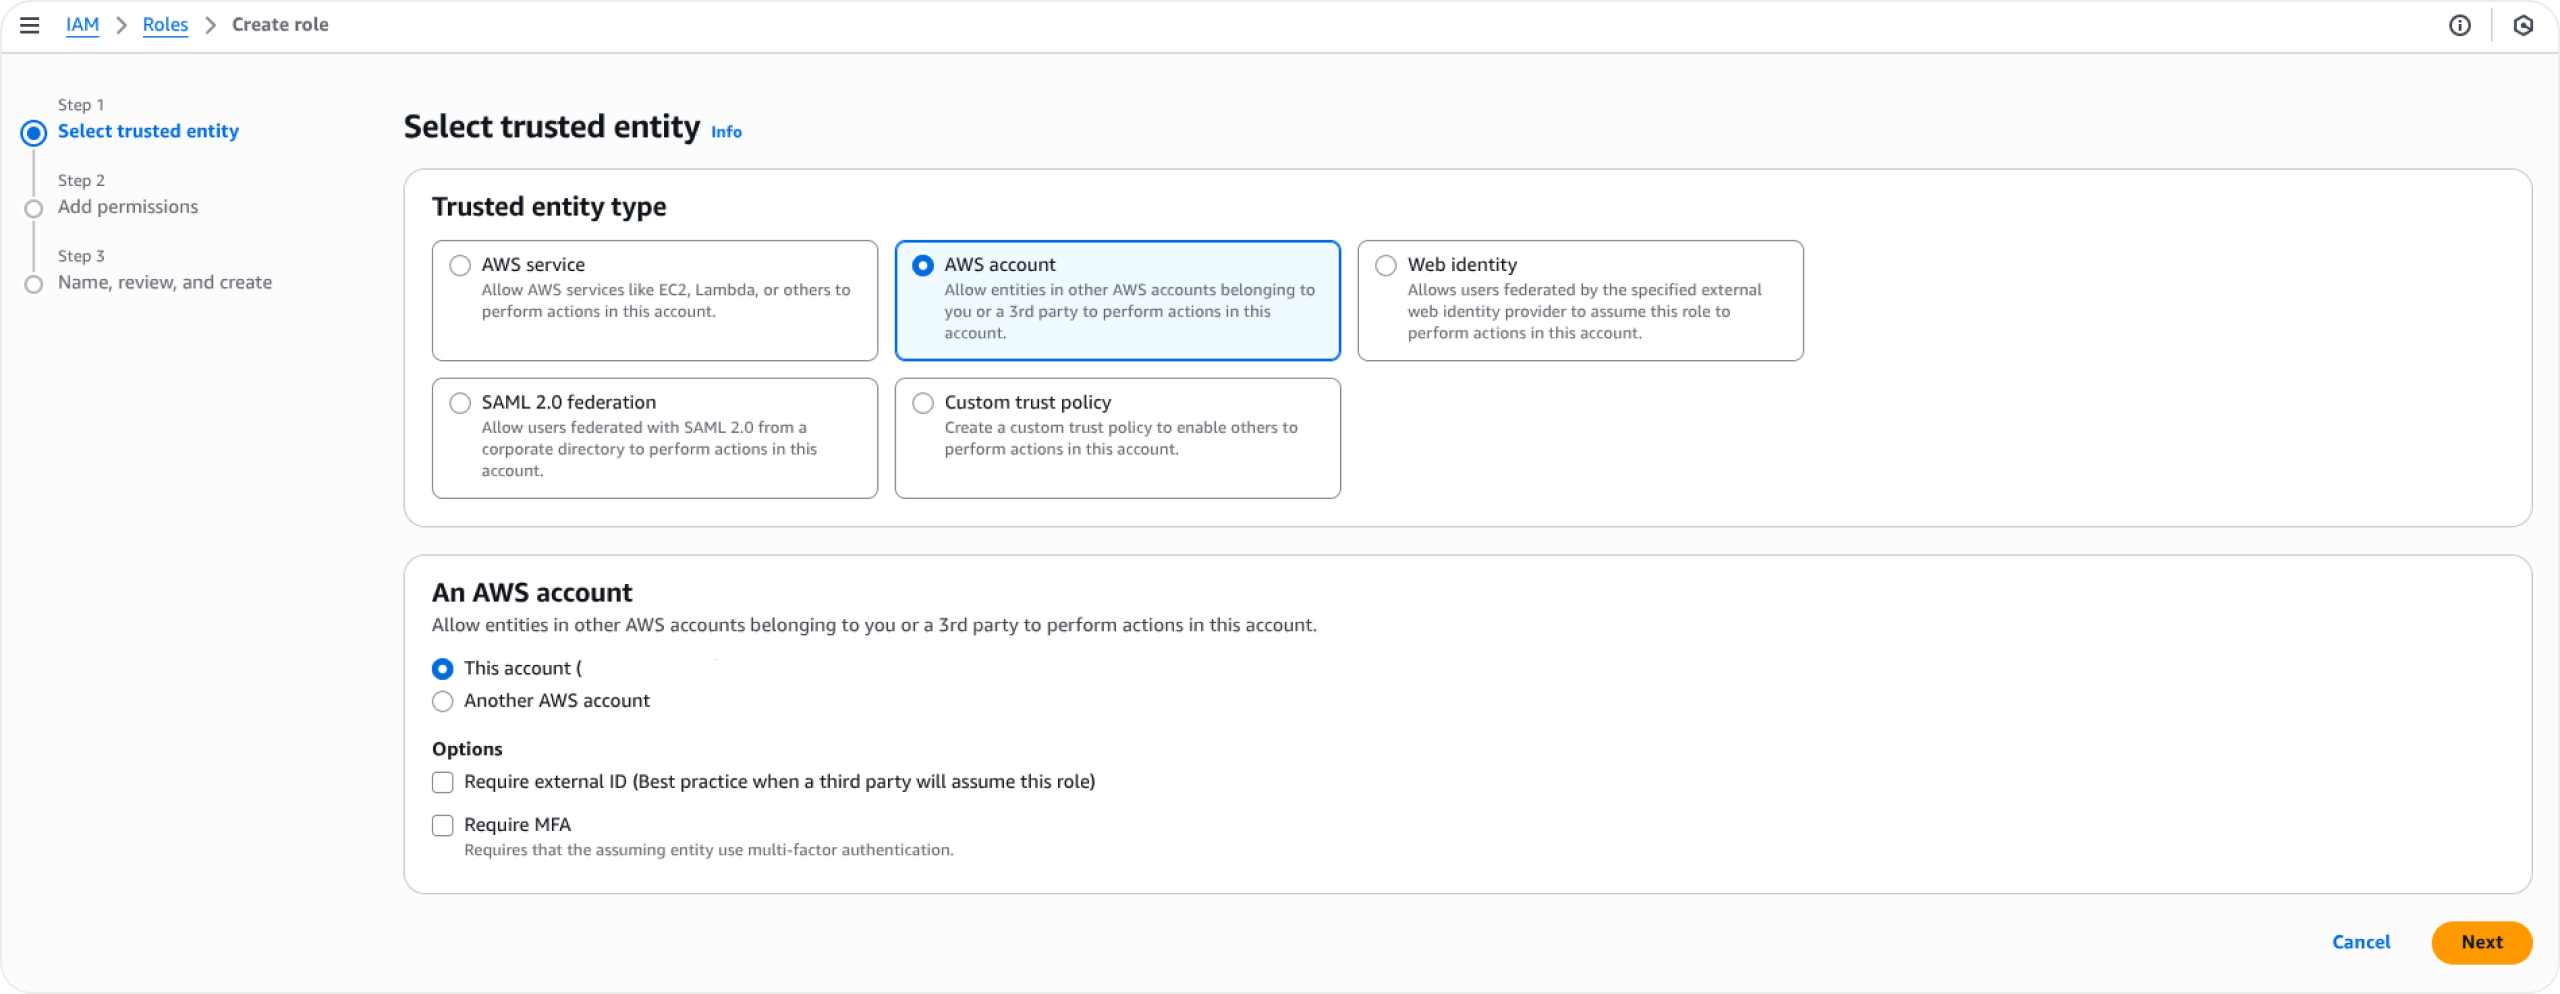
2. Click **Create role**, then select **AWS account** as the role type.
3. Enter the **Account ID** and **External ID**. These values are automatically generated within the Datasaur **ML-assisted labeling** extension and can be copied into AWS.
Select trusted entity
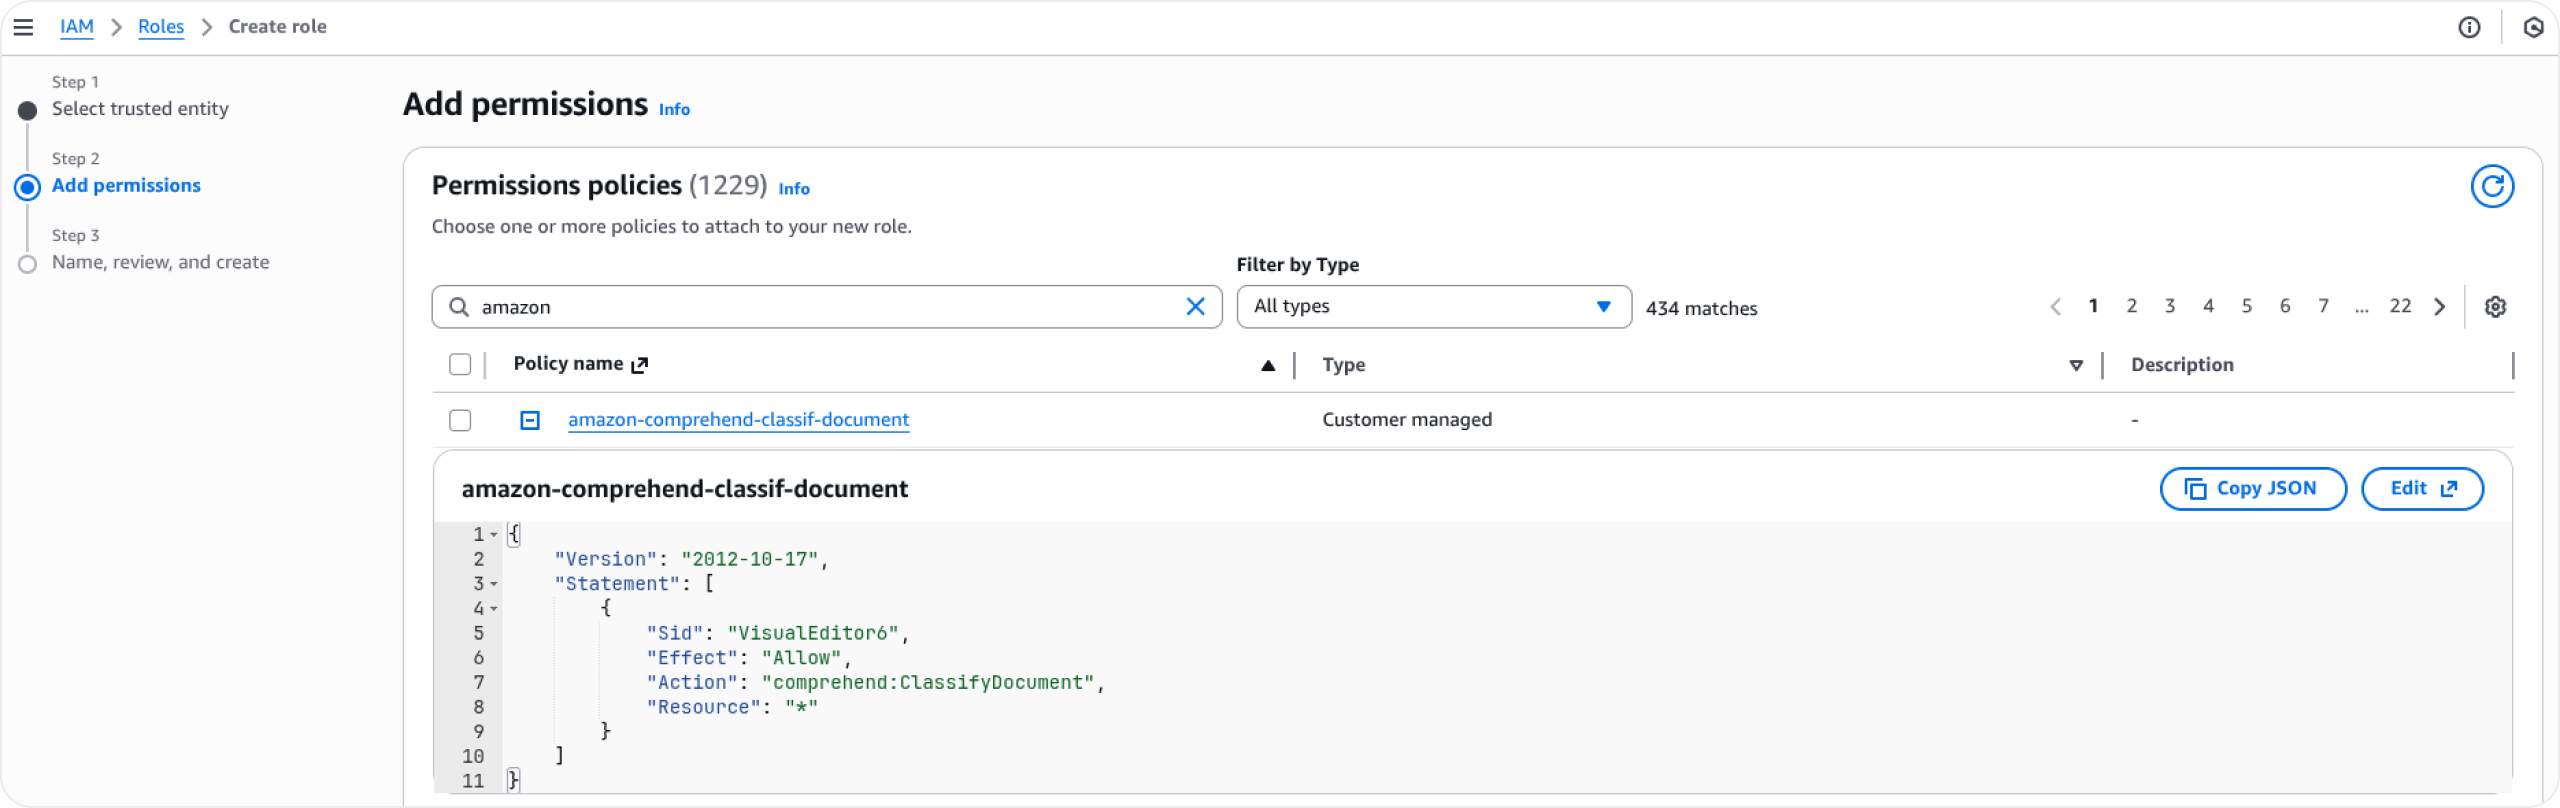
4. On the **Add permissions** step, search for the policy you created earlier and add it to the permissions.
Add permissions
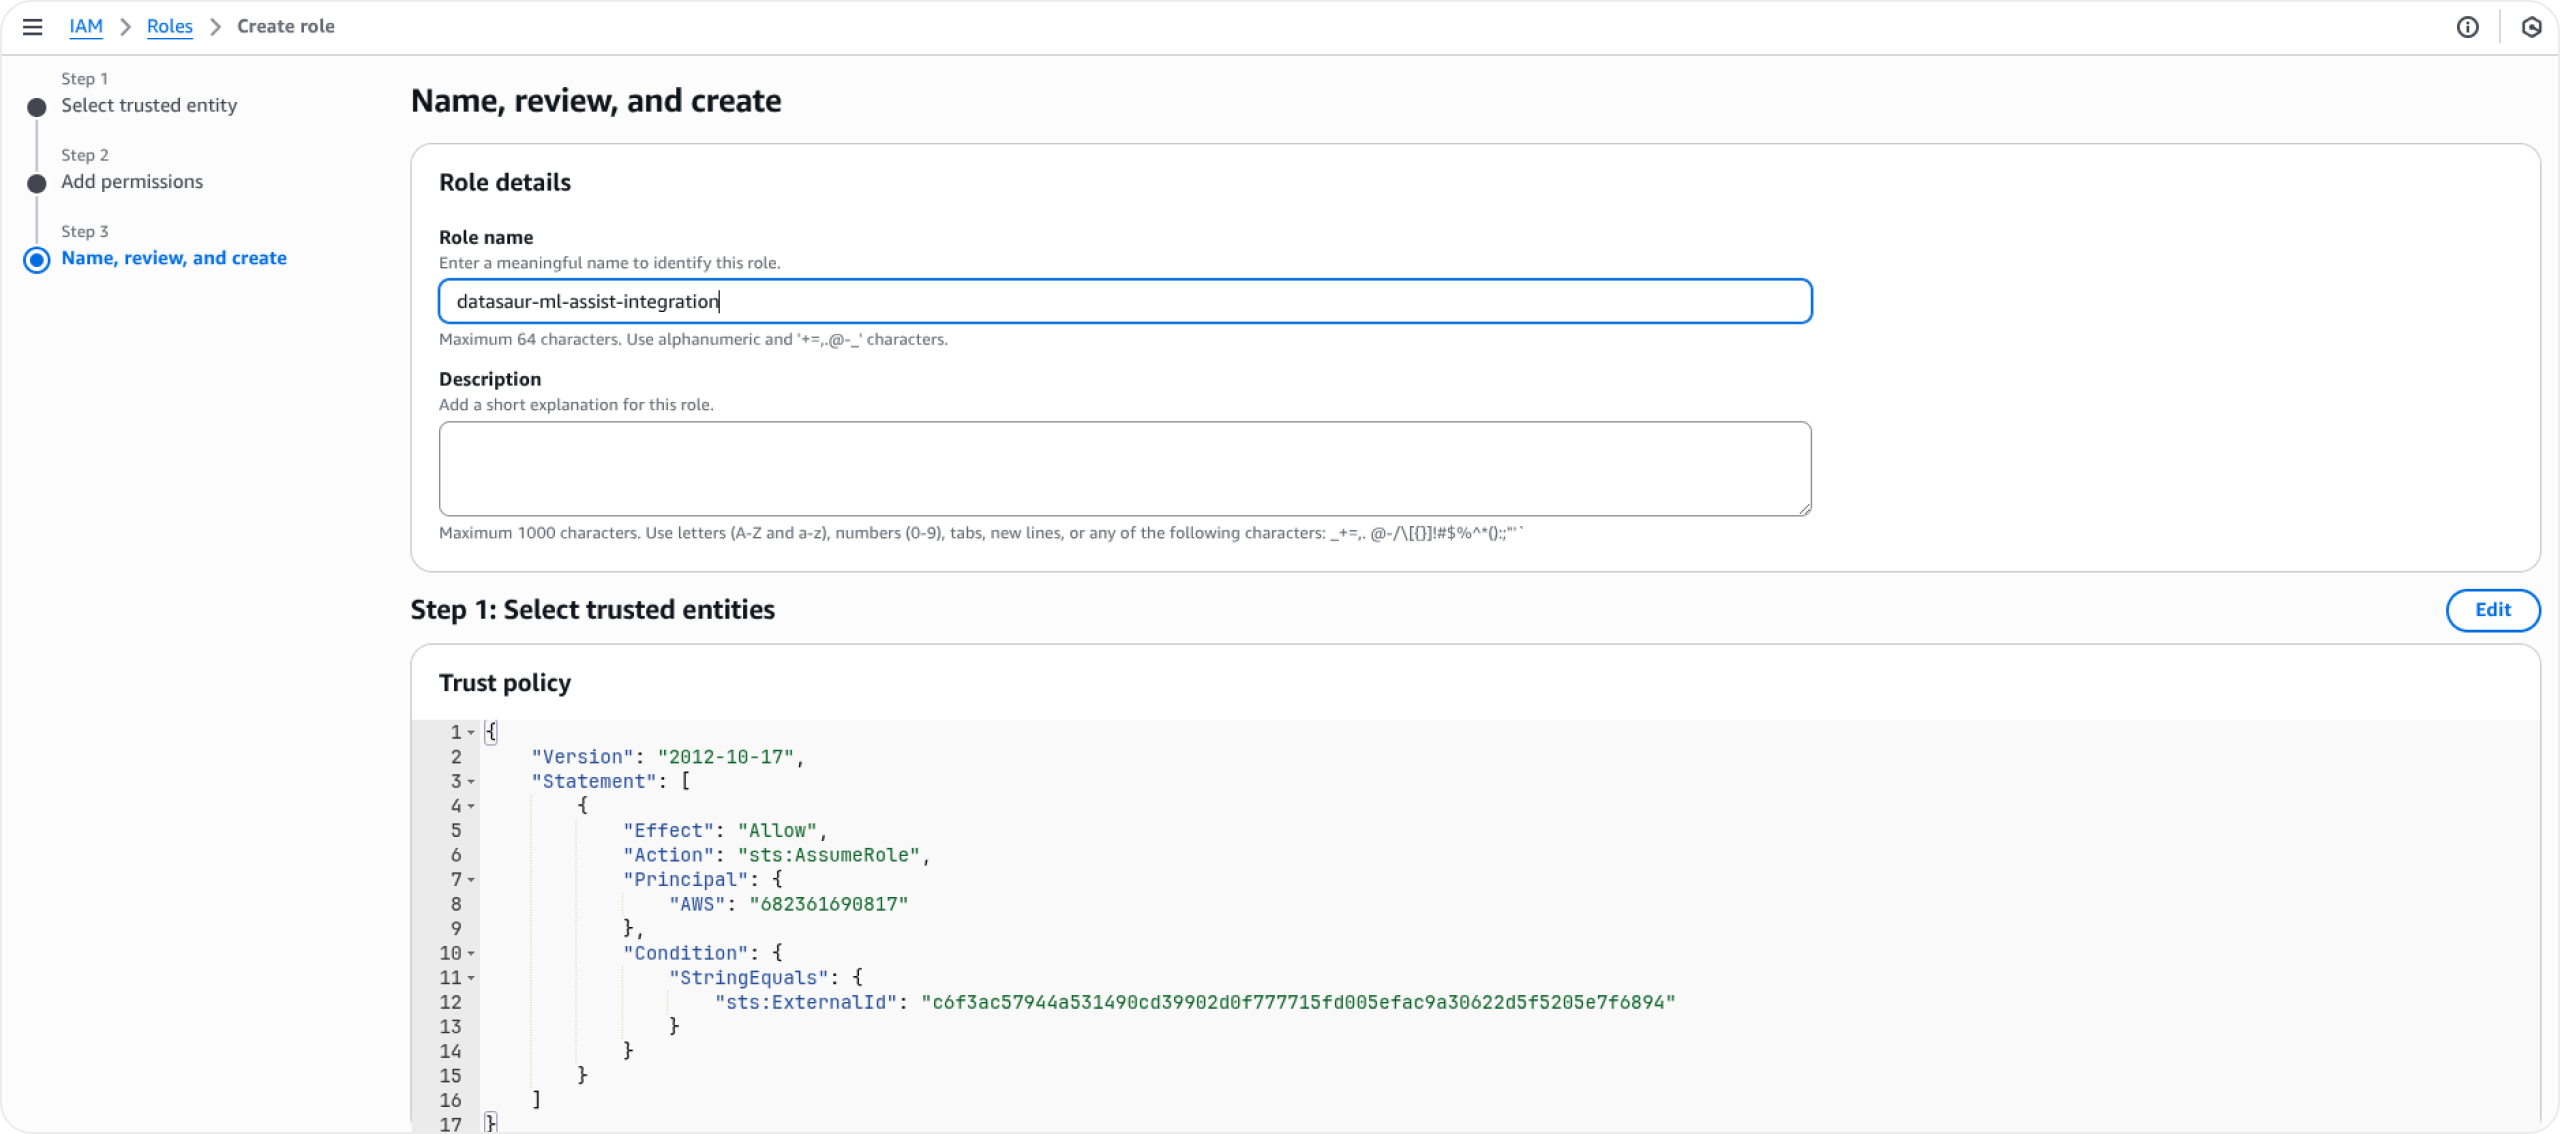
5. Provide a role name and click **Create role.** The role will be created successfully.
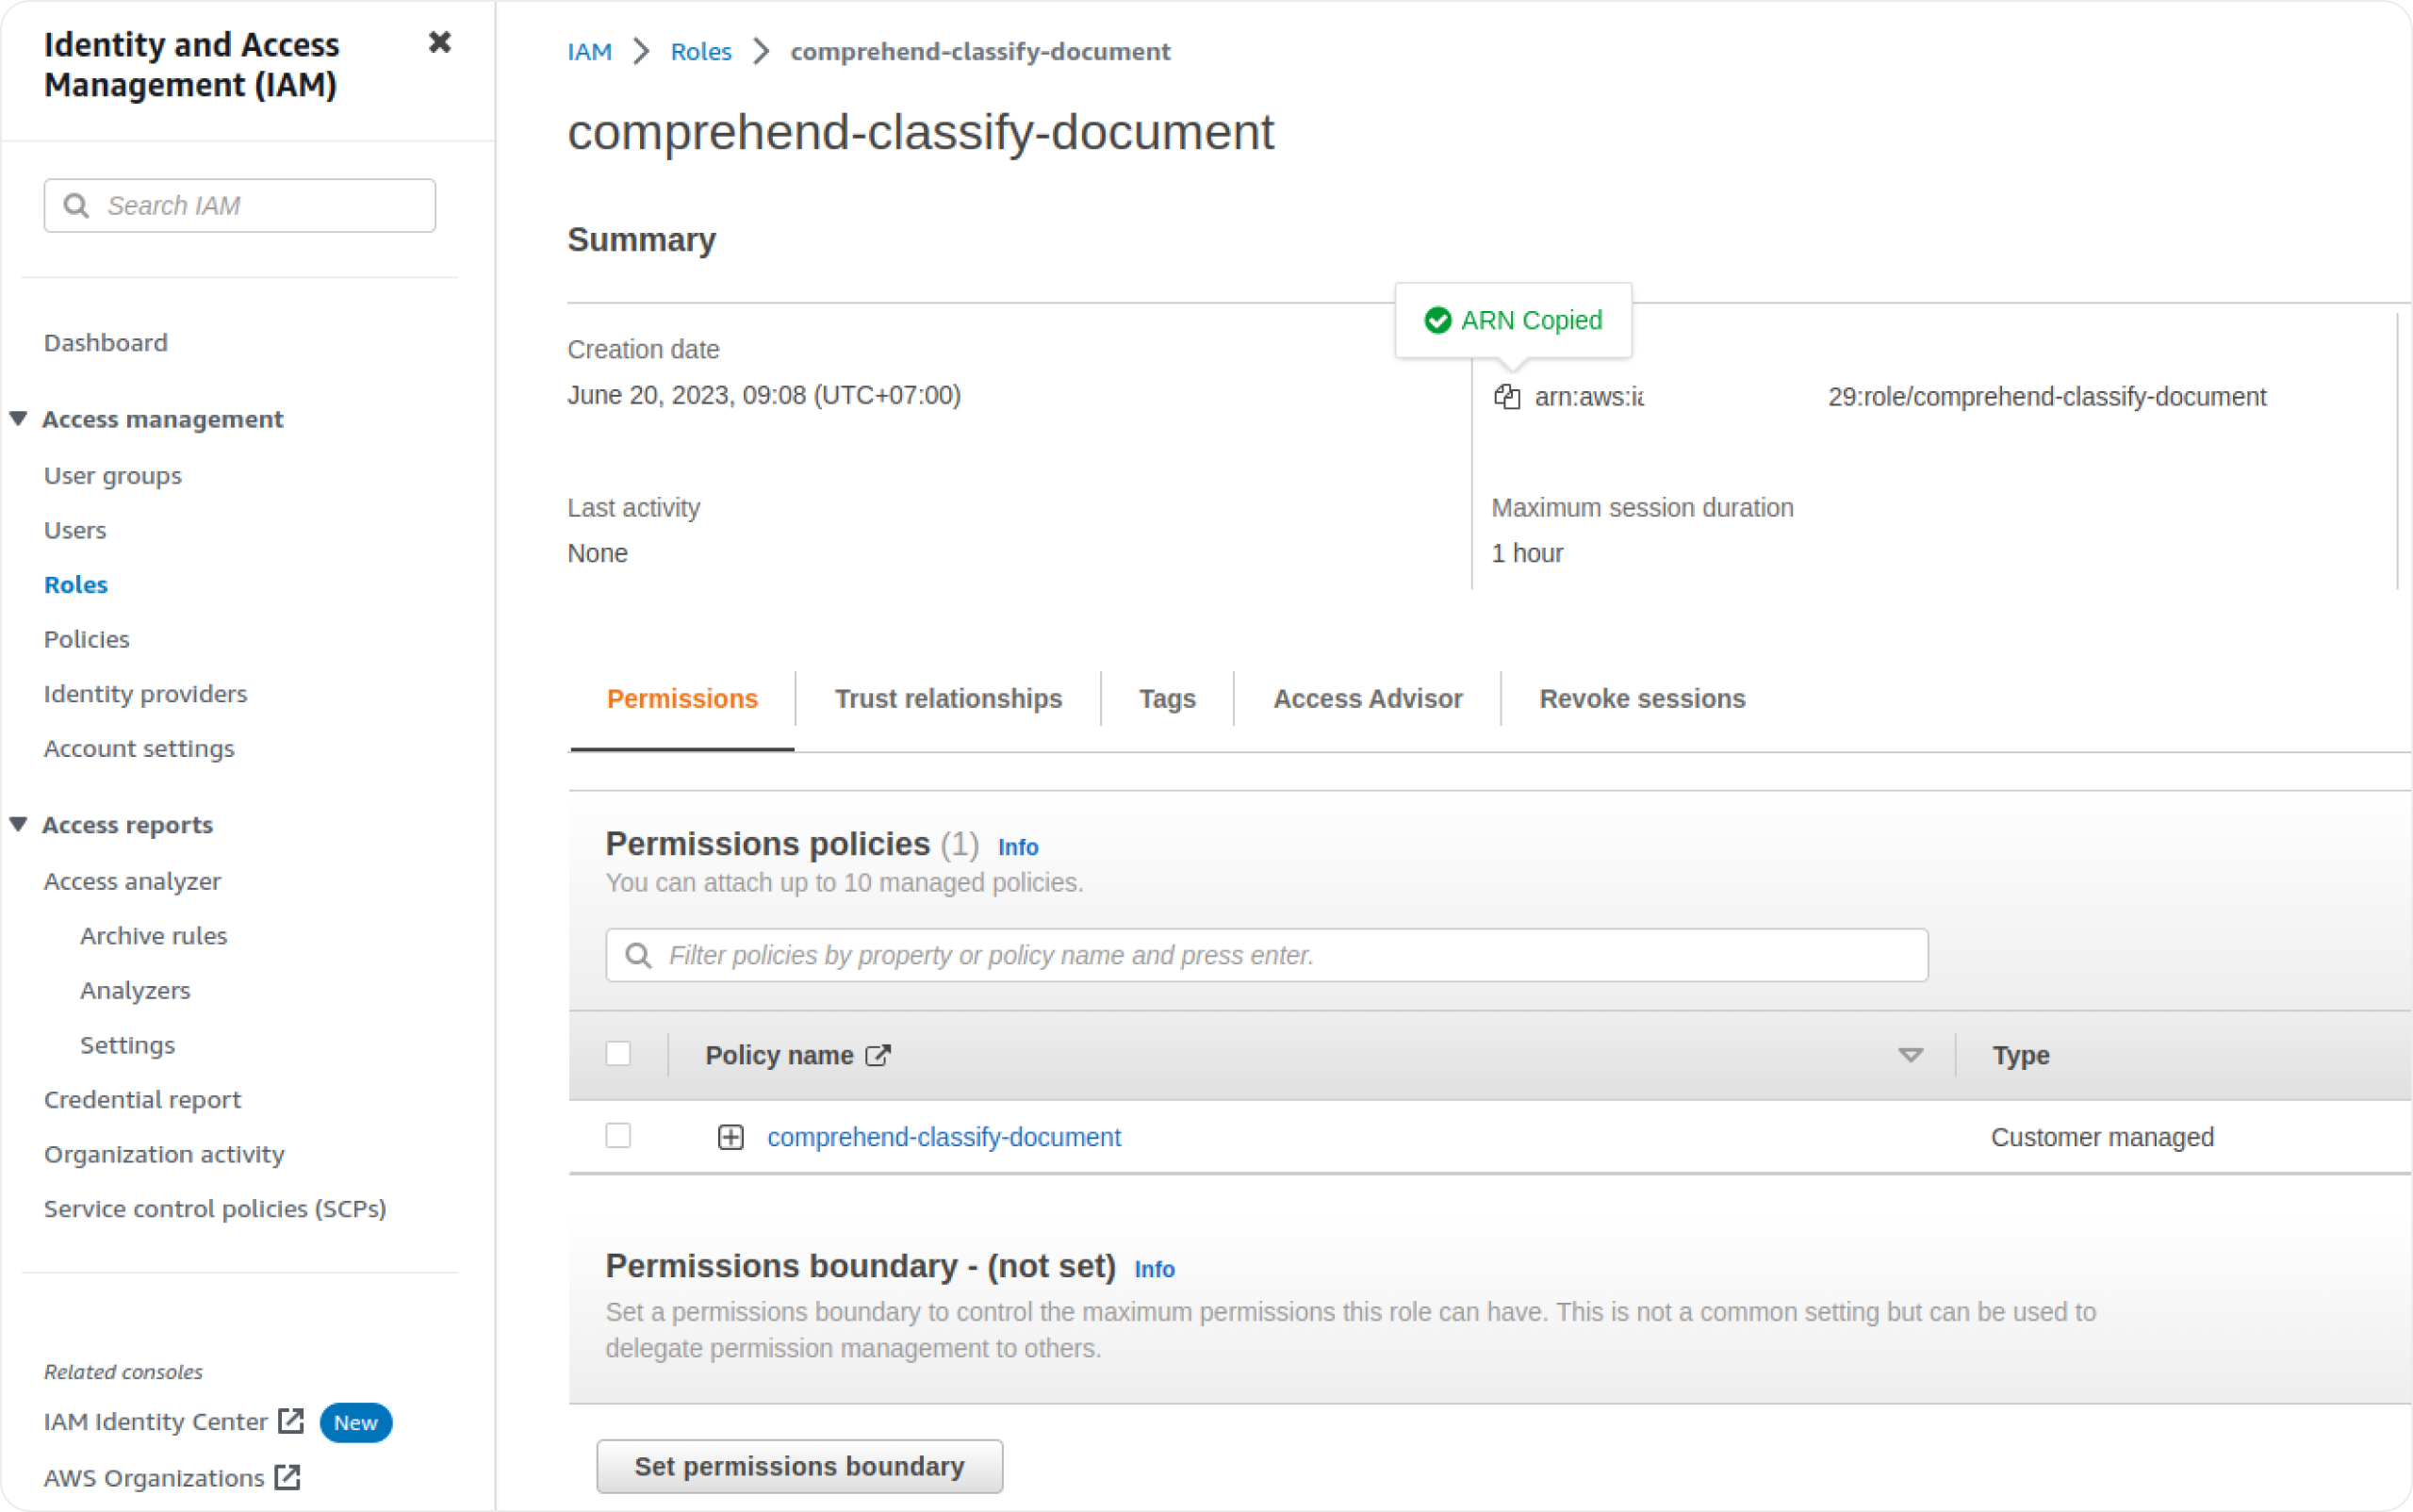
6. View your role and copy the **Role ARN**.
Role ARN
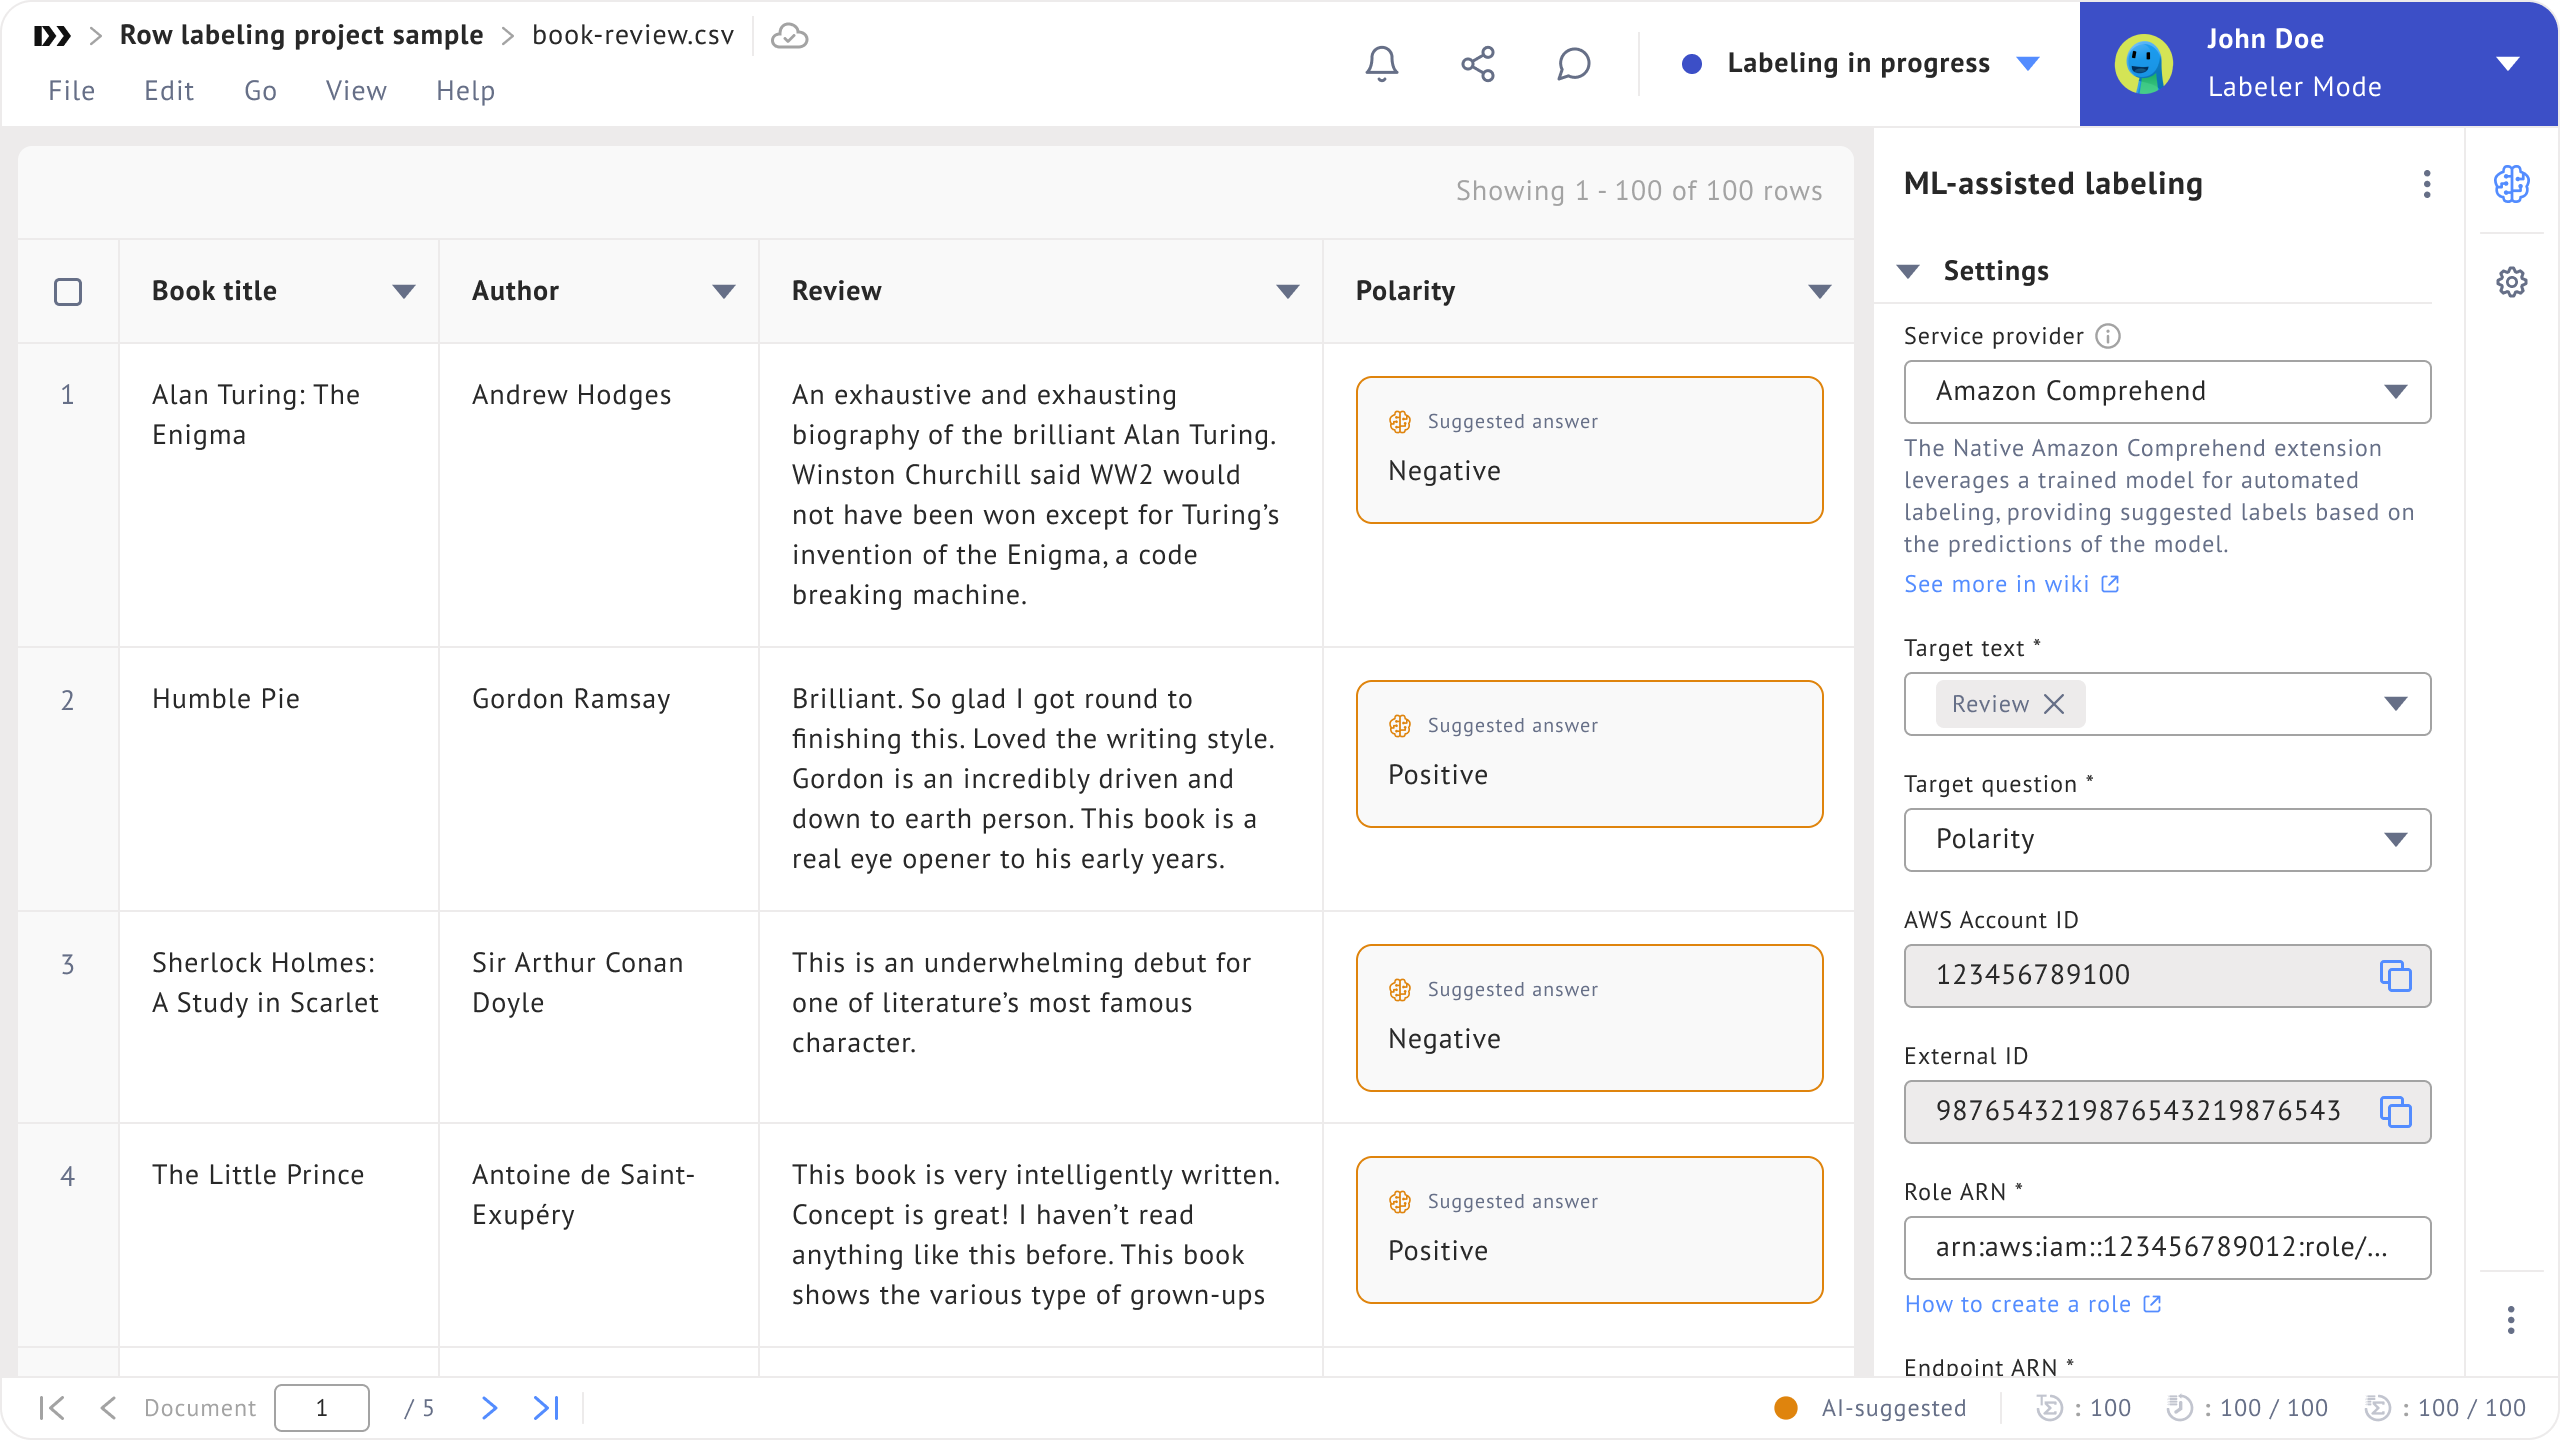
7. Paste this information into the **ML-assisted labeling** extension.
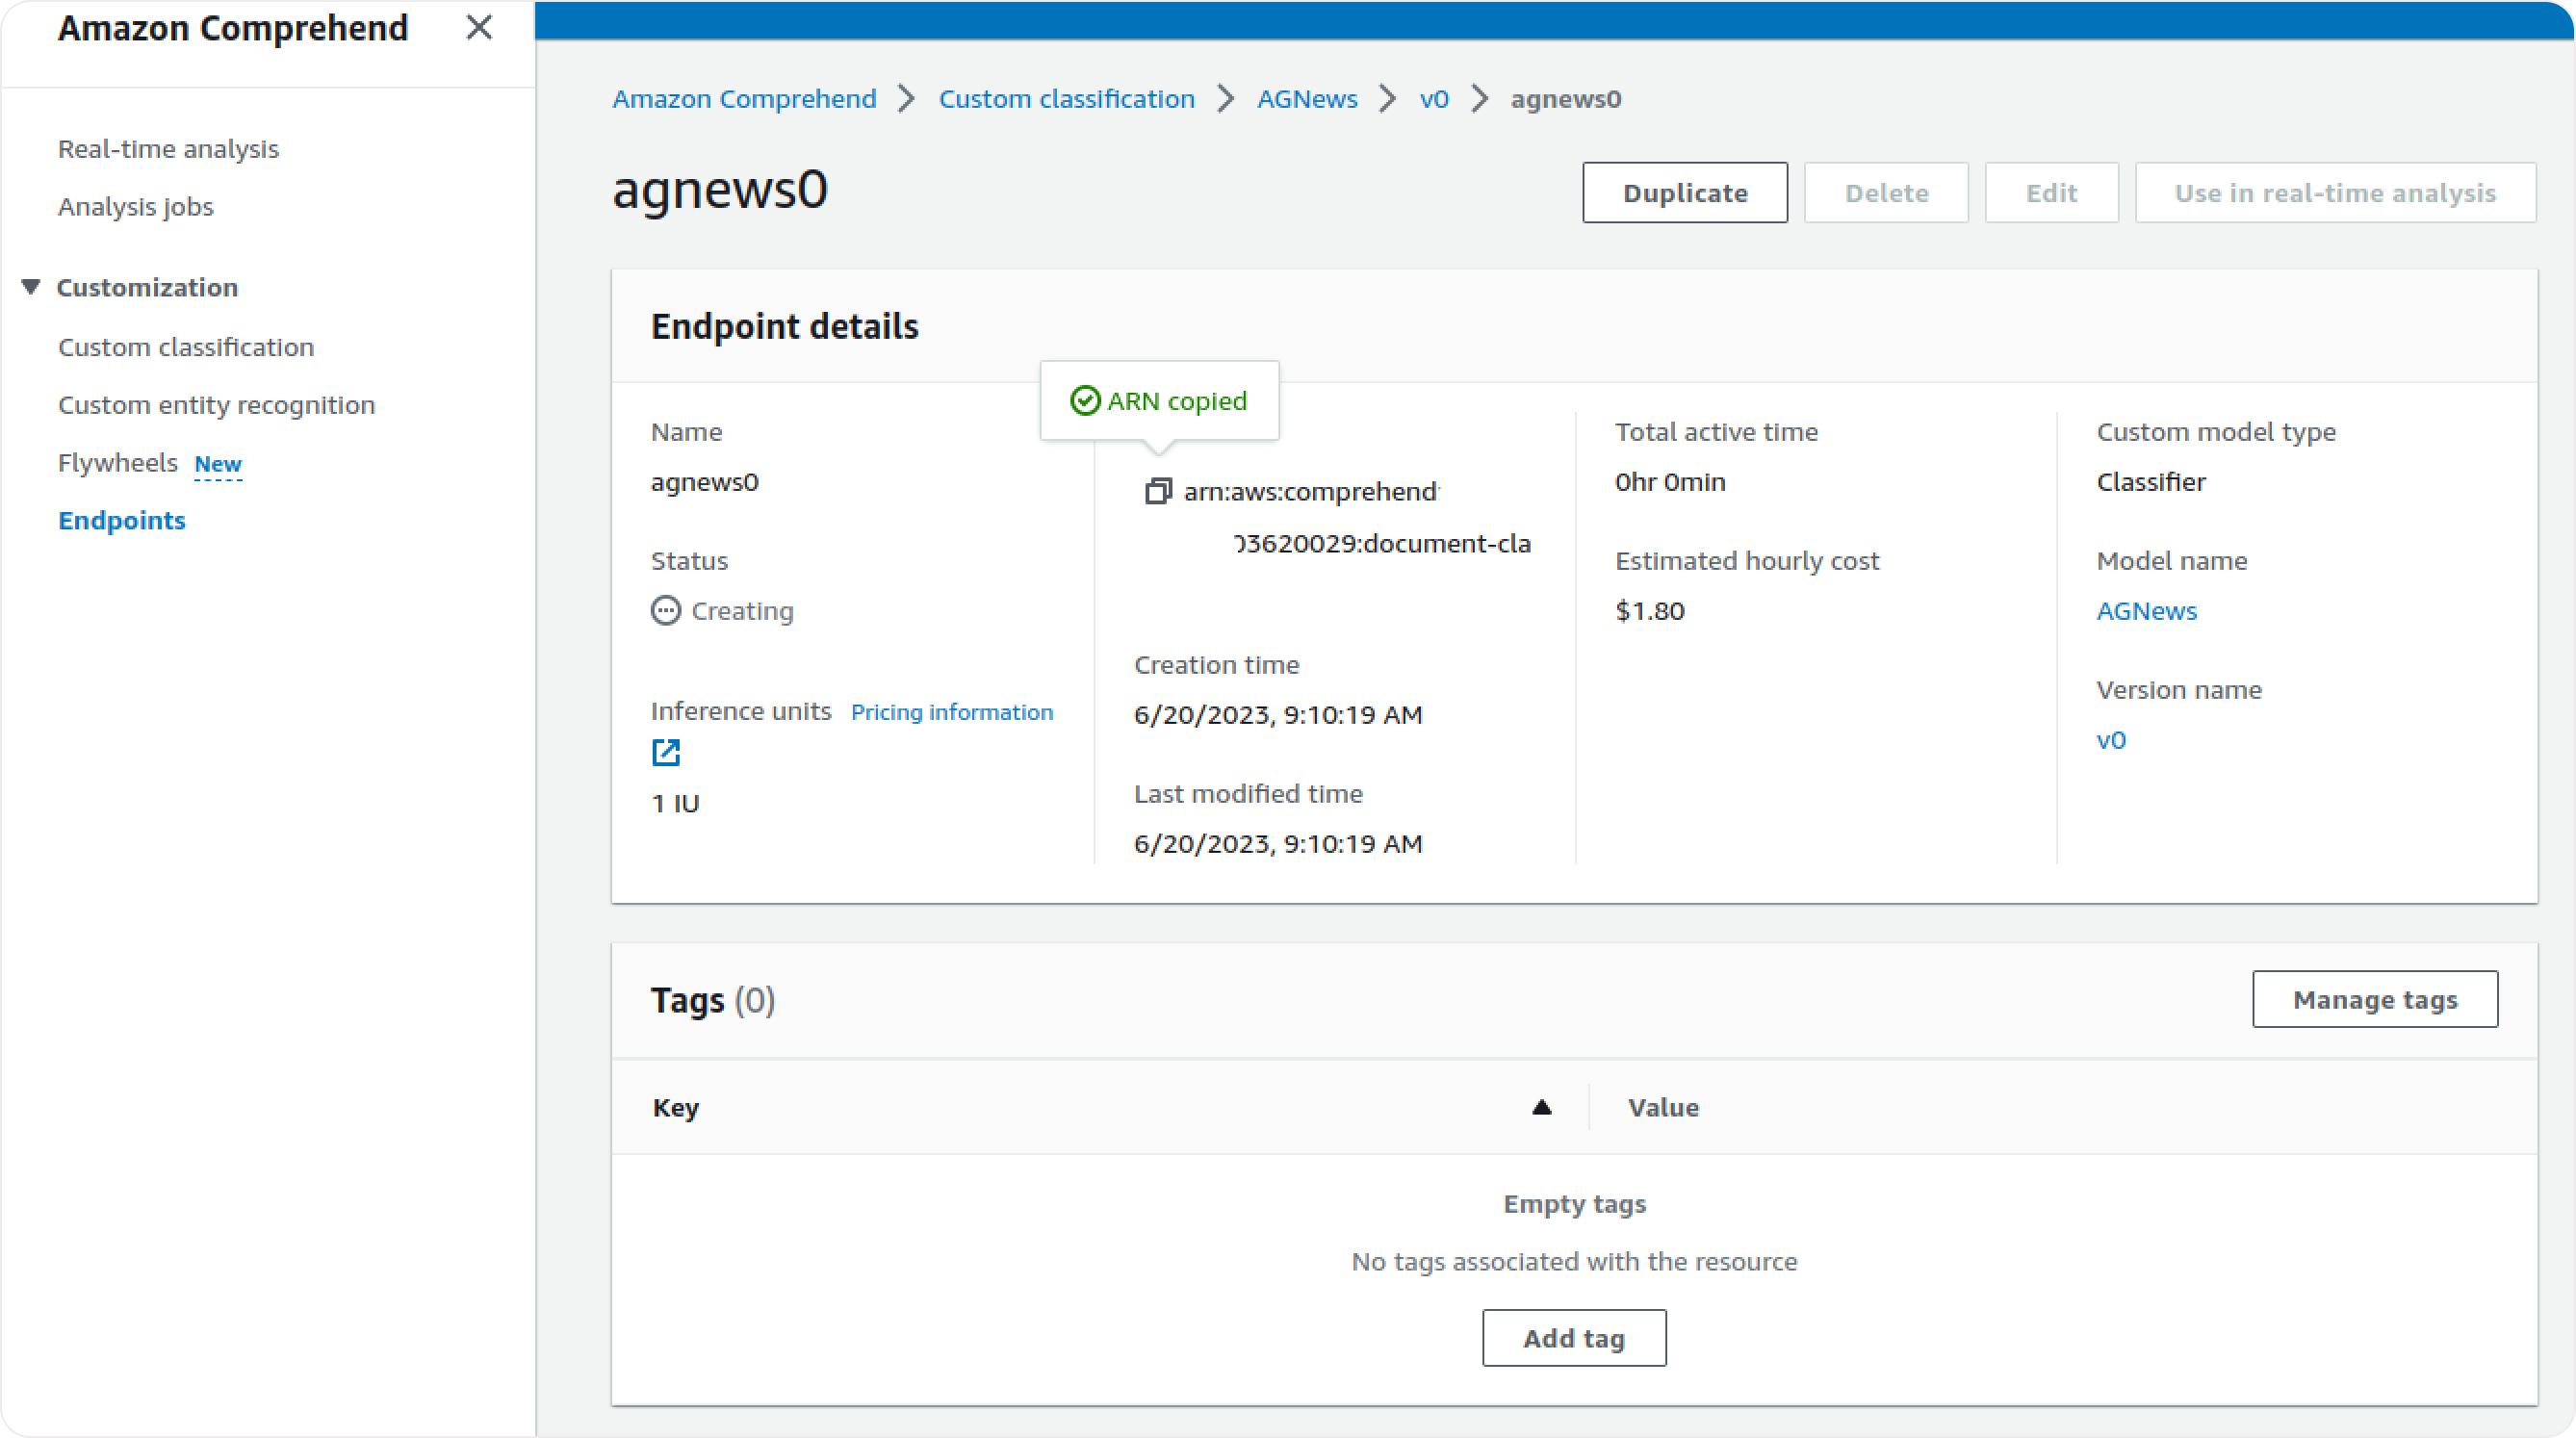
8. Go back to the **Amazon Comprehend** page and retrieve the **Endpoint ARN**. Copy it and paste it into the extension.
Endpoint details
## Start prediction
Once you have configured the settings, click **Predict labels** to generate predictions from your model.
.png?alt=media)