> For the complete documentation index, see [llms.txt](https://docs.datasaur.ai/llms.txt). Markdown versions of documentation pages are available by appending `.md` to page URLs; this page is available as [Markdown](https://docs.datasaur.ai/build-model/datasaur-dinamic/aws-sagemaker.md).
# Datasaur Dinamic with Amazon SageMaker Autopilot
## Introduction
**Datasaur Dinamic** with [Amazon SageMaker](https://aws.amazon.com/sagemaker/train/) lets you build and train models using Datasaur and AWS together. Your labeled data is directly connected to Amazon SageMaker to start the training process.
## Quick start guide
Follow these steps to train a model with **Datasaur Dinamic** and Amazon SageMaker.
### Setup Datasaur Dinamic extension
1. Create a custom row labeling project.
2. If the dataset is unlabeled, start by labeling part of the data first. For example, if the dataset has 20 rows, you can label 10–15 rows and [automate the rest later](#automate-the-rest-of-the-data-with-ml-assisted).
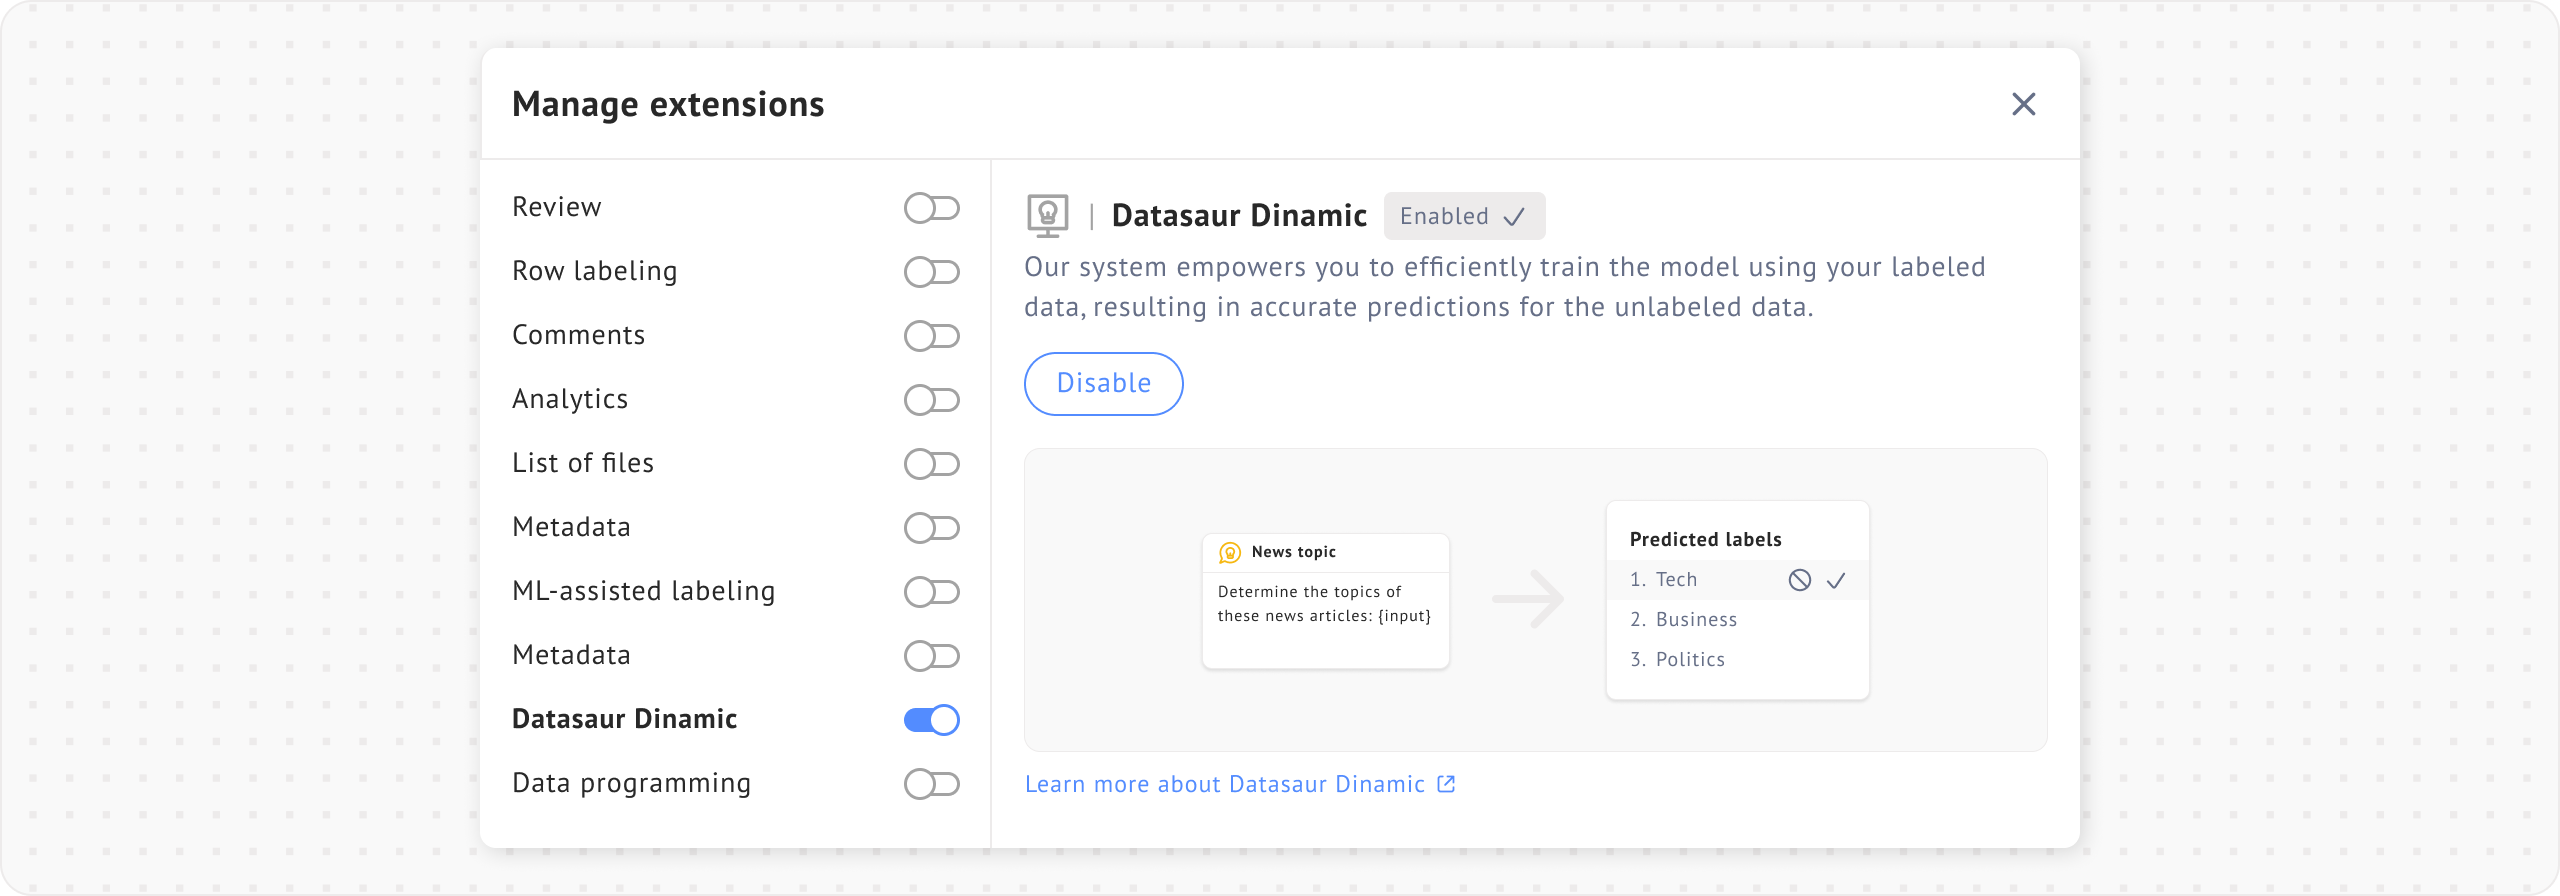
3. Enable the **Datasaur Dinamic** extension from the **Manage extensions** dialog.
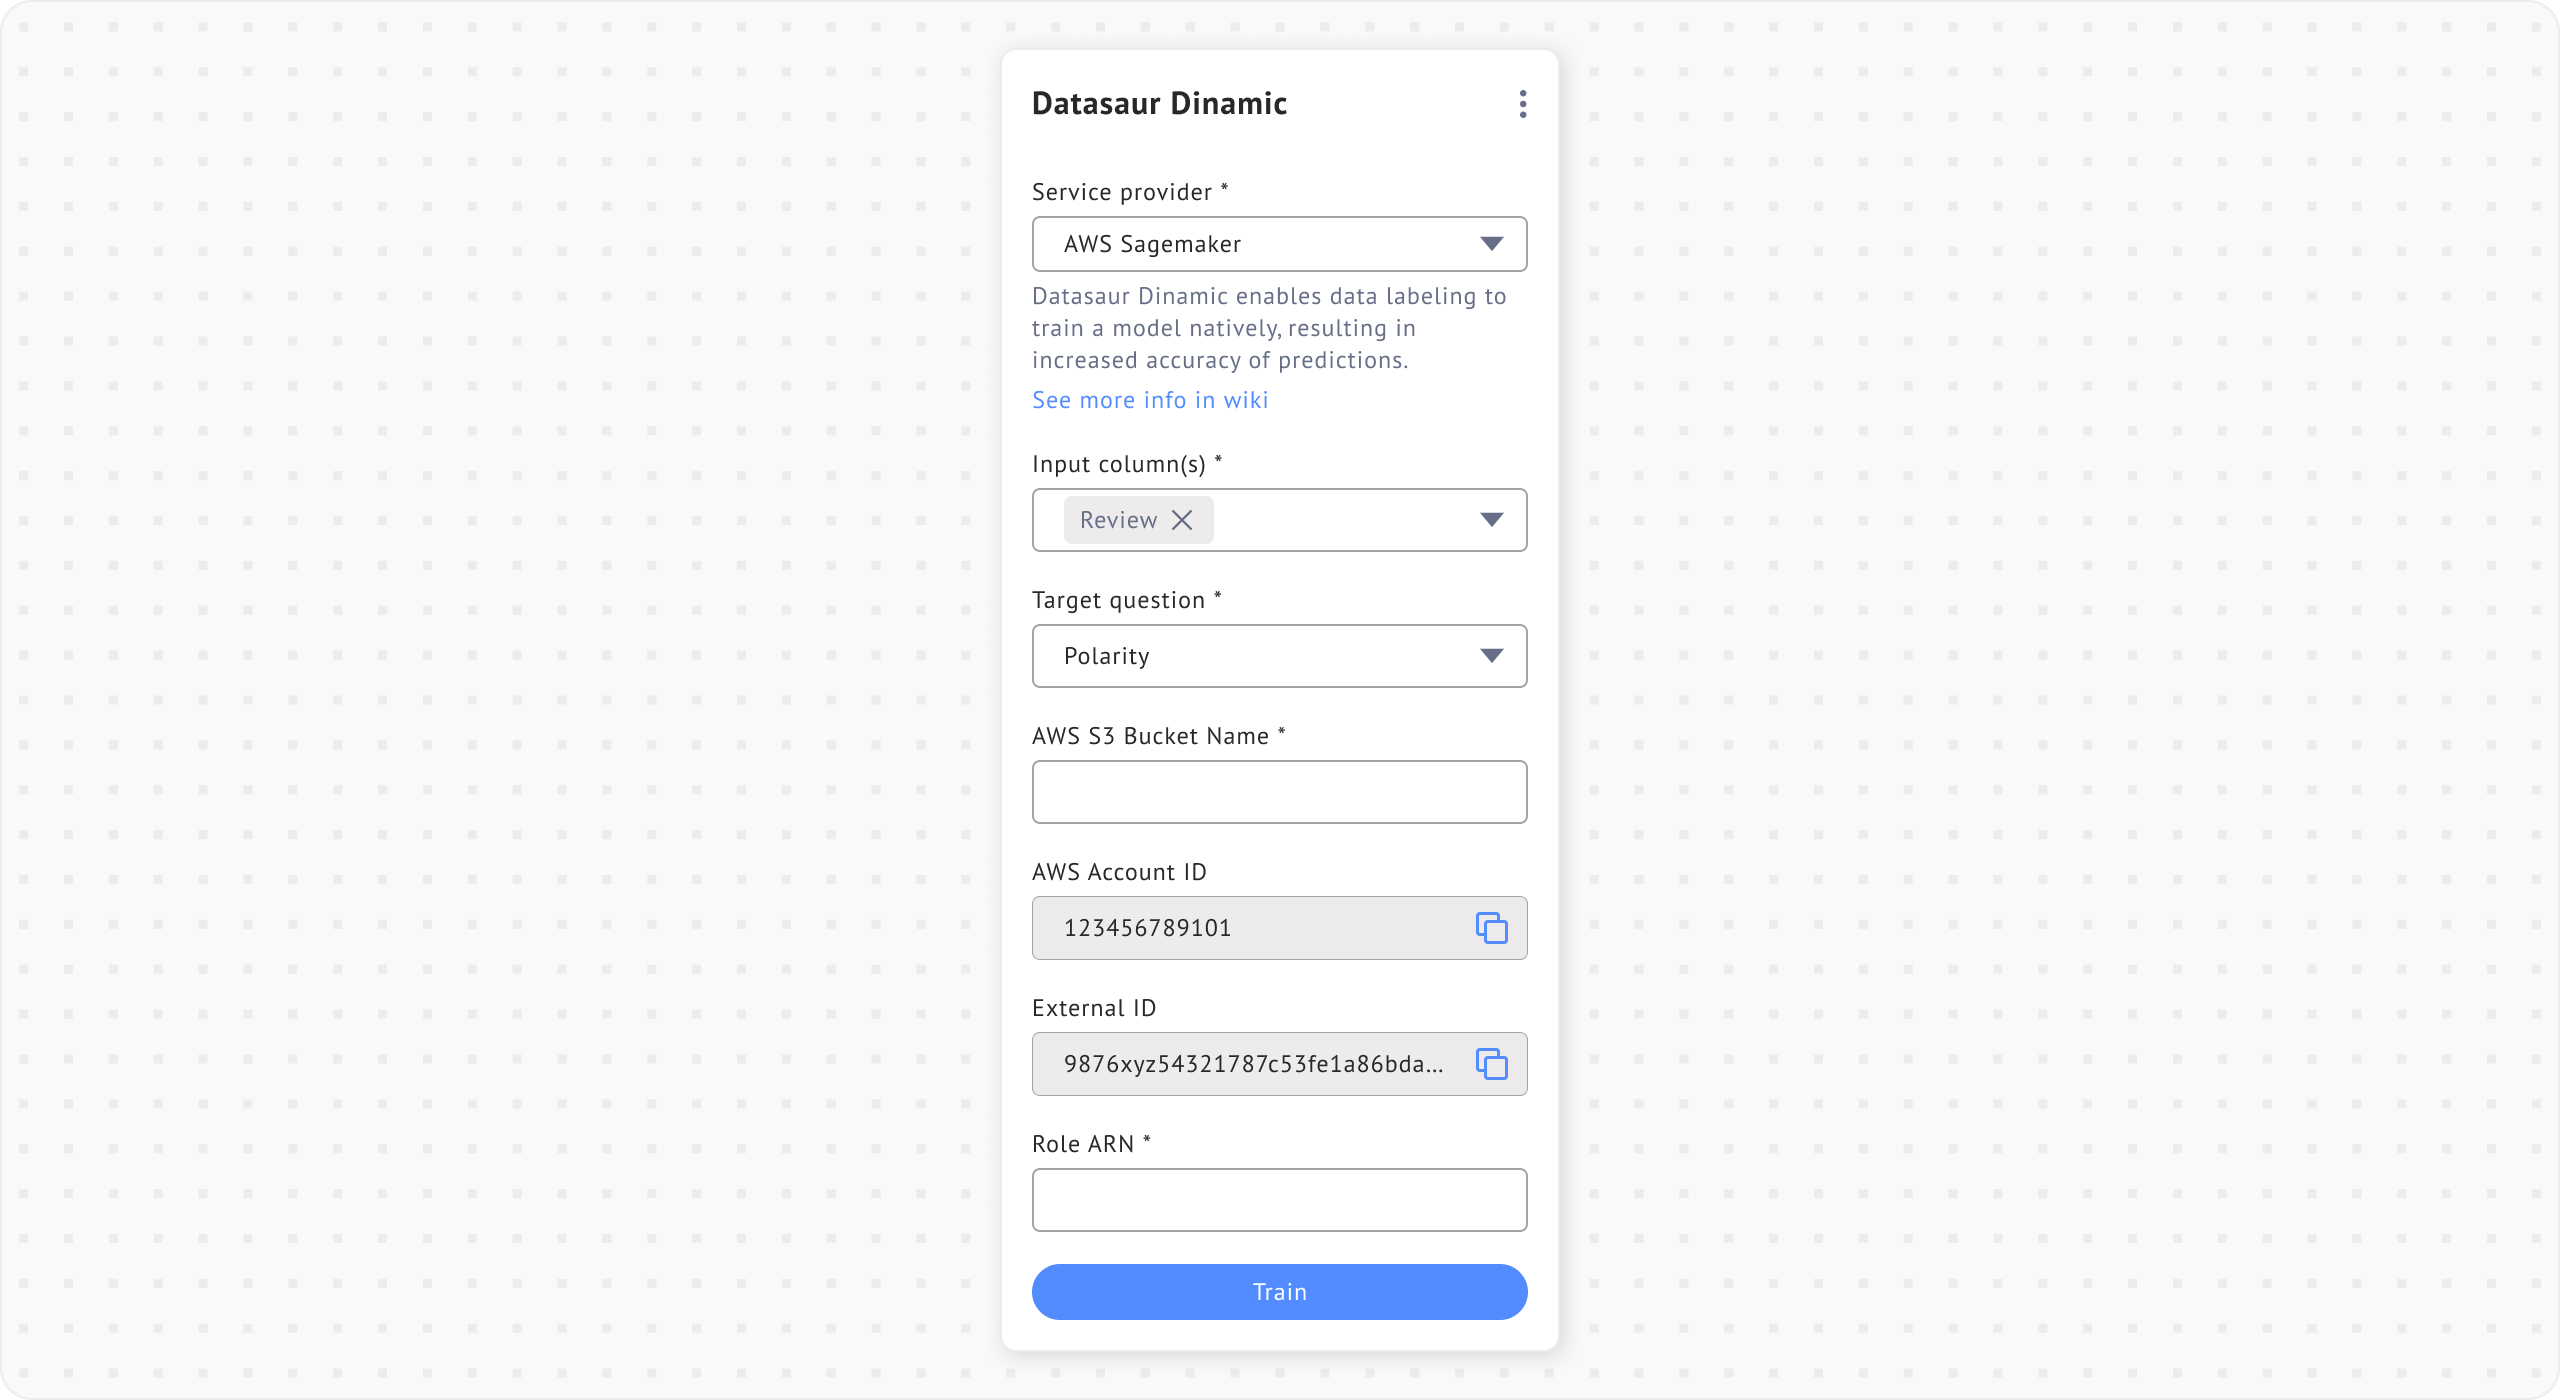
4. Select the **AWS Sagemaker** provider.
### Setup an IAM role in AWS
{% hint style="info" %}
Make sure you have an AWS S3 bucket available for storing training data and model outputs.
{% endhint %}
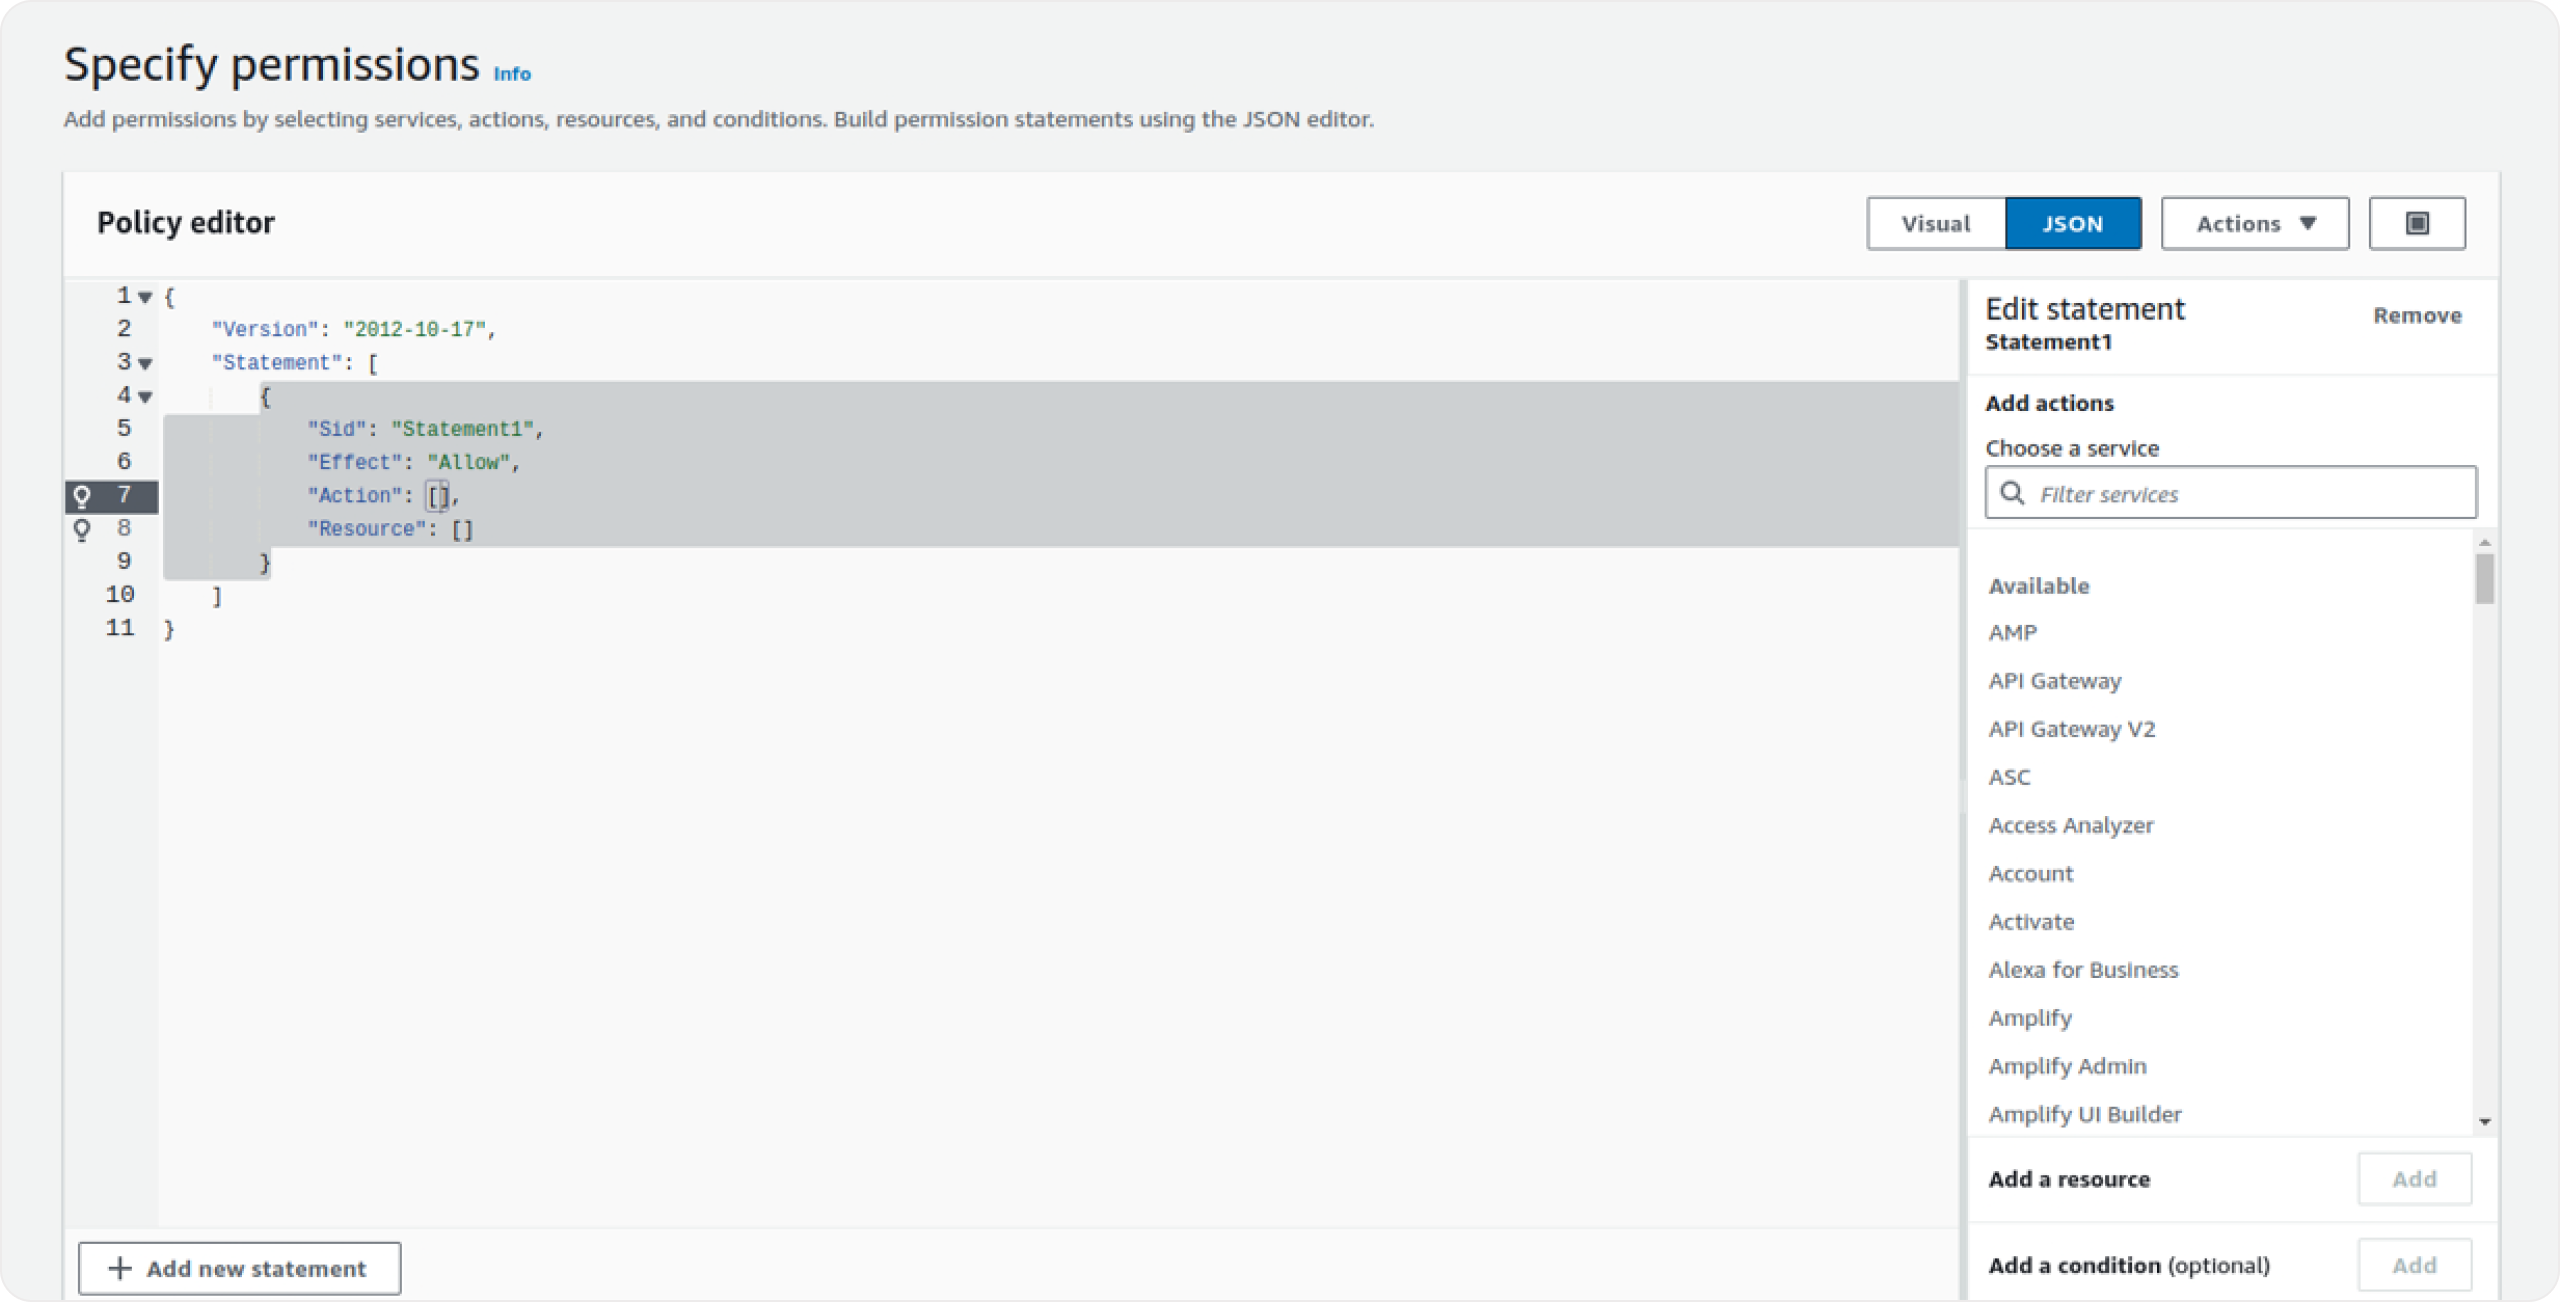
#### Create IAM Policies
1. Open the **IAM** page and navigate to the **Policies** section.
2. Click **Create policy**.
3. Create the following policies:
* `sagemaker-limited-access`
* `sagemaker-s3-specific-permissions`
Use the provided policy examples and update the variables with your bucket information.
{% file src="/files/l5Ka6FxshtMHLUw0pSlF" %}
sagemaker-limited-access
{% endfile %}
{% file src="/files/zFJXgAXxct7lrTKFXifC" %}
sagemaker-s3-specific-permissions
{% endfile %}
#### Create an IAM role
1. Go to the **IAM** page and navigate to the **Roles** section.
2. Click on **Create role.**
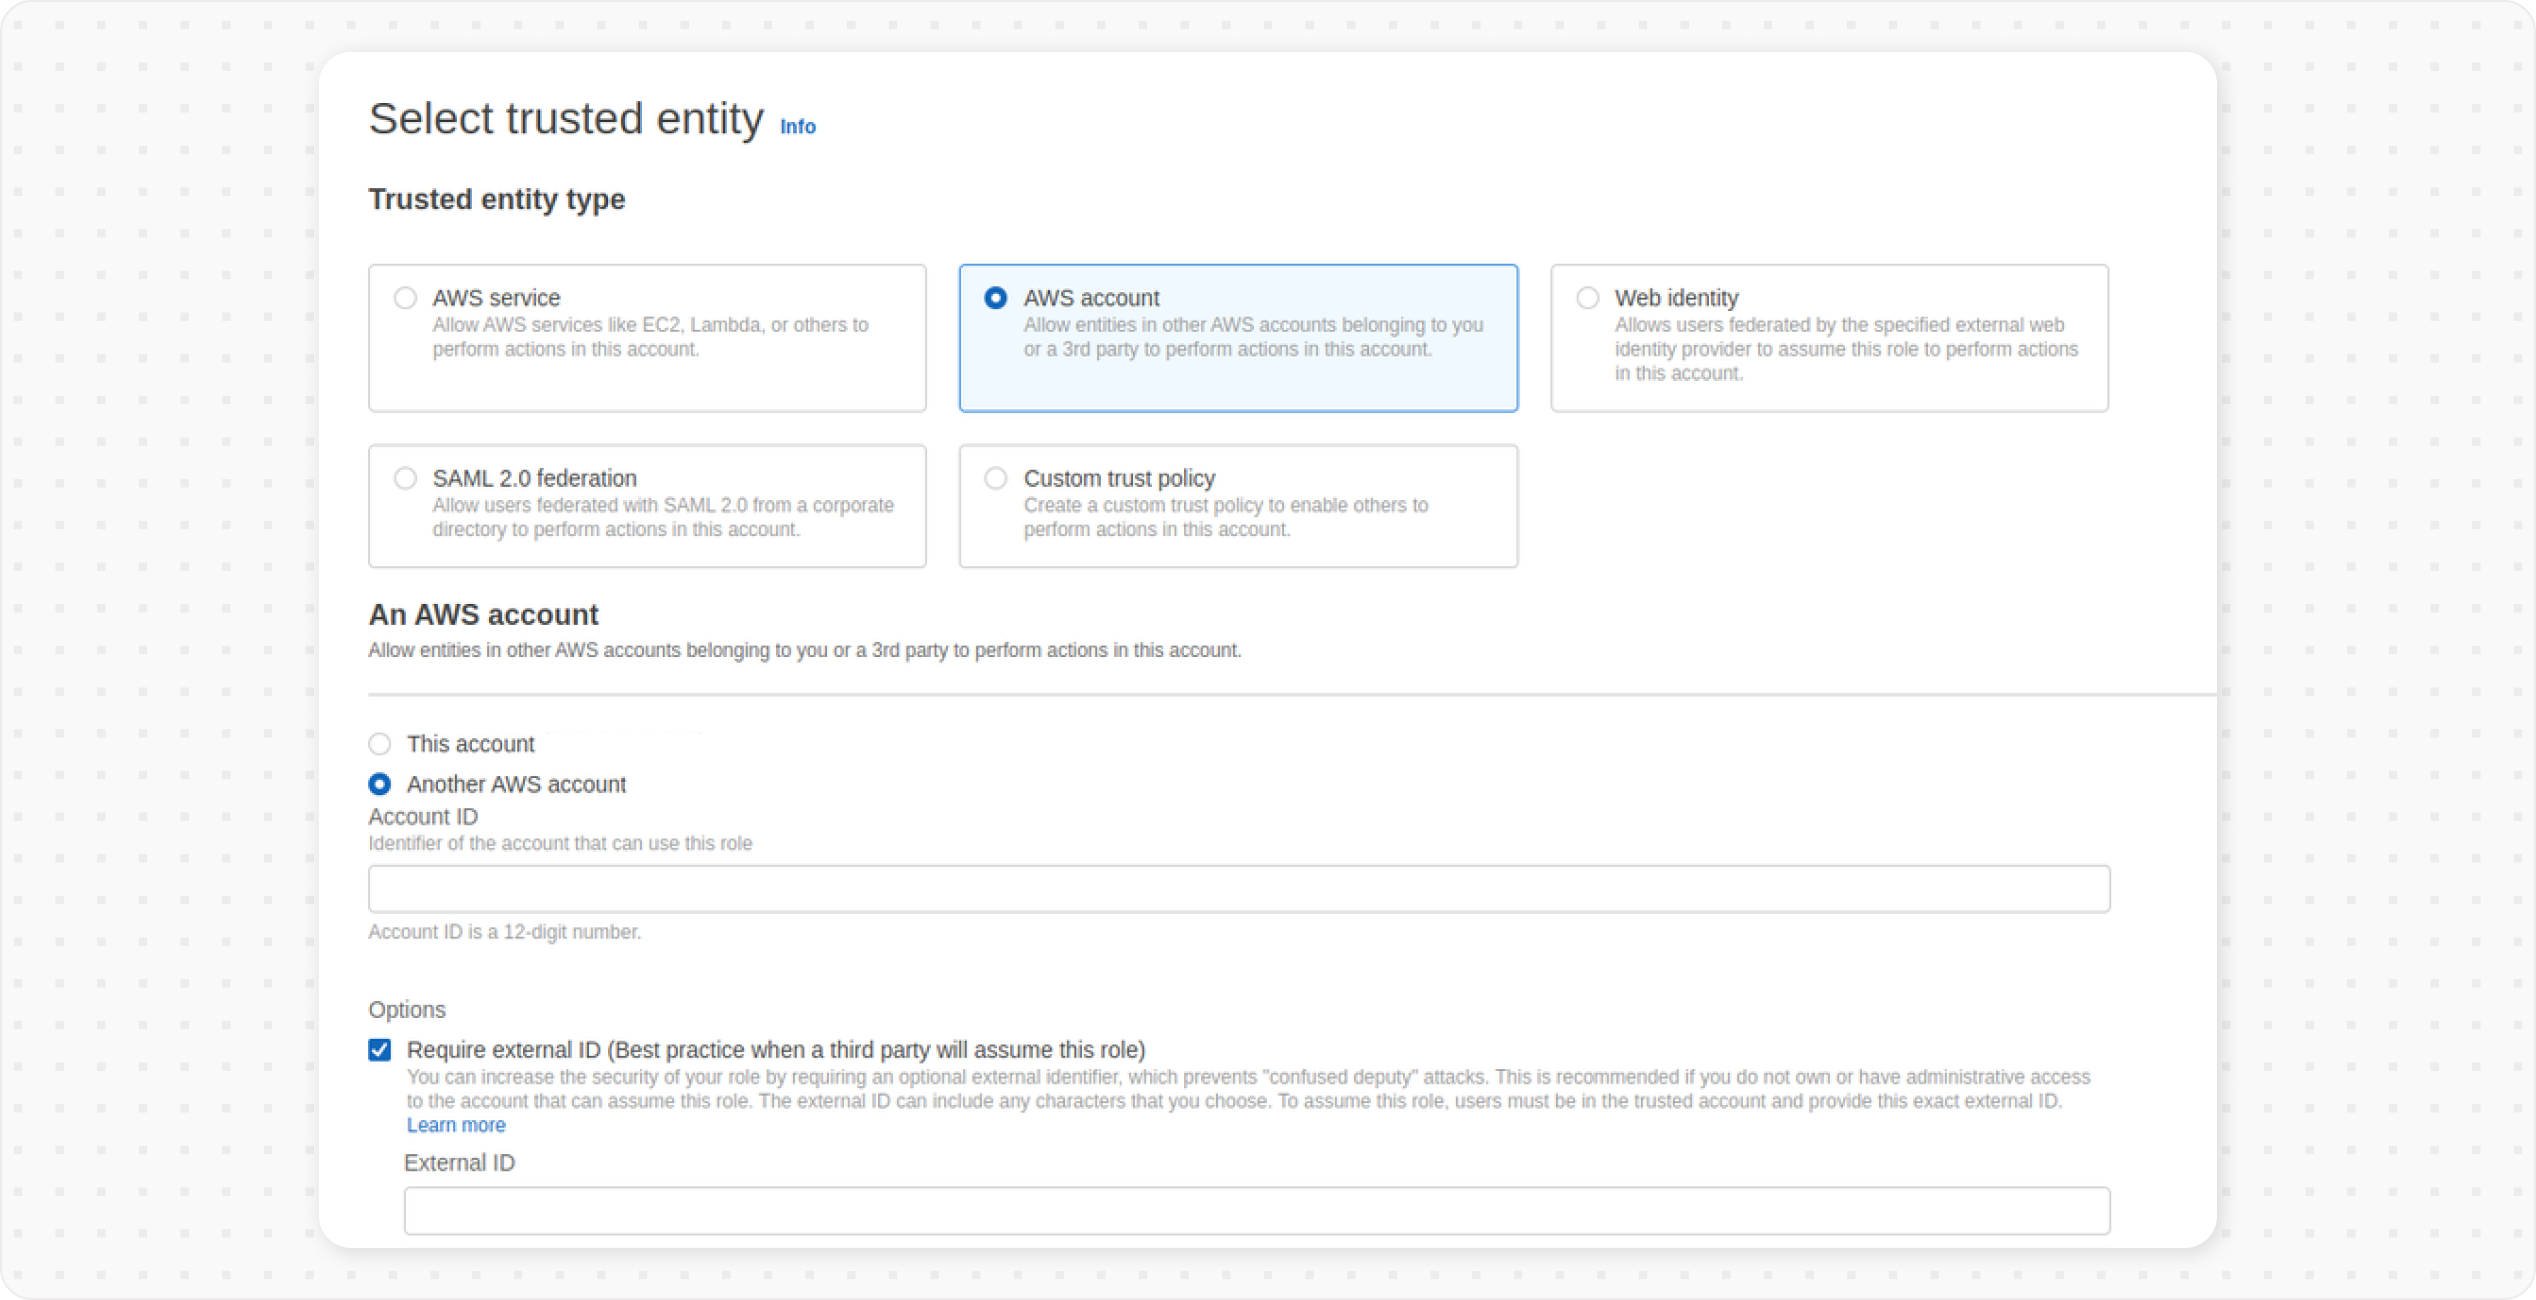
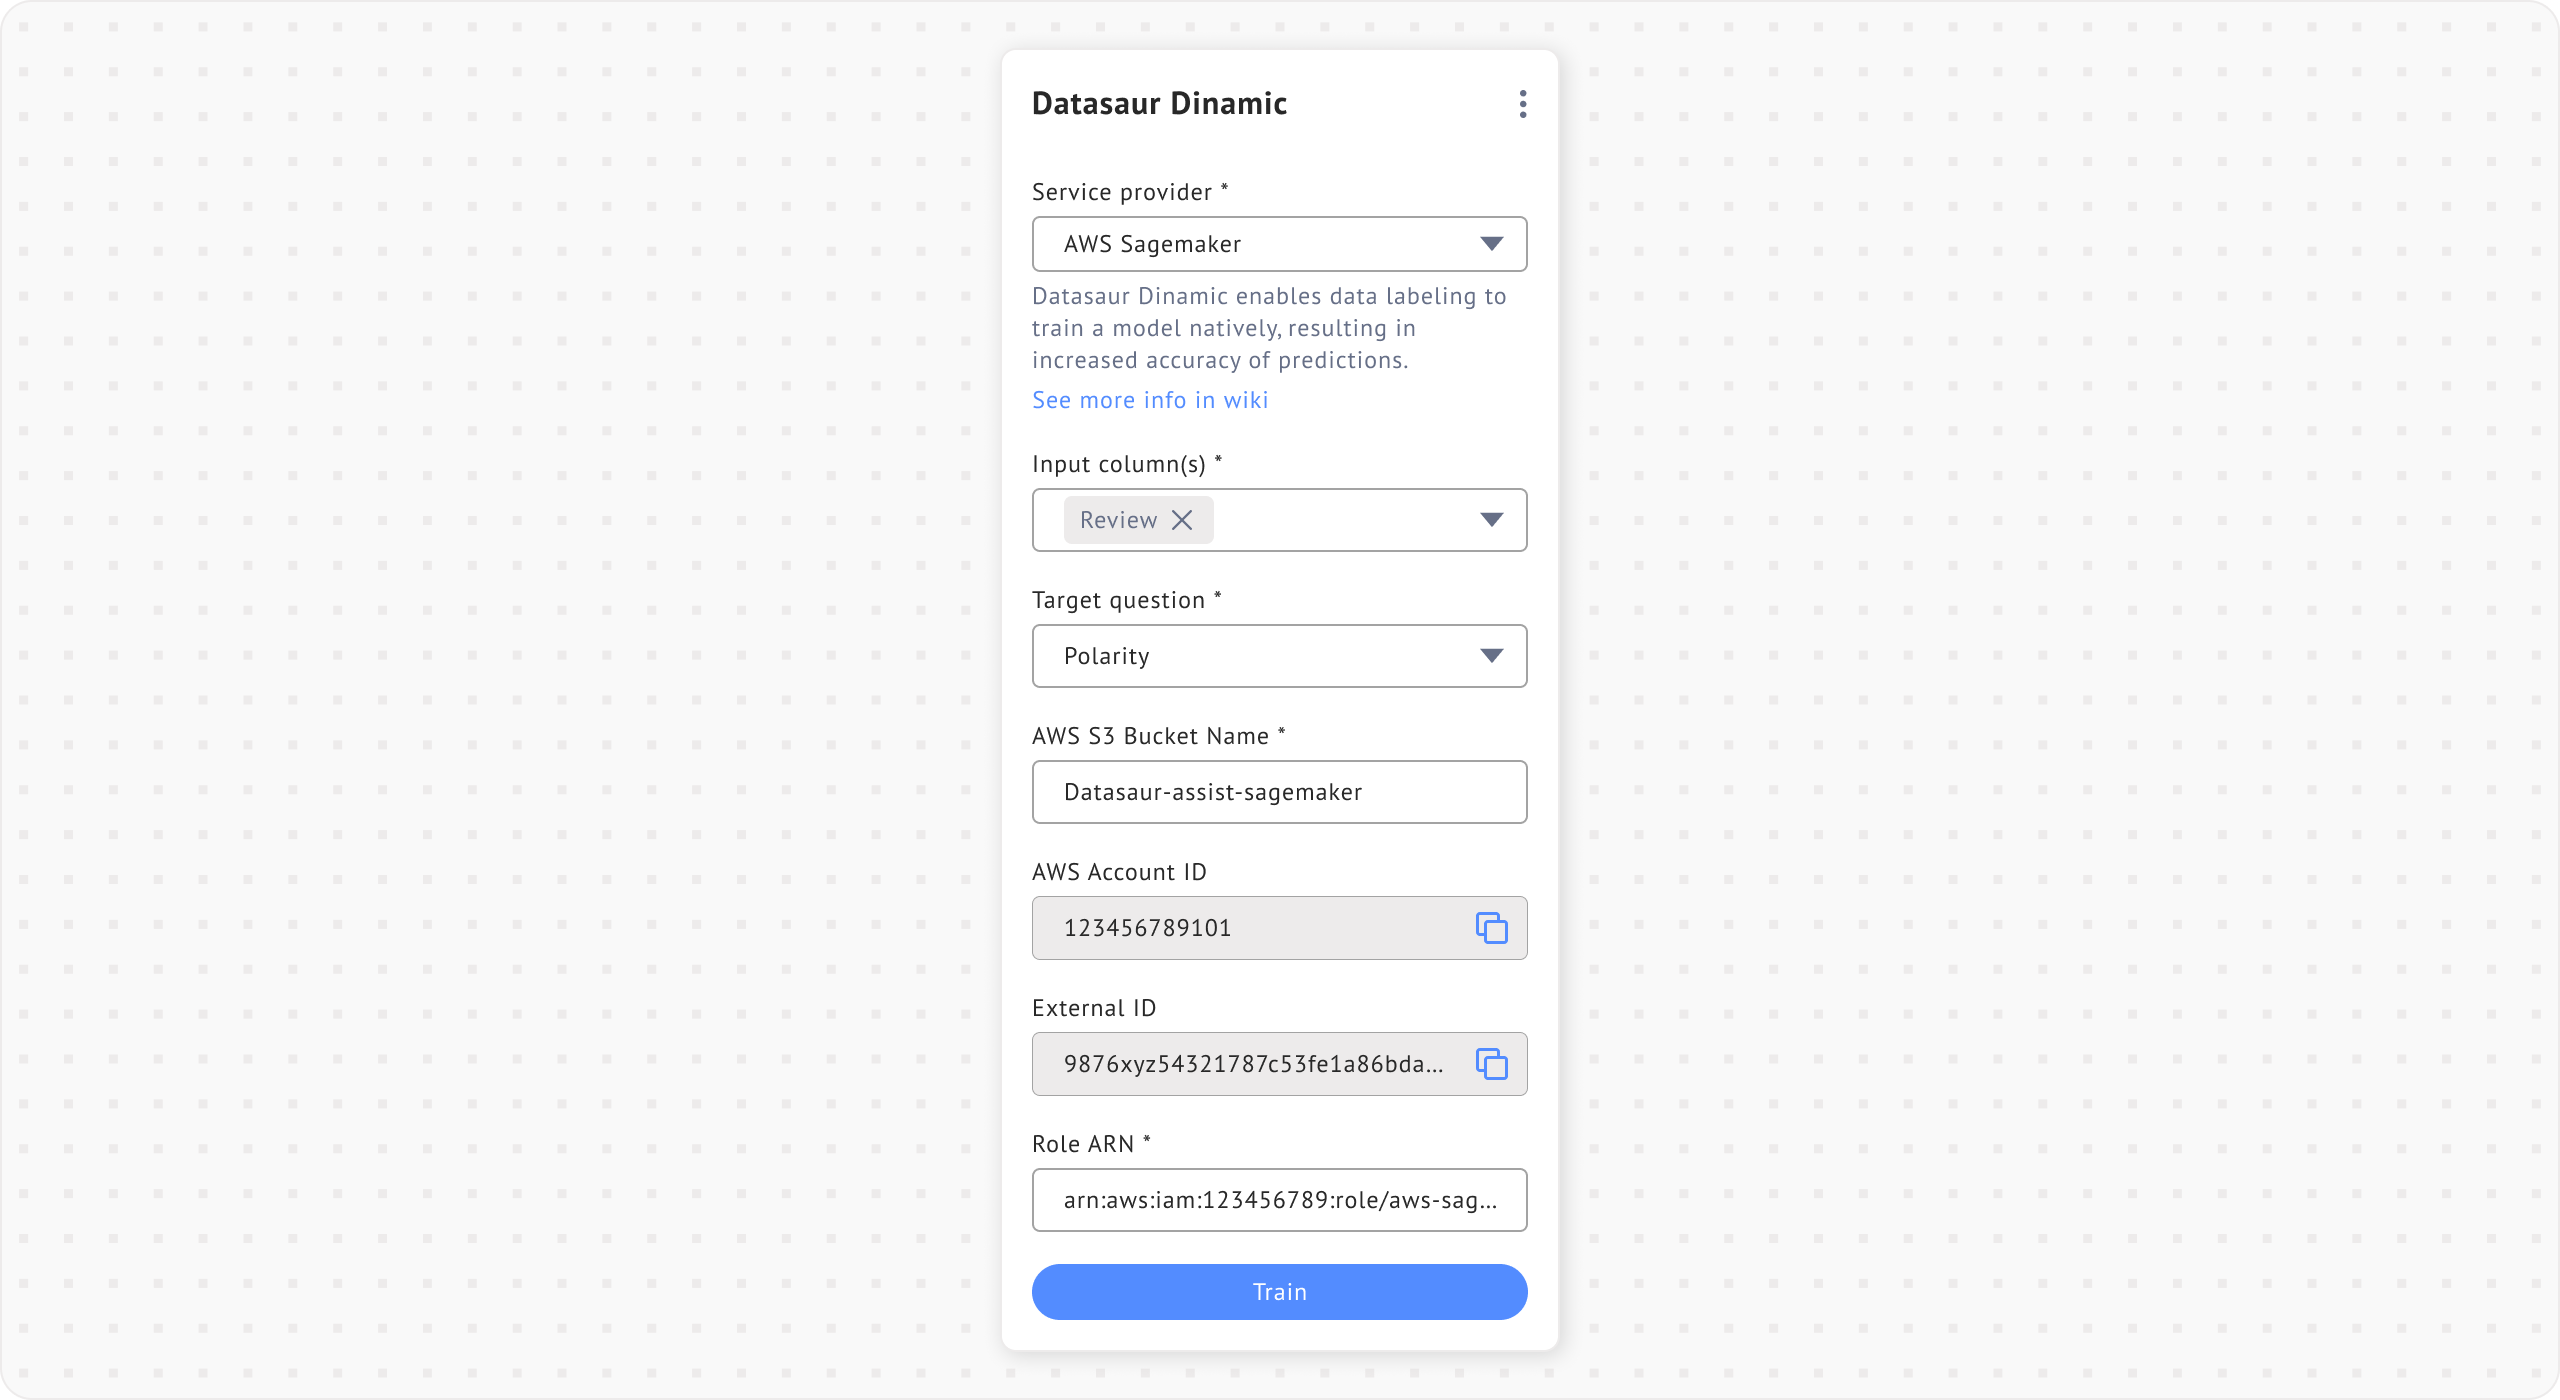
3. Select **AWS account** as the role type and enter the **Account ID** and **External ID** generated in the **Datasaur Dinamic** extension.
Select trusted entity
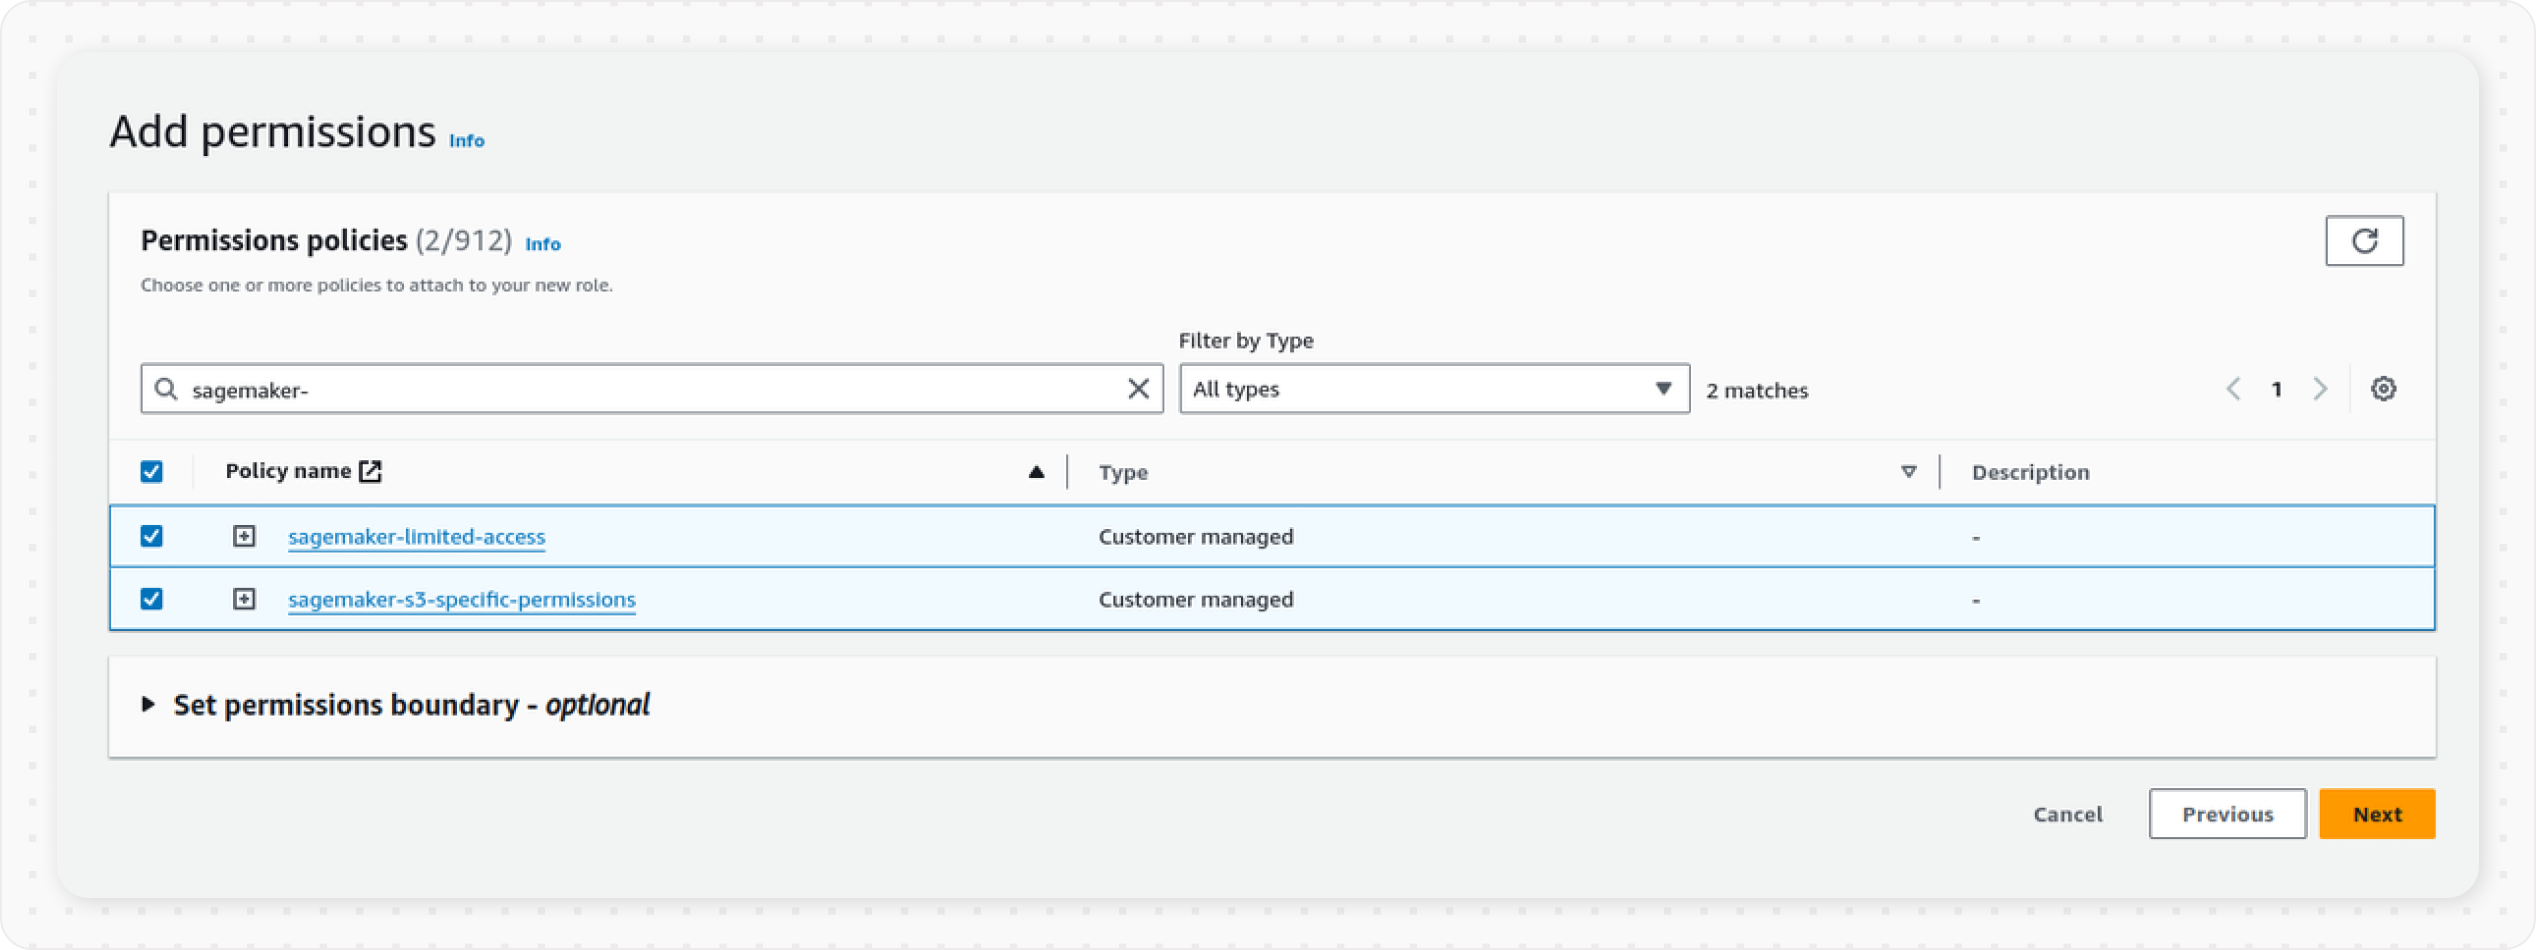
4. In the **Add permissions** step, attach the policies created earlier.
Add permissions
5. In step 3, complete the role creation process by entering a role name and details.
6. After creating the role, open the role and go to the **Trust relationships** tab.
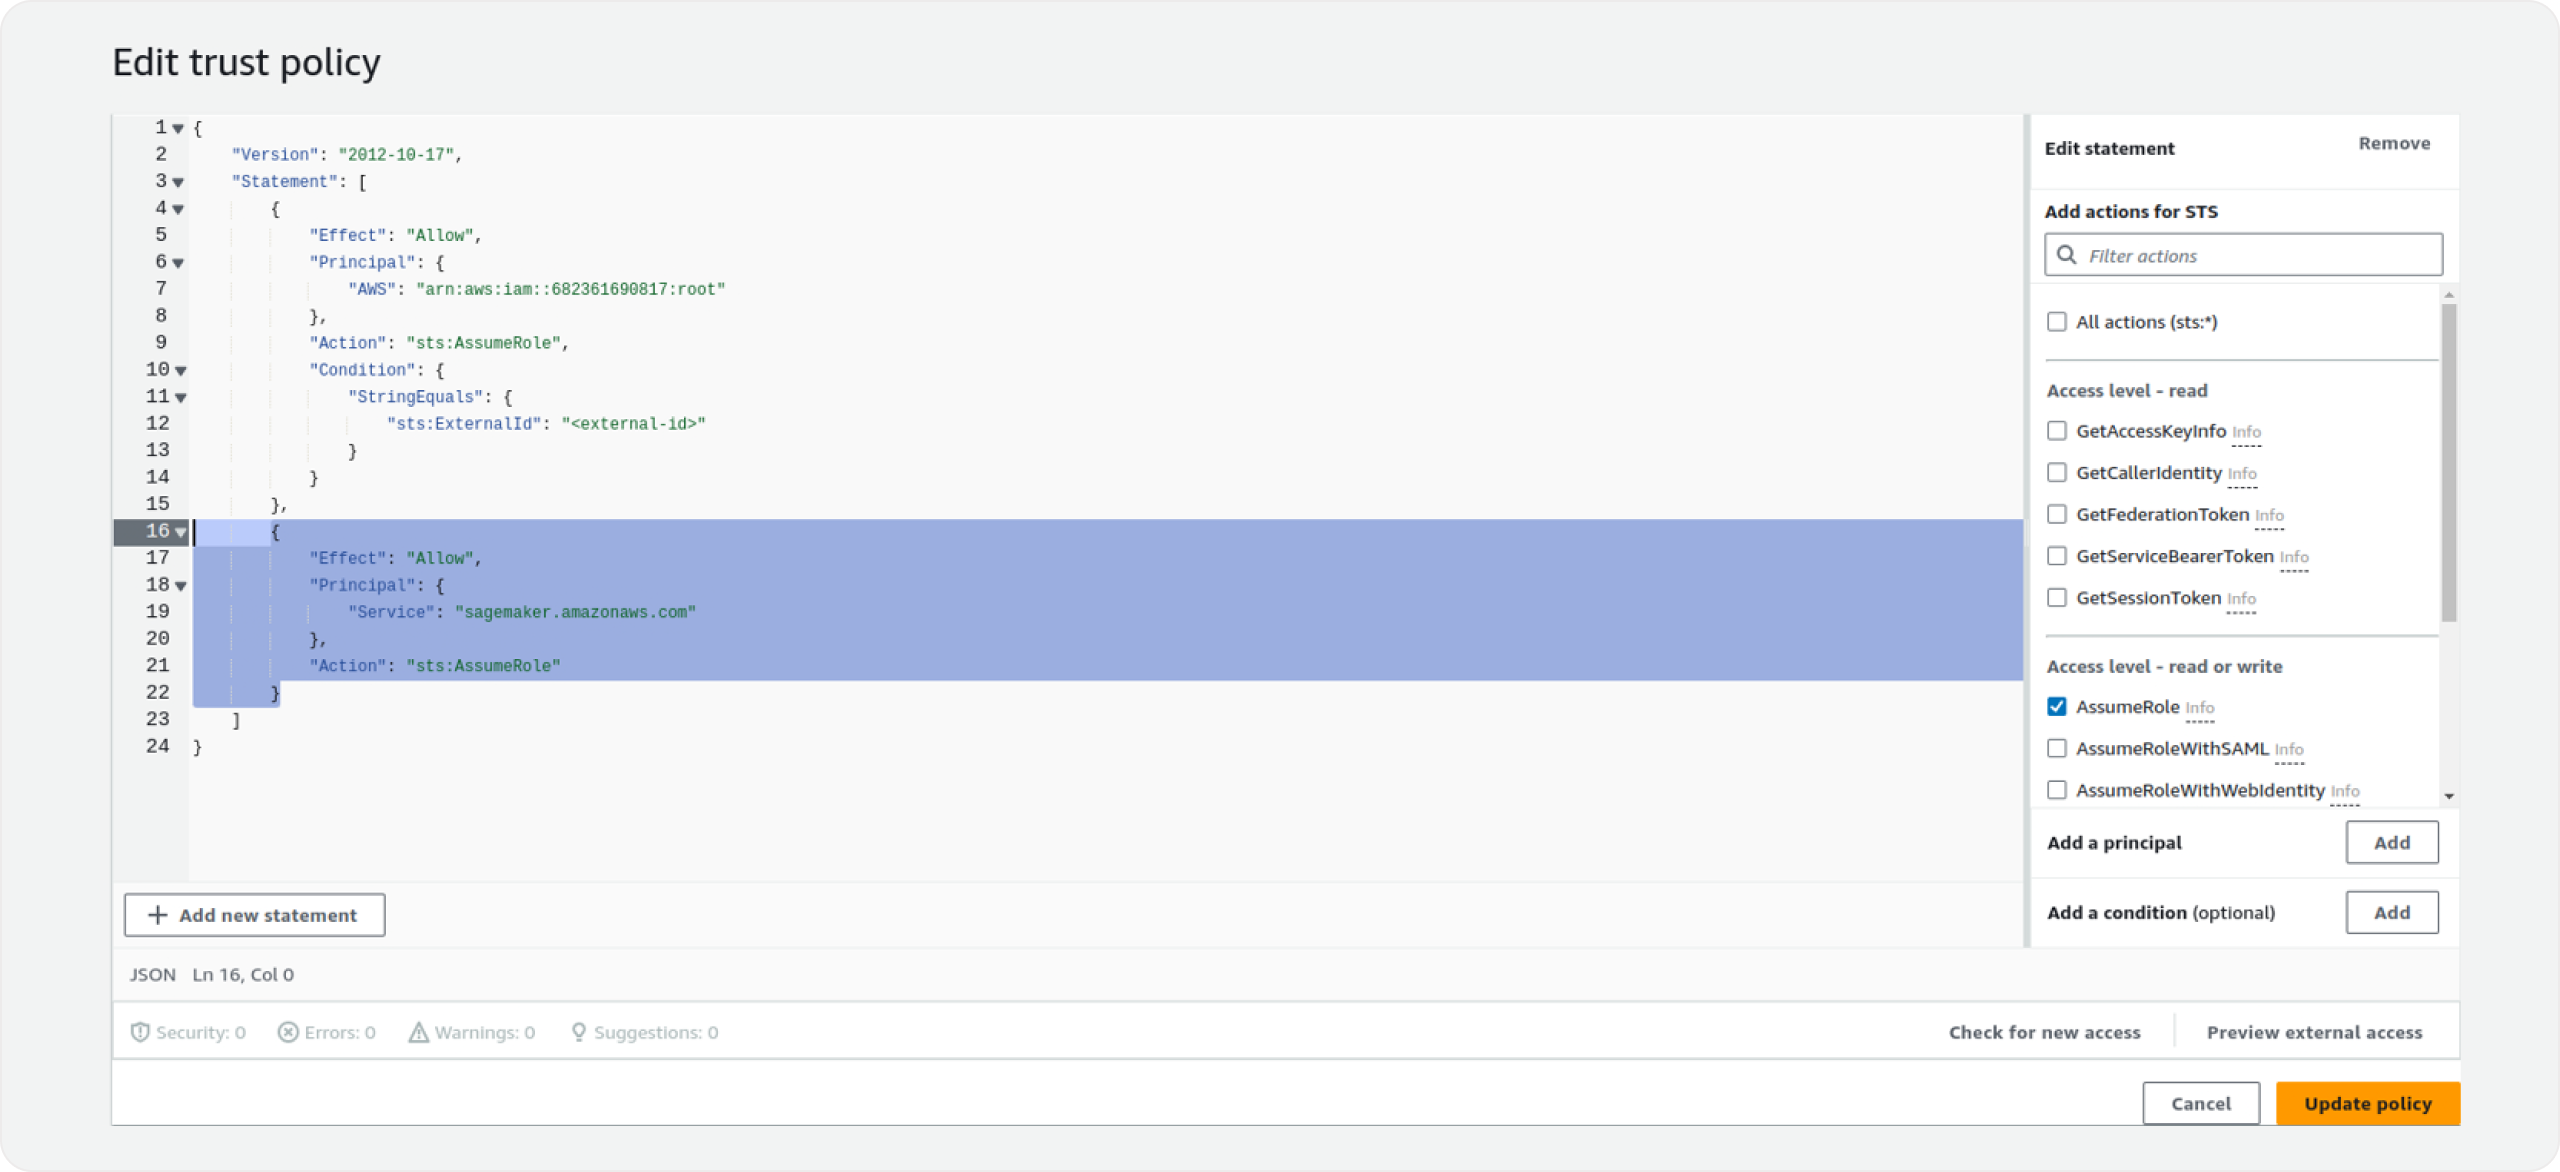
7. Edit the trust policy and add the following statement:
```
{
"Effect": "Allow",
"Principal": {
"Service": "sagemaker.amazonaws.com"
},
"Action": "sts:AssumeRole"
}
```
Edit trust policy
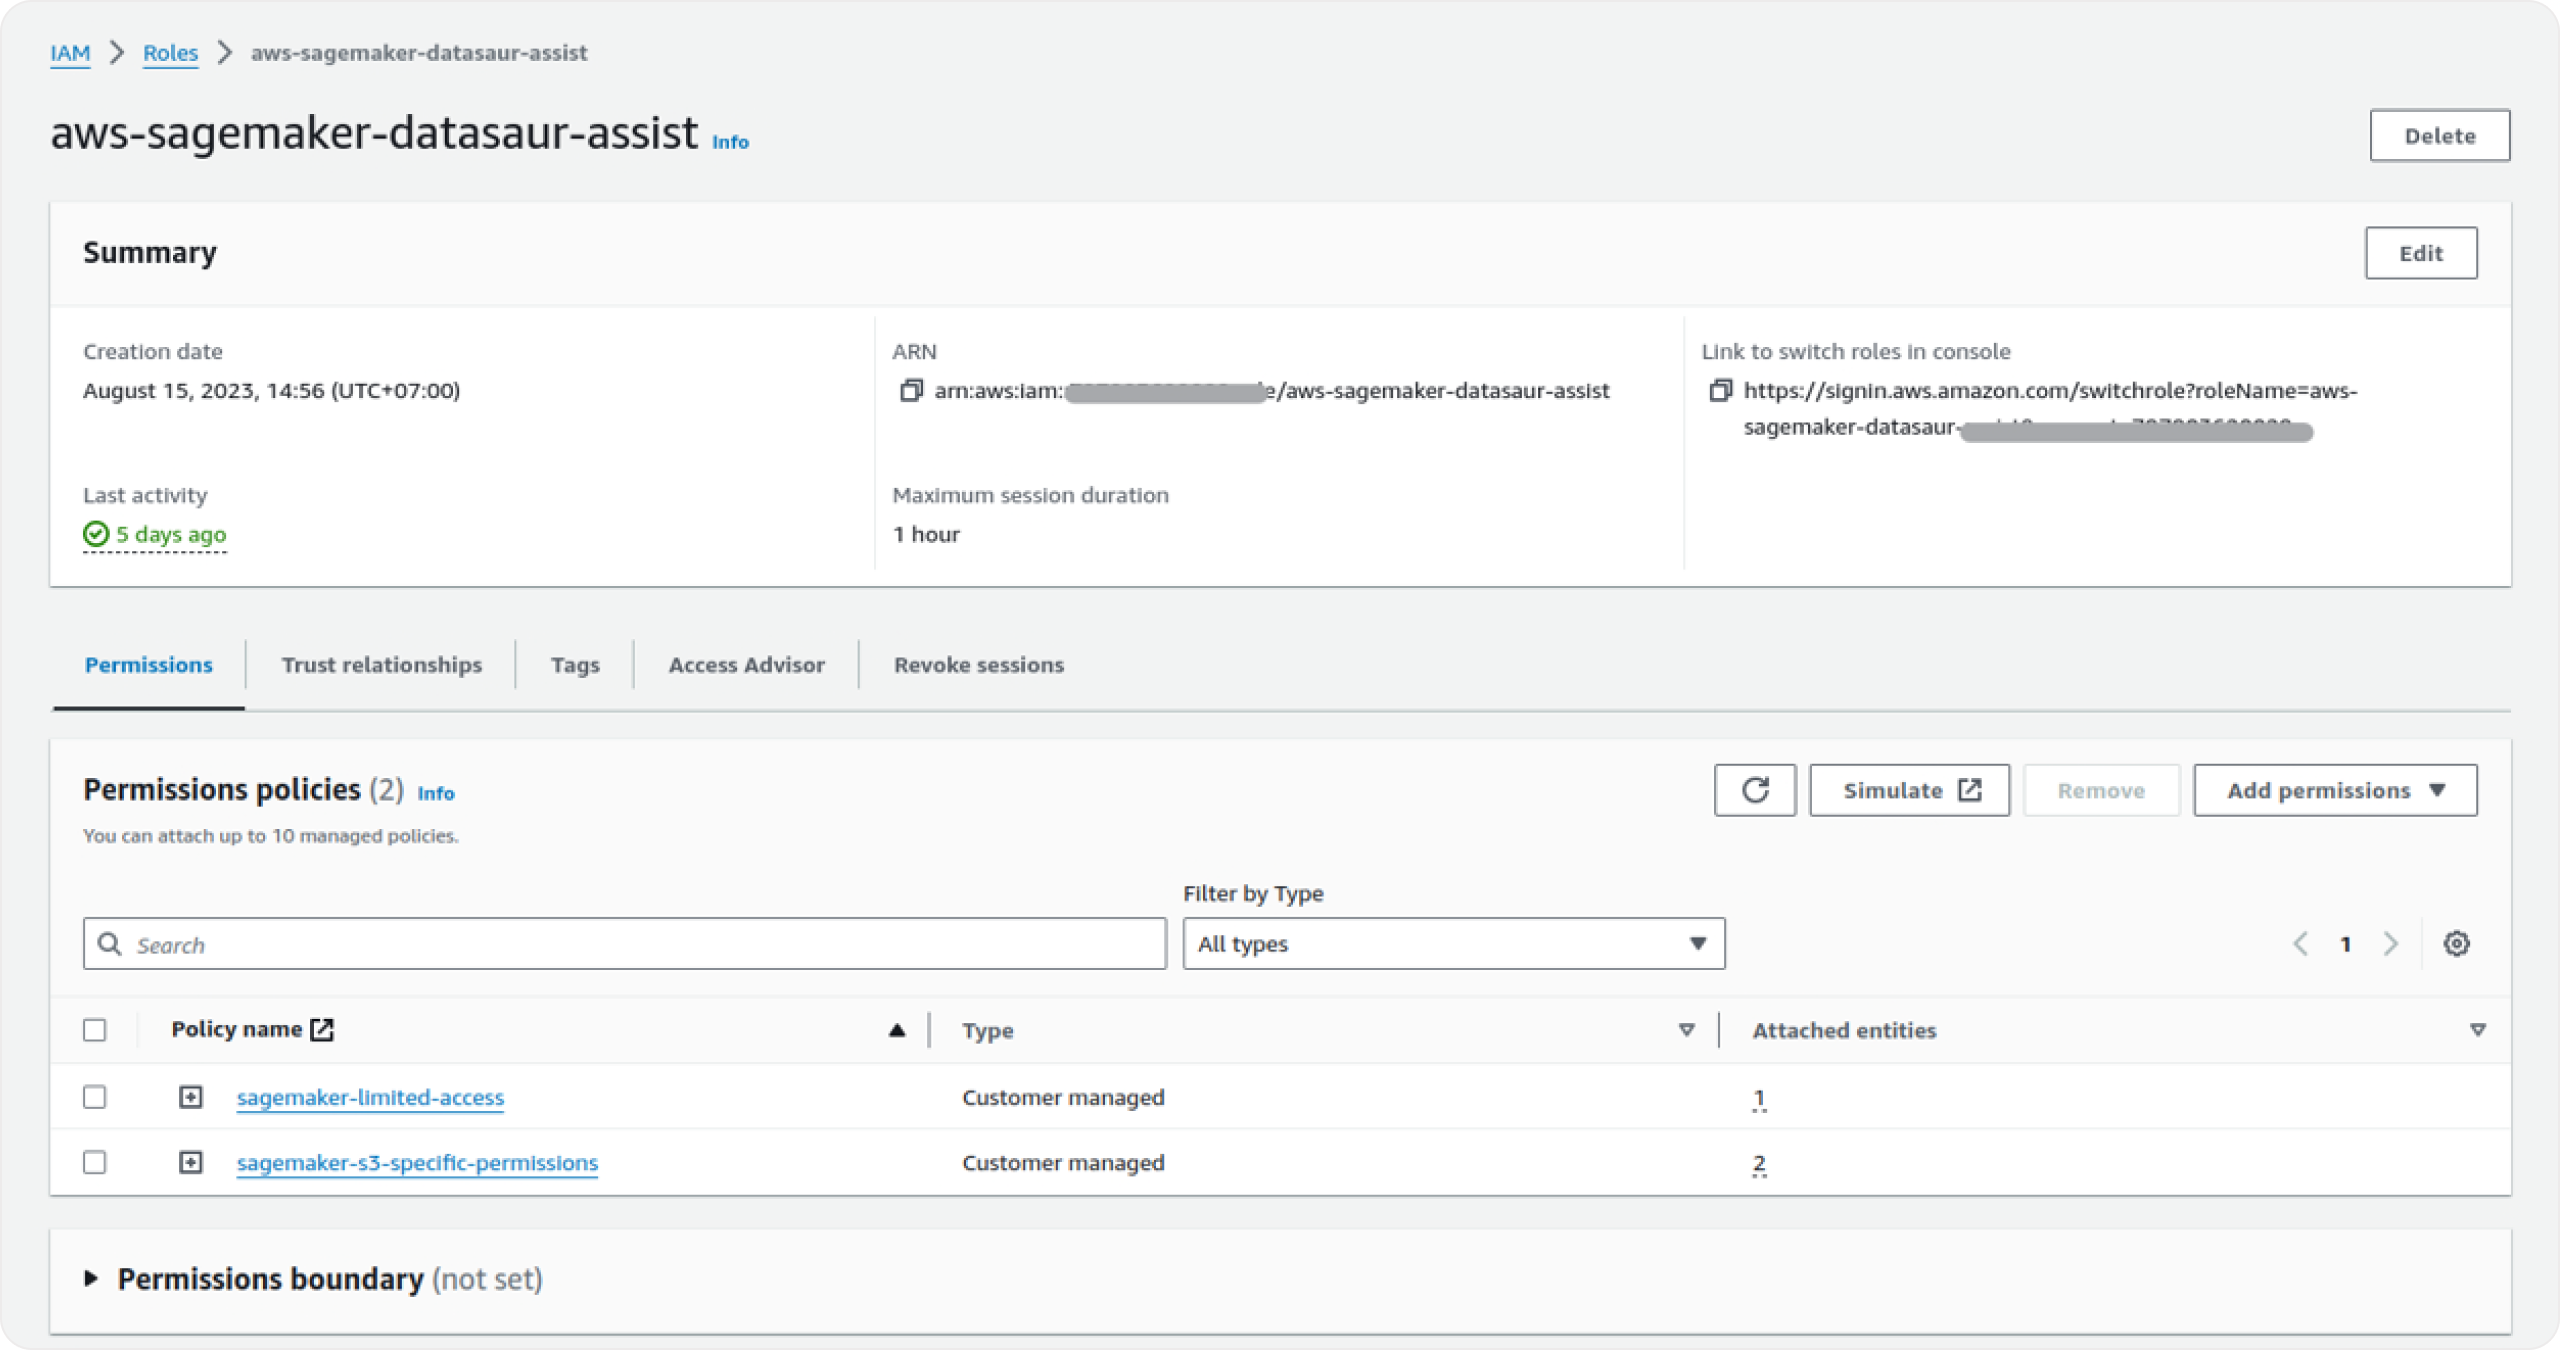
8. After saving the changes, copy the **Role ARN** from the role summary and paste it into the **Datasaur Dinamic** extension.
Role summary
## Start training
1. In the **Datasaur Dinamic** extension, enter the **AWS S3 Bucket Name** and the **Role ARN.**
Datasaur Dinamic with Amazon Sagemaker
2. Click **Train** to start training with Amazon SageMaker Autopilot.
Datasaur Dinamic training progress
3. After training is complete, the model name will appear in the extension. You can also find the trained model in your Amazon SageMaker model list.